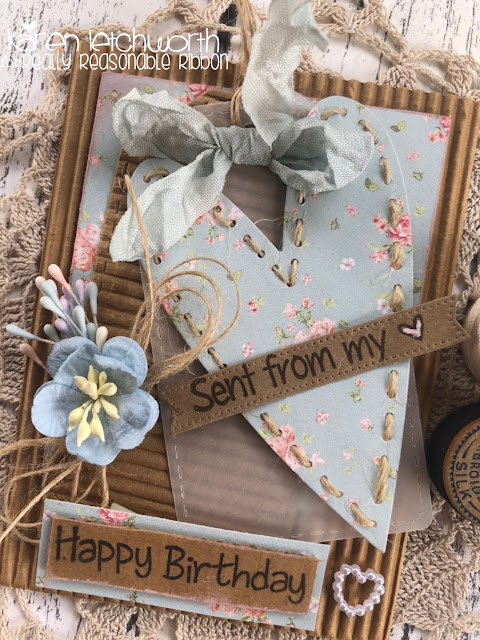
Welcome by, blog friends. Thanks for visiting us today as I share this sweet little Birthday card I created using some of the wonderful products from Really Reasonable Ribbon. I just LOVE the fact that they always have the perfect color trim for every project. Seriously...just about every color in every width, texture and style you can imagine is available at Really Reasonable Ribbon. I always enjoy making cards and projects using their FABULOUS products.
Monday, March 7, 2022
Sent From My Heart
Wednesday, October 14, 2020
The Splendor of Fall Card Recipe
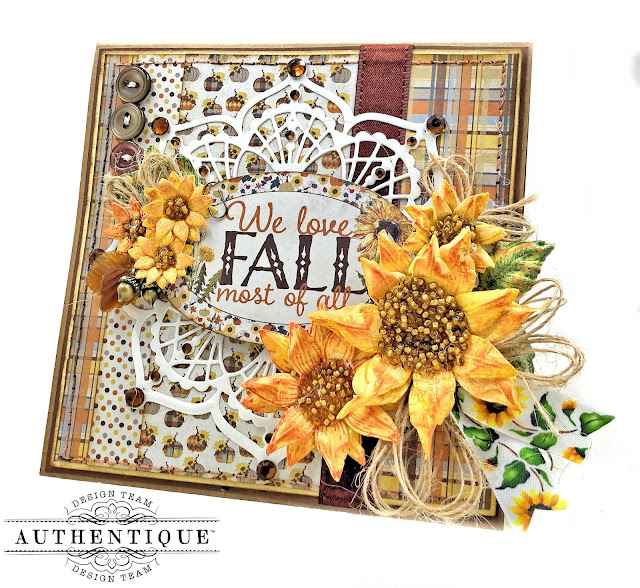
Hello, Friends! Today I have a recipe for a pair of "twin" fall cards that use ribbon...but not bows!
Ribbon doesn't always have to be tied into a bow. For these cards, I created an elegant border with 5/8" Cappuccino Satin with a Grosgrain Edge Ribbon. Attach the ribbon with 1/2" Scor-Tape. Leave the ends slightly longer than the card panel. Then wrap the ends around to the back side of the card for a neat and tidy finish.
No room for a bulky bow? Fold a 4" piece of ribbon in half. Cut fishtails on the ends. Then tuck beneath a floral arrangement to add a touch of color and texture. This Sunflower Satin Ribbon is a match made in heaven for these Splendor papers. Add a touch of rustic charm with loopy Burlap String Bows.
The great thing about having card "recipe" is that you can use it as a template for cards made with any of your favorite paper collections and ribbons. Here's the recipe for this card design.
All the papers for this card come from the Splendor 6x6 Paper Bundle.
- First, create a 5 1/2" square top fold card base from one sheet of 8 1/2" x 11" kraft cardstock.
- Next cut a 5 1/8" square of the fall plaid pattern. Save the off cut of this panel.
- Cut a 5 1/4" square of yellow cardstock and a 5 3/8" square of brown cardstock.
- Then cut a 2 1/2" x 5 1/8" panel of the fall pumpkins.
- Now layer the cut papers on the cardstock mats as follows:
- First put down the fall plaid paper panel.
- Next layer in the offcut from the fall plaid paper about 3/4" from the left hand edge.
- Then add the fall pumpkin layer.
- Now stitch the panels to the cardstock mats on your sewing machine.
TIP: Steer clear of a sticky situation by placing your adhesive in the center of each panel and away from the sides. This way, your sewing machine needle will not get gummed up and your thread will not break.
- Now you are ready to wrap the card panel with your Scor-Tape and Ribbon.
- Die cut two Doily Rounds from cream cardstock and adhere in the center of the card.
- Then punch out the oval sentiment from the Cardstock Elements sheet. Back with two layers of dimensionals and adhere in the center of the doily.
- Add flowers, rhinestones, ribbons and vintage buttons to finish the card design.
TIP: You can use handmade flowers, or pre-made flowers. Both are gorgeous. Find a tutorial for making these sunflowers HERE.
Now we will finish the inside of the card. It's easy, peasy!
- First, cut (2) 5 3/8" panels of designer paper and adhere to the top and bottom of the card.
- Next, create a pocket with the rectangular die cut sentiment from the Elements sheet. Just place your adhesive on the sides and bottom.
- Create a belly band with a 1 3/4" x 5 3/8" strip of the pumpkin pattern. Adhere just the top and bottom edges to the fall check.
- Mat a 3x4 journal card on a 3 1/4" x 8 1/2" panel of cardstock. Score in half and fold to make a little notecard to tuck inside the belly band.
Now that you know how to put these cards together, it will be quick and easy to make more!
Wishing you all a joyful and creative day!
Cheerio,
kathy
SUPPLY LIST
- Authentique Splendor
- Really Reasonable Ribbon
- Amazing Paper Grace Circle Doily Die
- Heartfelt Creations Classic Sunflowers Stamps and Dies
- Leafy Accents Stamps and Dies
- Acorn Charms
- Rhinestones, Vintage Buttons, and Resin leaves from my stash
Wednesday, October 30, 2019
Forever Fall Book Box
Friday, December 21, 2018
Christmas Magic Book Box & Tag Set
The front cover of my book box is loaded with Red and Ivory Aster Daisy Stems, WOC White Magnolias and White Bead Berry Spray Clusters for sparkle and pizazz! The 5/8" Red Taffeta Ribbon adds decadence and charm to the piece. Some Natural Burlap String tied into a bow and to the buttons lends a bit vintage goodness to the box and ties in beautifully with these darling vintage-style papers to complete the look. I added gold foils around all the edges and a vintage metal keyhole and key, as well as a metal clothespin inscribed with the word "timeless", which I believe is one of the words that describes the true meaning of Christmas.
Wednesday, August 29, 2018
Fill Your Life With Adventures
Friday, August 24, 2018
Vintage Masculine Birthday Card
Natural burlap string adds even more texture and does a good job of amping up the vintage vibe I was going for.
The card interior turned out super cute with pockets, flaps and a little gift card holder.
It's great to have ribbon options that work on masculine cards! I hope I've shared some tips and tricks with you today that you can use in your own crafty adventures.
Have a great weekend!
kathy
Friday, August 10, 2018
Scripture Card and Tag
I also made a cute little tag to tuck inside the card. I created this by using the same Echo Park papers. Using strips of Scor-Tape, I attached some thin pieces of the patterned papers as well as a width of Natural Crochet Lace. I also attached some Pink, Blue, Turquoise and White Double Head Stamens, some Open End Roses and Mulberry Flowers. I added a small sentiment sticker, and then at the top of my tag, I added a cute new 12mm Mixed Color Fish Scale Round Cabochon from the Embellishments section. The final touches on the top of my tag include the Blue Center Stitch Burlap Ribbon, Bright Pink Gingham Ribbon, and Light Pink Gingham Ribbon. Really Reasonable Ribbon always helps make it easy to beautifully adorn all my projects.
Friday, June 8, 2018
All You Need is Love and a Dog
There's room to write a personal message on each side of the post card. The center panel lifts to reveal a fun flap/photo mount element.
Check out How to Graphic 45 Raining Cats and Dogs Card/Photo Folio by Kathy Clement on Snapguide.
Thanks so much for stopping by!
Cheerio,
kathy
Friday, January 26, 2018
The Beauty of Burlap String
Monday, December 11, 2017
Have A Cup Of Cheer
Blessings to you,


