Sunday, June 30, 2013

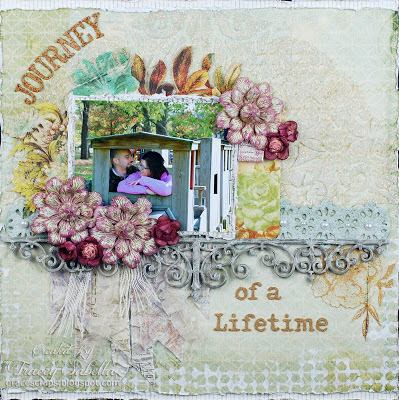
Journey of a Lifetime

It's Tracey here to share a layout featuring Really Reasonable Ribbon. It's so hard to believe that it's the last day of June already!! I hope you are staying cool. 

Our son, Joseph, met the girl of his dreams in Rachel. It is amazing how well suited they are for each other. Rachel is a wonderful pastor's wife and helps him in his ministry. They also run an home based business together. This fun photo was taken during a photo shoot when they became engaged. We went to a park and Joseph coaxed Rachel into this wooden train. It's just the beginning of a journey that I pray lasts a long and beautiful lifetime together. 

"Journey of a Lifetime"


Close-Ups:

Banner and Ribbon ~ I love to combine distressed paper banners with gorgeous ribbons like I did here to mix up the textures and add dimension. First I cut the paper banners, distressed the edges, wet, and crinkled up the paper. After allowing them to dry, I opened and kind of flattened out the flags. 

Next I selected these gorgeous ribbons from Really Reasonable Ribbon to pair up with this banner. First, I selected the Cream Mesh Ribbon. This is one of my favorites in Bonnie's store. I love the shabby, stringy texture. I cut a length of ribbon just a little shorter than the paper flags. This ribbon is held together by clear thread, so I pulled out the thread from one end to fray. Then I cut down the center of the ribbon, carefully cutting between two threads. I also cut off the edges that have the clear plastic strand running through them. This left me with two gorgeous frayed ribbons which I adhered atop the flags. Next I selected the Ivory Sheer Box Pleats Ribbon. I just adore the shimmer this sheer ribbon adds to a project!! I just snipped off two pieces and adhered them among the other ribbons and paper banner flags. Scor-Tape is my go to adhesive of choice for adhering ribbon. 

Here's another close-up of the flowers showing the gorgeous ribbon below.

If you are looking to purchase ribbon, be sure to stop by our Really Reasonable Ribbon Store to see Bonnie's amazing selection of ribbon, lace, natural fibers, and more . . .

Thanks for stopping by today! If you would like to see more close-ups and additional tips and techniques from this page, please stop by my blog, Garden of Grace.

Saturday, June 29, 2013

Inks and Ribbon 101!

It's Tammy Louise posting today and I wanted to test out some of my ink on some of the Really Reasonable Ribbon called Silky Crush White Ribbon.  I've seen people stamp on ribbon and have always wondered which of my inks would work and just how much bleeding would occur with each of them?
So instead of a tutorial, per say, I'm going to share some of the results with you.  I guess what I've decided is that until you try something new, you'll never know what's possible REGARDLESS what the label on the ink says!  
First, I cut a small section of the ribbon and got a butterfly stamp out to try four different types of ink. I challenged Momento, Stazon, Indian Ink, and Versafine.  Here is how it worked!

Let's learn ink 101 together today!  Momento is a water based dye ink, this means that it can be used on most papers but as it is water based, any added water will encourage it to bleed or blend out.  BOY DOES IT EVER! 
Stazon ink is a fast drying solvent ink that is recommended for non porous surfaces such as metal, plastic, glass, ceramic etc.  However, it did leave a crisp outline on the ribbon around the stamp image. 

Indian Ink is archival and fade resistant ink IS SUPPOSEDLY for non smearing, the label says it's a quick drying dye ink perfect for use with markers and watercolors, however, there was a considerable amount of bleading on the ribbon with this ink.  

Versafine ink is an opaque pigment ink for finer details.  This is oil based and water resistant and did actually turn out the best of all four images with crisp detail and NO bleeding with really rich dark color.  
This is the versafine ink
This is the India Ink
This is the Stazon Ink
The big brown blob at the bottom is the Momento Ink!  Yuck!

My intention was to apply a subtle amount of Distress Ink to some of the areas of the stamped image so I colored some ink on my pad and added water until the desired color was accomplished.  

After applying color, I dried with my heat gun in between each application, some of the areas where too much water was applied, the ink did still do some running but not more than acceptable amounts.
Sneak peek of the girl card!
 more on my blog.  

I used some adorable buttons from Really Reasonable Ribbon Store called Cherries Jubilee and Blueberry Pie from Color Blends Buttons Galore and the twine on the girl card is the Baker's Twine Peppermint, on the boy card, I used the Twinery Caribbean.  The Design Paper is Recollections "Itsy Bitsy Ditsy Cherry Pie and Aqua Screen.  
I just so happened to have the Inkadinkado boy stamp set as well, and couldn't resist showing you a sneak of this as well!
Thanks for joining me today and I hope you give this technique a try, it was simple and really quick to do!
Hugs,

Friday, June 28, 2013

Ribbon Carnation by Jenn Cochran

Hello friends and followers of RRR!  I am so excited to show you my tutorial today.  I was playing with Wire Woven Chevron Striped ribbon black/white and thinking how could I make an embellishment other than a bow with this fabulous wired ribbon.  So I was like "flower?"...ok...but I want something different than any old flower.  This is what I came up with:  I am sure someone else has already come up with this fun Carnation flower....but I have to honestly say "I have not seen one!".


1.  First I started off with accordion folding the Wire Woven Chevron Striped Ribbon black/white .  
2.  Then I adhered it to a 2 3/4" cardstock black circle.
3.  I then repeated step 1 and adhered the accordion ribbon partially to the cardstock circle and partially to the 1st layer of ribbon with Helmar Professional Craft Glue.
4.  Repeat step 1 and 2 again adhering slightly to the last row of ribbon.  I then spiraled the ribbon to the center creating a little "nest" for my rhinestone.  
5.  Ta Da!!! Ribbon Carnation!

Hope you enjoyed my tutorial.  Here is what is looks like on a finished card.  Again I used the Wire Woven Chevron Striped Ribbon black/white. My Image and sentiment is from SP and Company Stamps.  It is called "Built for Two mini stamp set".  


I embossed the bicycle to look like a chalkboard.  The paper is EP.  


Here is a close up of the finished carnation flower.


Thanks so much for stopping by RRR today!  I hope my tutorial inspired you!

If you would like to see more projects from me using RRR, visit my blog!

JENN

Supplies:
Adhesive: Helmar Professional Craft Glue
Paper: EP

Thursday, June 27, 2013

Shabby Chic Bookmark

Hello Peeps!!
Heather here and today I would like to share with you a bookmark that I made for myself.  I am a big fan of reading during the summer.  Normally I just use a grocery receipt for a book mark.  I thought I would make myself a nice flat book mark for the summer.
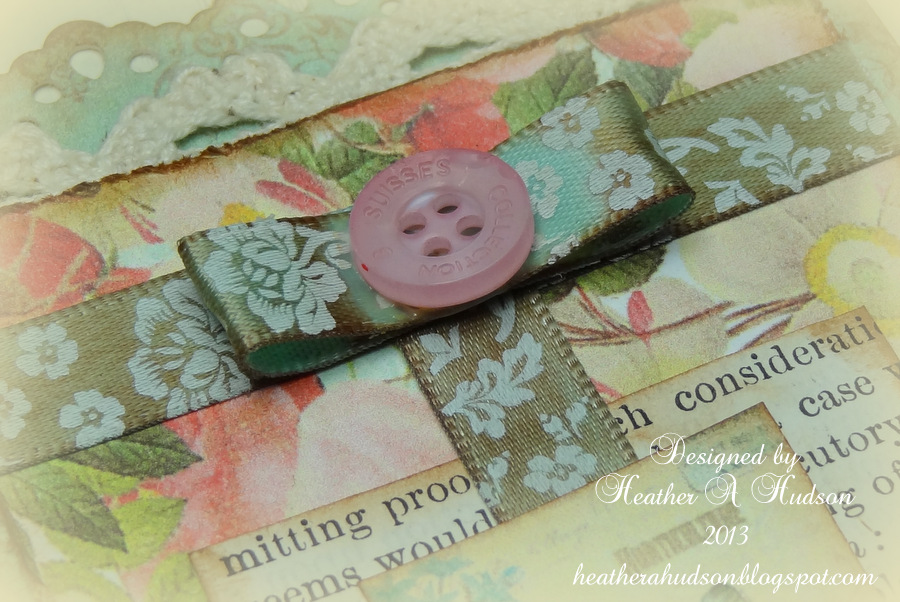
I used some fabulous ribbons and trims from Really Reasonable Ribbon!  My favorite Juliet Lace has been tucked in at the top and bottom of my bookmark. I used the Pink Twill Chevron behind my old book sheet layer, I did slightly ink it with Ranger's Vintage photo.  I used the Aqua Floral Satin ribbon (which I inked with vintage photo) under my floral paper, over my floral layer and to create a cute little flat bow across the top.
Here is a close up of the chevron ribbon and the aqua floral ribbon.  The Butterfly images, floral paper, and aqua paper are digital images from Gecko Galz.
Here is a close up of the Aqua satin bow and Juliet lace.  I used a button from the Vacation Totes collection from Really Reasonable Ribbon.
Close up of the bottom.  I love how the inked Aqua Satin ribbon turned out.  I adhered all my layers and ribbon with 1/4" Scor Tape which you can find at Really Reasonable Ribbon.  
One last look at the finished bookmark.
I applied the Gecko Galz aqua digital paper to a scrap piece of a manila folder using scor tape (so it would have some weight to it).  Cut it to the size I wanted, punched the top with a Martha Stewart Lace punch.  Inked it with Ranger's Vintage photo.  I cut the floral digital paper piece .5" inches narrower and 1" shorter than the background piece.  Used the score tape to adhere the aqua ribbon across the center of the bookmark.  Next was the floral paper, then pink chevron ribbon, scrap piece of book paper, more aqua ribbon and finally butterfly images.  Pretty easy peasy!
I hope you have a great day and have some time to read a great book!
Thank you for visiting!!
Hugs
Heather

Wednesday, June 26, 2013

Sweet Baby Girl


Hello everyone and Happy Wednesday to all!!!

Today I made a Sweet Baby Girl Card for Really Reasonable Ribbon using the Beautiful Pink Double Faced Satin. It's one of my many RRR Fav's. I own all the different widths in this pink. On this card I used the 1/4" & 7/8".


For my card I used some old Baby design paper that I had left over. The yellow has kitty cats and stuff on it, then the other is a pink gingham print. My Oval and Doily is from The Scrapping Cottage and is a CottageCutz die. The border and all the other Die cutz are CottageCutz dies from the Baby Release. I also added some Buttons/ sewing /and pearls to my card.


Thank you for looking and have a lovely day!!
Hugs to all,
Cheryl

Tuesday, June 25, 2013

Mini Folded Book Tutorial

I've sent my sweetie and my little guy off to scout summer camp this week...and I miss them terribly. This year I tucked a sweet little  folded paper mini book into D.H.'s duffle bag so he'll know I'm thinking about him while he's gone. It's got tiny tags tucked into the pockets to add sweet nothings. Best off all...it started out as a 1 sheet wonder.  I did add a fair bit of details....not so easy in a masculine book It was a great way to use up some bits from the scrap and salvage box : )
Here is a preview of the folded book....
Here is the inside with the pockets.... don't worry...I've written all the mushy stuff on the backs of the tags lol.  I've added just a bit of  Seam Binding in Tobacco to 2 of the tags. If I had done all 3 it may have been too bulky. I used a thin width of brown trim from Really Reasonable Ribbon to tie this little book together. You will want to choose the color that coordinates with your paper selections.
Here is the back of book....I used some thin chipboard, die cuts, and stickers. Lot's of detail...but not too girlie. I should also mention that I've inked the folded edges heavily. 
Okay...so here is the super easy tutorial. I choose to use Scor-Tape for the adhesive....since it will be taking a beating squished in a bag of camping gear.

I think these would be a great way to give a gift card...or folded up cash...for a more personal gift. Or just a little something to let someone know you are thinking about them : )

I hope you all enjoy a happy and productive day and find some time to be creative : ) Huggs Ginny

Monday, June 24, 2013

Best Wishes

Good Morning!  Happy Monday to all of you! 
This summer is in FULL SWING here in Texas...and I have had a BOAT LOAD of graduation parties, weddings, etc to attend. 
I have been making cards right and left...and I am SOOOOOO not a card maker!

I keep forgetting to photograph these cards...but I finally remembered with this one...
Mostly because it was my day to post a project!  LOL!

I used ribbon and lace to compliment this pre-made sentiment...and I actually kind of love it!

I used the lace from this month's Ribbon Club Assortment for the border and tossed in a bow made with Ombre Royal Blue to compliment the bluebonnets in the photo.

.

This was a super quick card for a last minute gift made with ribbon remnants.
Those are usually the BEST ONES!  

Have a WONDERFUL DAY!!!!

Sunday, June 23, 2013

Happy Day


Happy day!  Today is my day over at the RRR blog.  I have a peppy little number to share!  I used one of my fave color combos...pink and grey.   I made a handmade pinwheel and layered it with a sweet Crate Paper chipboard piece.  Perfect sentiment to go along with a special someone's birthday.   To top my pinwheel off I used silver and baby pink  seambinding.  I also added tails to the bottom using chevron stripe twill ribbon .  It seemed like something was missing so I used some of my new favorite lace....lyndsay white crochet lace.   So sweet.   Hope you enjoy and your summer is going swell!  hugs, cherry
 

Saturday, June 22, 2013

Ruffled Embellished Ribbons - A Tutorial

Today I want to share an easy tutorial with you on how to make ruffled embellished ribbons. I love the look of ruched ribbon, and adding pearls (my favorite embellishment) seemed a natural thing to do.

You can also add glass beads, charms, or any other kind of embellishment that has a hole for sewing it on.

I chose Noble Peacock Seam Binding for this card today. I love the color and the ease with which it gathers. There are a lot of beautiful colors in the RRR Store here.

Here are the steps:


1. Collect supplies needed. Cut a length of ribbon 2-3 times longer than you want for the final length (Do you like my vintage spool of thread? All wood. Miss those!).


2. Tie a knot in the end of your ribbon, and pass through the ribbon a couple of times, leaving a long enough tail to tuck under a layer or behind your cardstock.


3. Thread one or two pearls or beads onto your needle and pull tight enough to make the ruffle. You can have loose or tight ruffles, or a combination.

Here is an example of the kinds of stitches I took (not planned, not straight, not even! Easy!)

4. Continue adding pearls/beads until you have the look you want. At this point it may look like a tangled mess, but it will straighten out as you gather it up and adhere it to your project.  I used 1/4" Scor-Tape and attached a piece to my card where I wanted the ribbon. Then I carefully arranged and laid it out on the tape to adhere. Tuck in the other end and fasten off.

Here is the final project:
 I hope you will try it!


Stamps: sentiment is from Spring is Sprung (Flourishes)
Paper: Crumb Cake (SU!), Sweet Tooth (Poptone), MME DP
Ink: Memento Tuxedo Black 
Accessories: pearls (Kaiser and SU!), pennant dies (SB), scalloped doily die cut (MS), distressing tool, Noble Peacock seam binding (Really Reasonable Ribbon)