Friday, August 31, 2012

Really Reasonable Ribbon Design Team Call

This post will stay at or near the top through September 30th.  Please scroll down for new daily posts.
 
Really Reasonable Ribbon is doing a full design team call and we are looking for a team of 8 highly creative people.
We are looking for talented crafters and artists who love using ribbon, work well with deadlines and have great personalities. If you are a card maker, scrapbooker, hair bow maker, paper crafter, ribbon artist, altered artist or if you do anything fun and unique with ribbon please apply.  Our readers are looking for variety, so don't be afraid to show your creative side.

Requirements

- You must be a versatile crafter who loves to work with ribbon.

- You must have an active blog and the ability to take quality pictures and post interesting entries directly to the Really Reasonable Ribbon Blog.   We require 5-6 projects per month as follows:
Ø  We require 3 projects per month posted directly to our blog with one being a tutorial. You must also post projects using 'Really Reasonable' ribbon on your own blog and promote Really Reasonable Ribbon whenever possible.
 
Ø  You will be required to link my blog and business on your blog, and participate in and promote special events (usually blog hops) 1-2 times per month.  Typically we have one blog hop per month but we may occasionally participate in a second activity in any given month.
 
Ø  You will be required to create a sample project for one of our two monthly challenges.
 
Ø  You will be required to assist us in commenting on RRR challenge entries. 
 
Ø  We ask that you commit to a 6 month term from November 2012 through April 2013.

Rewards

- You will receive $25 in free product of your choice per month plus a free Monthly Ribbon Club assortment for use in your projects. You will also enjoy a 20% discount on any other purchases made with free shipping if additional purchases coincide with your regular monthly shipment.

- We will link your blog from the Really Reasonable Ribbon blog.

- You will receive a badge to display on your blog stating that you are a Really Reasonable Ribbon design team member.

- You will have access to our Facebook group where the design team can network and support each other on RRR projects and other design team work.

If you want to work with some fabulous ribbons and think you have what we need please send us the following information to reallyreasonableribbon@gmail.com .

- A paragraph about who you are and why you want to be a part of the Really Reasonable Ribbon team

- 3 of your favorite projects that you've used ribbon or trim on that will show us the type of work you will create for the Really Reasonable Ribbon blog

- Your crafting resume

- A link to your blog and galleries

- A list of any design teams you are currently on

- Your contact information including your complete name and shipping address

The call will be open until September 30th, 2012. New design team members will be notified by October 10th, 2012.

For more information about Really Reasonable Ribbon, please
visit our Really Reasonable Ribbon’s Ramblings Blog and our Really Reasonable Ribbon website.
This call is open to everyone in any country as long and you can receive parcels sent thought the Postal Service in a timely manner and post to the RRR blog in fluent English.  Your personal blog must also be in English or have a translator.

Thank you
~ Bonnie Garby ~
 

Woven Ribbon Headband Tutorial

 
Hi everyone. 
 
Today I have a video tutorial for you for woven ribbon headbands using ribbon and supplies from Really Reasonable Ribbon
 
I've been promising this video for a while and I finally have it done.  My video editing needs some work, but I think it's good enough to give you an idea of how to make them.  My oldest son had the nerve to grow up, get a job and move out without any consideration for my video editing needs if you can believe that.  This is why it's been 2 years since my last video.  If you did not see it, be sure to take a look at my Military Braid Tutorial where I made a pair of fun flip flops.  I'm not of the generation that is born with the knowledge to run all computer programs, so you'll have to bear with me for now.  :)  I'm sure my skills will improve once I have a few videos under my belt.
 
First I have the video for you below.  Then beneath that, I will show you some other headband samples I made.  I encourage you to give this project a try.  Once you get the hang of it, it's really quite easy.


Here is my adorable niece modeling a headband I made with 3/8" double-faced satin using a 1/2" child size headband.  This size headband is probably ideal for girls up to age 7 or 8.  It's a bit shorter end to end when their heads are still a bit smaller.
 
Here is a set I made with a 1/2" child size headband and an 18" doll headband.  These are fun gift ideas so your little girl had a matching headband for her favorite doll.  The larger child sized headband is made with 3/8" grosgrain and the doll sized headband is made with 1/4" grosgrain.


Here is an American Girl doll that belongs to my other niece modeling a doll sized headband.  (Sorry, I couldn't seem to get my niece and the doll at my house at the same time for a photo of both of them together.)

Below are some additional headband samples.  You can make so many variations just by varying the starting ribbon positions or using printed ribbon.  A headband woven with just one color ribbon is also very nice.


The white headband below is made with 3/8" white satin with grosgrain edge ribbon and would be lovely for a 1st communion or even a flower girl at a wedding.


This final headband is a 1/4" headband and I used 1/4" grosgrain ribbon.  I love the smaller profile of this width of headband.
 
I hope you enjoyed the tutorial and you have success making your own headbands.  They are wonderful for holiday gifts or to sell at holiday craft fairs.
 
If you give this a try, we would love to have you share your finished projects on the RRR Facebook page. 
 
If you have any questions or problems, I'd be happy to help if I can.  Just be sure to leave an email address so I can answer you if your blogger account does not have an email link.
 
~ Bonnie ~
 

Thursday, August 30, 2012

Ribbon Flower Tutorial

Hi there.  It's Ginny here with a tutorial for a beautiful ribbon flower using ribbon from
Really Reasonable Ribbon.
 First here's a finished project that
I used the flower on.
 

 I received this lovely gray ribbon from Bonnie in the August Ribbon Club Assortment and wanted to make a flower with a flat back for my cards and projects...the only catch is that it was not wired edge...which you would typically make a twisted and rolled flower from. So I developed a technique to give my flowers all the layers and texture...and would be easy to adhere to my projects.
 

The first step is to cut a generous amount of trim 9-12 inches long and pin or pinch in half. I found it just as easy to hold it and snip being careful not to clip all the way through the ribbon. I choose an opaque ribbon for this project...will have to try a sheer ribbon next time.
 

Once you have all the snips cut for the full length of your ribbon...twist and tape one end to work like a "shoe lace". Starting at the top...thread the ribbon through the cut hole. continue threading until you reach the end of the ribbon.
 

Cut yourself a little scrap of file folder to adhere the flower to and using hot glue...attach the end of the trim to the center of the scrap. Twist and glue as you move down the length of the trim. I like the texture of the little frayed bits...but you may choose to clip them off as you go along. Once you get to the last 1/4 inch or so..trim the folder around the flower until it no longer shows and wind the end of the ribbon to the back and glue in place.
 

Add some sweet little pearly accents to embellish the flower. These pearls had adhesive meant for paper...so I added just a bit of the hot glue to keep them permanently affixed.
 

Once you get the hang of making these pretty flowers you will find that they're the perfect "busy work" to do when your feeling productive...but not so much creative. I just make several of them in different colors to have on hand as just the right finishing touch for my projects. Now you can make flowers from all your beautiful trims from Really Reasonable Ribbon!

Thanks to Bonnie for asking me to be the Guest Designer for August. I can't believe it's went by so fast. I had so much fun joining the super talented design team to share my projects with all of you.
Huggs...Ginny

Wednesday, August 29, 2012

Life is Short - Play Hard

Hi everyone!  I hope you are all having a great week!    I have a cute card to show you today!

I cut this cute little car from the Cricut Lite Cartridge B is for Boy.   These cute pattern papers are from the new My Mind's Eye Six by Six paper pad....this one is called Summer Splash.  
I added a button and some red and white twine.
I hope you like my card....stop by my blog for more details.

Corri


Tuesday, August 28, 2012

Party Time!


Hi to all of you. Linda here today with a party invitation card project. This card is very whimsical with a touch of bling to brighten the day. :)

 
For this card, I used a combination of these following ribbons;

3/8" Twill Assortment

and

1.5" Cream Mesh Ribbon


I am sooo addicted with this cream mash ribbon, I love to put it on almost every card project I have. For the title, I stamped with staz-on on top of vintage tag and for accent, I added wooden butterfly and star that glittered and air dry.


I hope you enjoy looking at today's project. Have a nice day and keep creating pretty stuffs!

Other materials:
October afternoon paper
Maya Road wooden embellishment
Hampton art stamp
Staz-on ink

Monday, August 27, 2012

Crayon Art Mini Album


Hello everyone! It's Emily here from Create Serendipity. Today I wanted to share a mini album that was inspired by a few different pins on Pinterest

I'm sure you all have seen the melted crayon art, right? I've been eyeing it for a while and finally I decided to give it a try. I didn't have a stretched canvas laying around, so I thought I'd try something different... a mini album. 

I had some library pockets that my mother in law gave me (she's a librarian) and I searched "library pocket" on pinterest and found a neat album idea. 

So I made a mini album with the inside pages out of library pockets.

Last, but not least... I added lots of pretty ribbons to jazz the album up a bit! 

Thanks for stopping by today! More details can be found on my blog

RRR Products Used: 

Chevron Striped Twill YellowNavy OrganzaGrey/Pewter Grosgrain


Sunday, August 26, 2012

Girly Glitz SKULL Mini Album & Video

Hello everyone. I'm Super EXCITED to share with you all my Girly GLITZ Skull Mini Album designed using a TON of Really Reasonable Ribbon :)
So for my album I used on the front cover some Black Jute, Double Ruffled Edge Ribbon, Satin Polka Dot, and Black Satin to bind my album. All are from Really Reasonable Ribbon. In my video I show and tell how I did my album and what ribbons I used throughout.
Really Reasonable Ribbons Used:
Black Netting/under trims and lace

For these 2 pages I made a pocket on the left side, and put some tags in it. Then on the other side I used the netting and Helmar Decoupage to create a design on that page. I'm super pleased on how it turned out. I then used the jute on the top to place a bow, the letters and Halloween tag.

This page on the left opens,and you will see that in my video. I made a couple of pockets to add photos and tags for writing. Can't wait to add some Halloween photos of the kids and hubby and I :)


For the last page here I used the CottageCutz Seed Packet Die for the swivel pockets and I will add some photos to the inside of each of those.

This is the last page and is the backside of my Skull Mini Album. I used the CottageCutz Lace Envelope on the back.  Its been a habit of mine lately to add one to each album on the back. I used more RRR and Lace for this page :)


Here is my VIDEO on my Album Hope you enjoy!!!


Thank you for looking and have a lovely day!!
Hugs to all,
Cheryl

Friday, August 24, 2012

Sweet Summer Sun

Happy Friday to all of you! 
Today marks the LAST Friday of the summer for my kiddos, since they return to school on Monday.  They are both excited and sad about it, and they are spending lots of time in the pool.  
For me, it marks the end of sumer and the beginning of football games and field trips.  Bring on FALL!
I thought I would share a layout with you all today sharing on of my favorite summer photos.  This is my 9 year old son acting silly in the pool...and I was lucky enough to capture it on film!  

To make the cluster at the base of the umbrella, I used 

I also used the Earthy toned Hemp cord to 
create the lei effect and tie around the layout. 


See, Ribbon can be used in masculine layouts!
I hope I've inspired you today...make use of the final friday of the sumer and put some of your ribbon stash to good use!

Have a Fantabulous Friday!!

Thursday, August 23, 2012

Bow tutorial


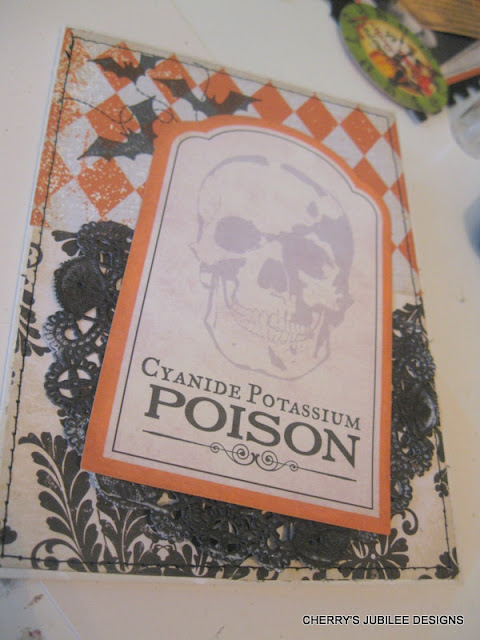
Hello there!  I thought I would pop in to share how I tie my seambinding bows.  Now I am no where near a perfect bowtier....is there such a thing and is there such a word, lol?  I always want to mess around with them.  Bows can be such tempermental little things.  With out them though my cards seem so sad so I almost always add them. Ribbon is essential to me and adds much needed softness to a card. So today  I have a spooky little project.  I have been having a blast making Halloween goodies so today's card is just that.  I made my card and scored it and added my pattern papers.  Of course than I started to pile on my goodies.  Little bit of stamping, fun cackling witch, and a diecut sticker.
                                               I grabbed my yummy black seambinding and crumpled it up.  I use a lightly wet paper towel and crickle it up in it.  Works well and fast.  Now with my seambindings sometimes I wrap it all the way around the card but often times I don't.  It just ends up getting covered with embellishments anyways.  I don't tie bows so it is all one piece.  I make separate bows and "piggy back" them onto each other till they look full to me.  As you can see in the pics I tie one and adhere and than add the next alternating the direction of each bow.  The last one I tied my sentiment tag with twine to it and than adhered.  My way might be a bit diffrent but it works for me.  OHHH and don't pay attention to my messy desk!  Hope you enjoyed!  cherry

Wednesday, August 22, 2012

Meow

I ain't lion - this is a cute digital image (Lion) available at I Brake for Stamps. I love the look on his face. You never know what he might be thinking! I printed my image on Georgia Pacific White cardstock and then colored in using Copic markers. My designer papers are from My Mind's Eye, DCWV, and Authentique. They all went together pretty well!

The sentiment is from one of Kim Hughes' Cornish Heritage Farms sets. I wanted to keep my trims natural, to go along with the theme of the card, so I chose 1 1/5" Ivory Jute Ribbon and Natural Jute String. There are several colors available of both trims HERE

Thanks for stopping by today!