Showing posts with label hemp cord. Show all posts

Friday, November 11, 2016

May Your Christmas Be Merry Greeting Card

Hey there Peeps! I sharing a festive Christmas greeting card today with a very homespun appeal. I am a big fan of warm and welcoming plaids, holiday embellishments and handcrafted flowers.


I've added texture with the Red Jute Ribbon. It's just perfect to coordinate with this holiday paper. I've also added some Flat Back Pearls with a bit of "snow" for a frosty snowball effect. For the tag I added a metal eyelet and threaded through some Hemp Cord.
Wishing all of you a happy and productive day with lots of time to be creative : ) G

Thursday, May 26, 2016

"You Shine" Lighthouse Birthday Card

Hello, Ribbon Lovers!  It's Kathy here with a great summer birthday card idea for the lighthouse lover near you.
 I can almost feel the salt spray on my face and hear the crashing waves on the shore.  I used Webster's Pages Yacht Club papers to make this card.  It's an oldie but a goodie from my stash.  I fussy cut the lighthouse, flowers and ship's wheel from the paper collection, inked all the edges and then layered them with foam dots to create lots of dimension.
There was so much grey in the color palette that I wanted to punch things up with my ribbon choice.  I turned to the May Ribbon Club Assortment and found that the Poppy Red Double Faced Satin was just the right ribbon for the job!  The silky texture and bold color really pumped up the volume of this nautical card. I topped it with a hemp string bow and a sparkly blue button.  These elements really brought the card to life.
There's a little gift card pocket on the front of the card, and I cut down part of the designer paper to make this cute tag to tuck inside.  And a gift card would fit in there, too.  The tag is topped with twisted hemp cord for even more of a nautical feel.
Here's a look at the decorated interior of the card.
I stamped the birthday sentiment onto grey cardstock.
And because I love pockets, I had to make another one.  This one holds a little notecard that I created using designer paper from the collection.  I left this blank so that the sender can add their own personal note here.

This month's ribbon collection is so versatile.  I've used it on a farm themed card, a true blue patriotic portfolio, and now on this nautical birthday card.  If you haven't signed up for the monthly ribbon club yet, I highly recommend it.  It's always a treat to work with high quality ribbon!  You can find all the details HERE.

Thanks for stopping by, and I hope you all enjoy a safe and happy Memorial Day!

Cheerio,
kathy

Thursday, July 11, 2013

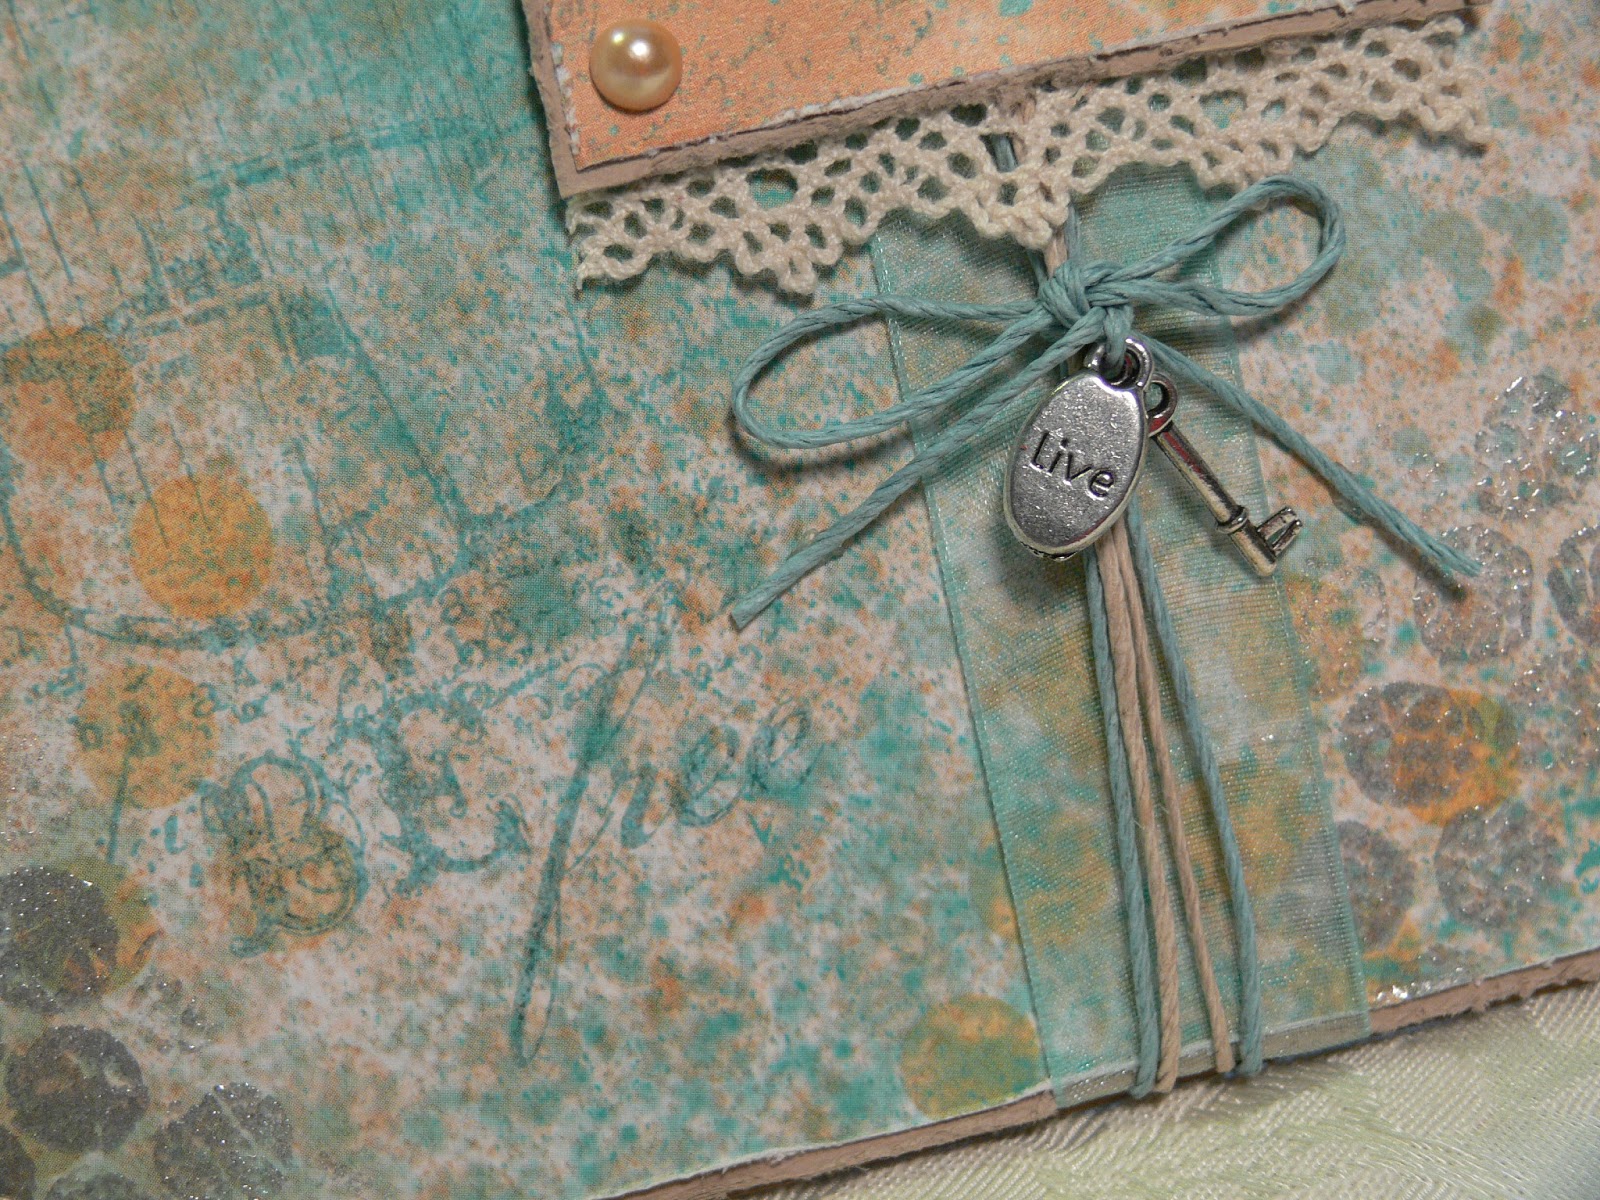
Mixed Media Combines Hemp and Organza!

Today I am sharing a mixed media project using trims from Really Reasonable Ribbon and Unity's The Strongest People stamp set. Mixed media is everywhere you look right now!
Although mixed media always scares me, I love making it because I am such a control freak and with this I can't be. It is fun to know that any "mistakes" will look just fine!

To create this background, I started out with the Summer Splash paper from Stampington and Co., and added some gold and silver Encore ink. I embossed the silver with Clear EP for added texture. I used sprays and direct to paper in various places and then stamped the bird cage from the stamp set using Poptone Blu Raspberry Ink. On a separate piece of Summer Splash, I stamped the sentiment with Poptone Hot Chocolate ink. All the edges were distressed.
I added Juliet Natural Crochet lace, Aqua Organza ribbon and two colors from Hemptique's Aquamarine Hemp Cord Set (all Really Reasonable Ribbon), and tied two little charms (a key and the word "Live") in the bow. A couple of Kaiser Latte pearls, and it was all done!

Thanks for stopping by today!


Tuesday, January 29, 2013

Make you own Bow Maker

 
Hello, my dear crafty friends! Today is my last post as a Guest Designer on the Really Reasonable Ribbon blog and this will be a small tutorial I want to share with  you.
And as ribbons are the main issue of this blog/shop, how about your own portable Bow maker and this time I am pretty sure it's a new and never seen tutorial. Why I am sure about it?  I used  my dental supplies to make it and I am pretty sure about not having so may dentists crafting with ribbons around the web.
So here it is- my Portable Tin Bow Maker for you. Look like a cute altered box? So it is, but wait for the inside of it.


Don't worry- dental supplies are not obligatory, you can use any paper clay or polymer clay to make this tool.
Pick a tin with a lid- can be a recycled one too (I used Making Memories tin, but any mint tin about 3x2'' will do the job.)
Now pick some molding paste (can be bought in any craft shop, but if you have a dentist friend it's even better as our molds smell better and mine has this great grape taste and smell). Make four 3'' wooden pegs from your BBQ wooden sticks or use an old chopstick.  We all have some at home and you will need them during the process and  to use  for your bow making after. Now mix the equal parts of both pastes (all molding pastes have 2 parts to be mixed for a minute or so) , make a rectangle about  3/4'' flat and fill the inside of your tin. 


Now stick 2 of your wooden pieces about 1/2'' from each side (it will give you 2'' ribbon  bow) and another 2 in the middle to make this 1'' bow. Let it dry with sticks inside. Now pull the sticks and your bow maker is done.


Here are some photos to show you how to make a 2'' bow. The box will use those wooden sticks storage and  you don't need to buy any fancy one (anyway, my fancy bow maker was lost  after all).
Please note that the pearl pins are just my add on to make the photos more clear, you don't need to use them during your bow making at all.
First tie the ribbon around the pegs as shown .

 Now take the left   ribbon end (the upper one) under the loop as shown.

Now move the same ribbon above  the loop as shown

This was a moment to take my pins off (as I said you don't even need them) and to make a knot with both free ribbon ends.

Pull the pegs  out of the mold and your bow is made. Trim the ends as wanted and use it as I did to embellish my bow maker box.

Now just take time to embellish your Bow Maker box.
First of all pick some ScoreTape and embellish the lid with Jute  Natural 3/8'' ribbon, cut the edges to fit the tin lid. Add some thin tape around and glue Hemp Cord from Multi Weight set. For my tin lid I used 3 layers of 3/8''width. The bottom was just perfect for one layer of Natural Crochet Lace  trim and I added the same hemp over it.


I  glued a nice flower branch over the lid (Prima) and added my pink bow I made with Swiss Dots Light Coral ribbon.
And as I said- any mold will make the job and if not- try some Paper clay  or some Polymer clay (can be baked with a tin, but don't use Microwave as the tin is metal)
Product list:
Really Reasonable Ribbon:
Tin (Making Memories)
Flowers (Prima)
Other: molding paste, wooden pegs
That's it for this post and for my Guest Designing for Really Reasonable Ribbon shop.
Thanks for great products and this fantastic exposure!
See you again in my blog with more ribbon posts!

Wednesday, October 10, 2012

Fifteen Minute Fashion: A DIY Tulle & Ribbon Button Embellished Headband Bow


Good Morning! Welcome to the Really Reasonable Ribbon Blog! My name is Keri Lee Sereika and I am thrilled to be guest designing for Really Reasonable Ribbon this month. I thought I would share with you a fun and easy project today that will make any little girl (or big girl for that matter) super happy! Who wouldn't want to make this Fifteen Minute DIY Tulle & Ribbon Button Embellished Headband Bow???

Using a few simple and inexpensive items let's take this simple dollar store headband from blah to FABULOUS! I have included step by step photos and instructions. Remember, while this is done to match my daughters Autumn Forest Nymph Tutu that I made for her, you can use ANY COLORS you like...why not make a rainbow of them!?? Let's begin by gathering our supplies, shall we?


You will need:
Really Reasonable Ribbon - Cream Seam binding Ribbon,
                                     - Length of Hemp Twine
Golden Toned Tulle - 54" x 5" length
Buttons Galore & More: Gold Button Bulk Button
Headband
Hot Glue Gun, Scissors & Button Shank Remover (Or heavy duty scissors as shown)
Bow Easy Tool (Optional)


Fold tulle in half, then in half again, then in half once more making eight layers of tulle.
Tie center with hemp twine.

Place on headband and tie onto headband using short length of Cream Seam binding.
Hot glue underside to headband to hold securely.

Tie a triple loop bow using Bow Easy Tool, or tie a big fluffy bow using any method you are comfortable with.

Use hot glue to adhere ribbon bow to center of tulle bow.

Using sturdy scissors or button shank remover tool as shown, remove shank from back of button.

Use hot glue to adhere button to center of bow.

Cut through loops on end of bow and scrunch tulle to make a fluffy bow.

Place on the head of a a VERY HAPPY little girl for complete enjoyment!
 

Sunday, September 16, 2012

A Simple Statement

Hi! Today I wanted to share a little mini-album that I did. This is a quick little book with minimal embellishments and 3.5x5 photos. I know there are a lot of really unique and fancy ribbon techniques but sometimes you just need a plain bow!!! They can make a statement of their own!
I have so many beautiful ribbons from RRR that I wanted to showcase a few of them! I used colors that matched the paper which is the "Paradise Beach" collection from Echo Park.
I used a simple stripe twill on the front and a couple of little ties on the book rings. I added little pearl and gemstone accents for the "bubbles".

Here I used the orange chevron twill and tied a neat bow. I used the same color ink to journal. I used my Zig marker for the journaling.

On this page I used the yellow star ribbon and a little of the hemp cord to tie the buttons.

For this page I used 3 ribbons the varied stripe the green star and the turquoise. It matched Addy's cute little dress perfectly!!!

Here on this page I used the same 3 ribbons. And another bow!!!


On this last page I just used a pretty turquoise ribbon, tied in a bow!!! This was really a quick little book to put together! And it shows off these cute little beach pics of Addy!!!
Sometimes you don't need fancy, sometimes simple makes a statement all it's own!!! Thanks for stopping by! Please check back for more inspiration from our talented design team!!!

Here are the ribbons that I used:
3/8" daffodil floral satin
island splash striped grosgrain
chevron striped twill orange
10 lb. hemp cord natural
stars on apple green grosgrain
shimmer satin turquoise
funky vert stripe teal/lime
sheer organza w/satin center turquoise