Showing posts with label Thanksgiving. Show all posts

Wednesday, November 25, 2020

Happy Thanksgiving!


Thanksgiving Photo Folio by Kathy Clement for Really Reasonable Ribbon Photo 01

Hello, Ribbon Lovers!  Happy Thanksgiving!  I'm about to trade in my scissors for my apron and rolling pin because it's time to bake pies.  But I thought I'd pop in quickly and share this adorable Thanksgiving Photo Folio with you first.  


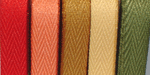
Burlap string bows create the perfect little nest for this cute felt pumpkin.  Clustered together with die cut leaves, wheat stalks, and pretty flowers from the RRR shop it ties all the colors in this folio together. You can almost hear the leaves crunching under the feet of the cute kids in the picture.   I selected Olive Green, Antique Gold, Yellow and Red Burlap string for the bows. Tie all four lengths of string into a big loopy bow with a little help from your Bow-it-All Tool.  The flowers are Mixed Earth Tone Chrysanthemums and Mixed Earth Tone Rose Buds.  


The inside of the folio has flap pages, pockets and magnetic mini folios.


I really cherish the old family photos from Thanksgivings past.  The images bring back lots of happy memories.


I wish you all a blessed, happy and delicious Thanksgiving Day!  

Cheerio,

kathy

Friday, September 25, 2020

Thankful card

Hello everyone and Happy Friday to you all! Today's card was designed for Really Reasonable Ribbon using the Beautiful Ribbons & Chrysanthemum from the RRR store. I Love working with the fall colors even though I dont want summer to end. Hoping to keep the warmth just a little longer.

On my card I started with lots of layers, and stamped my images from Makers Movement on the top layer, and then dusted orange , Yellow, and Green over the sentiment and flower stamp. I then added stickles to the centers of the flowers and in other spots as well. My ribbon choices were Brown Satin double faced, and the Moss and Cream Plaid ribbon for my bows. I then took the cream colored Chrysanthemum and airbrushed it using copic markers and my air compressor , and added stickles to the center. All layers of my card have sewing and white gel pen dots. 

 Really Reasonable Ribbon 

Hope you enjoyed my post for today! Thank you so much for stopping by
Hugs,
Cheryl

Friday, September 28, 2018

Give Thanks Bag

Autumn is in the air!  
The days are cooler and the rich autumn colors are painting the landscape.  My thoughts turn toward family time together.  Meals together, lively conversation and cards played around the table.
It's fun and easy to create these Give Thanks Bags to hold silverware for your special get together's or some sweet treats for that special someone.
I used a canvas bag, fabric leaves and beautiful ribbons from Really Reasonable Ribbon.  The beautiful Moss Cream Plaid Ribbon and Natural Burlap String added a soft fall touch to this bag.

Hope you enjoyed another fun and easy project.


Monday, August 8, 2016

It's Turkey Time

Hi all, 

Hey, hope you are all getting excited over the new Ribbon Club Assortment  - Colors of Autumn Assortment - it's super gorgeous!! The colors are so vivid and just great for all your fall projects. :D 

Well I want to share with you all a cute little turkey candle holder I created using these beautiful ribbons. I created one of these about 2 years ago or so but it was different. I used the same concept for the front of the turkey but used the rosette technique with the ribbons instead of using feather. I think he turned out cute. 

So here is my little Turkey guy, hope you all like it. I know it's a bit different than the usual but I thought it would be a nice change. :D 

To create the back of the turkey I cut out 3 1/2 , 3, 2 1/2 inch circles. 
I used score tape around the circles and then got my ribbons and
started the rosette only going around half way. I then used 3D adhesive 
to stack the rosettes on top of one another, in a layered look. I used my little 
scallop punch for the front of the turkey's body. I hot glued him to the small
mason jar. I used googly eyes and cut a beak and did a snood. 


I wanted to show y'all another close up of the turkey and the ribbons.
Here are the Ribbons I used 5/8"Delicate Stitched Satin Ribbon Turftan Brown
5/8"Square in Square Print Satin Ribbon Kiwi Green5/8"Square in Square print Satin Ribbon Tangerine to create the rosettes for the Turkey's feathers. I also used the cute 

 Here shows a close up side view of the ribbons layered. 
I used the 1.5 inch Brown Netting to decorate the mason jar
which I wrapped around the  mason jar and then wrapped the 
I used hot glue to adhere both ribbons to the mason jar. 


Supplies:
Really Reasonable Ribbons - 5/8"Delicate Stitched Satin Ribbon Turftan Brown
Paper - brown paper, craft paper, yellow paper
Accessories - Glossy Accents, googly eyes, mason jar, small scallop punch (fiskars), 

Thanks for stopping by and taking a look at my project. I hope you are inspired to try making this or put a new twist on it. Check out the Really Reasonable Store and if you haven't joined the Monthly Ribbon Club you gotta do it, these ribbons are just beautiful. 
Wishing you all a great week and will be back soon. 
Hugs, 
Deborah xxx

Tuesday, November 26, 2013

We OWL Give Thanks Treat/Place Card Setting/Video

Hello everyone.  Today I am sharing my Treat/Place Card settings for Thanksgiving Day at our house! These were designed using Toilet Paper Rolls, Really Reasonable Ribbon, & CottageCutz Dies!

To start with, I cut 1 toilet paper roll into 3 pieces.  This will give me 3 bases.  I used a total of 3 Toilet Paper rolls for 9 of these. Next I covered them with DCWV Design Paper and used Really Reasonable Ribbons Scor-Tape in 1/2".  It made it easy to attach the design paper to the rolls. Next I prepped all my CottageCutz Acorn OWLs and added TURKEY Feathers by using all CottageCutz Mini Leaves. Next I used Really Reasonable Ribbon Mini Ric Rac along the bottom in brown, and then added some RRR Buttons. OOoooo I forgot to add the darn BOWS to these, omgosh! LOL  Oh well, they are going BowLess....hahahahahahaha

Next I used Plastic Saran Wrap to wrap up 4 Reese's mini cups, tied them up with Brown Seam Binding, and then added a ticket for the NAME using Hemp in Natural.


Supplies Used:
Buttons Ivory

Other supplies Used:
Copic Markers
DCWV Dp
Toilet Paper Rolls
Hot Glue
SU! ticket punch and ticket stamp


Video showing briefly how I made these super fun Toilet Paper Place Card settins/w treat!


These were SUPER FUN to make, and this is my 1st year doing a place card setting for Thanksgiving! :) I thought it would be neat to add some candy for a treat! Super FUN!!! You will have to try these!

Thank you for looking and hugs to all,
Cheryl

Tuesday, November 19, 2013

Happiness by Jenn Cochran

Good morning to all the Really Reasonable Ribbon friends and followers.  Hope you all are having a great week.  It is the calm before the Thanksgiving cooking storm.  What are your Thanksgiving traditions?

Speaking of Thanksgiving, take a look at Pilgrim Tobie from Some Odd Girl.  Isn't he just a cutie.  I love the Totally Twill Moss Green ribbon from Really Reasonable Ribbon.  It was perfect for this card.  I tied my bow with the Bow It All from Zutter.


Thanks for joining me today.  For more inspriation from me, visit my blog here or google Jax Bean Stalks.

JENN

Supplies:
Image: Pilgrim Tobie From Some Odd Girl
Paper: EP
Copics:

Friday, October 25, 2013

Fall Flower Makeover Tutorial


For our current sale codes, please click HERE.

 
Hi there all, it's Ginny here to share a great tutorial on how you can transform basic flowers from the craft store ( or your own stash lol. I know we all have faux flowers in our supplies.) I needed some flowers to embellish a fall inspired mini album we were creating for our class this week...and try as I might I could not find any that fit the size or style I needed without them looking too "Thanksgivingy" So I transformed these rather plain flowers into a warmer and seasonally fitting embellishment.
Basic flower off a stem with lot's of the same blooms. It's not really so bad...but it can be better!

Pull the layers apart.

Cut the shank off the center. It's plastic...so it's pretty easy to get through.

Ink all the layers. I used my current favorite Gathered Twigs Distress Ink.

Cut rough circles from Faux Burlap Antique Gold trim and roll to tatter edge.

Reassemble using hot glue between the layers.

Using Bisque Liquid Pearls smash and spread it into the center to lighten it up and along the petals to add a shimmery accent. I think you could have fun experimenting with different colored flowers and inks and pearls. Maybe a Christmasy poinsettia?

I trimmed these leaf shapes from another stem...the leaves were actually too big to use in their  original state....so I just nipped them in a bit. To the edges I added a nice line of Cinnamon Stickles for detail.
Once I had two of the  flowers transformed...I got out the glue gun again and attached them close to the base.. then layered them over the jazzed up leaves.


I think they look fabulous on this Count your Blessings Fall Mini Album....it's seasonal without being Thanksgivingy. Hope this inspires you to give your flowers a makeover so they will coordinated perfectly with your projects!
Wishing you all a happy and productive day and time to be creative : ) Huggs Ginny

Monday, November 21, 2011

Guest Designer - Sandee Setliff


Hi everyone! My name is Sandee Setliff, from Inspired To Scrap, and I am so happy to be a guest designer today for Really Reasonable Ribbon. I love ribbon and all the fun things you can do with it and I love checking in to see what fabulous creations that the awesome design team keeps coming up with!
My projects today are some fast and fun ways to use ribbon to spruce up your holiday place setting. A little ribbon can make something great into something fabulous! I have a couple here to show you and over on my blog I'll show you 2 more! I know everyone is getting ready for Thanksgiving so I really hope these ideas can create a little spark for your entertaining!

All my projects were created with the ribbon assortment Autumn Twill, which you can find here
at the Really Reasonable Store! But I can also imagine doing this with the November monthly club assortment for Christmas!

3/8"  AutumnTwill Assortment RESTOCKED!

For my first project I dressed up my wine glasses with a simple twill bow and then hot glued a flower on the ribbon, adding three leaves and simply tied it to the glass stem. ( I'll show you the back of the glass on my blog so you see how easy this is )

Next I made matching napkin rings by cutting a paper roll into quarters and covering each section with the twill. It was super easy to do and by using the ribbon assortment as my inspiration my table embellishing just fell into place. We need simple, easy and elegant sometimes, especially since holidays can be a tad bit stressful!
I hope you like my ideas and if you are interested in seeing the rest of the table including the centerpiece I hope you will take a moment to pop over to my blog and check it out. Here's wishing each and everyone of you a wonderful Thanksgiving with friends and family!
:)

Wednesday, November 9, 2011

Hooray, It's Turkey Day!

Hi everyone!  I'm so excited for my first post as a member of the Really Reasonable Ribbon design team.  My name is Corri Garza and my blog is Bug Lover Cards.
 
I have a cute Thanksgiving card for you today featuring the orange ribbon from the Fall Twill Assortment.
I love the colors in this group....perfect for all your fall projects. This twill ribbon is also very easy to tie...the bow came out perfect on my first try.


The card base is cut from the Cricut Wild Card cartridge, the turkey is from the Simply Charmed cartridge and the label is from Once Upon a Princess.

For more details, you can visit my blog.
Thanks for stopping by!


Friday, October 7, 2011

Fall Fun with Ribbon!

Hi everyone! First let me just start off by saying how thrilled and excited I was when Bonnie asked me to guest design for Really Reasonable Ribbon! I love all the ribbons that she always has in stock in the store! There is always the latest trends from bakers twines to seam binding ribbon as well as the old favorites like satin ribbons and ric rac! And not to mention Bonnie and her team are just the sweetest! So thank you again Bonnie for having me!


When I first saw the beautiful Autumn Diamond Satin Assortment, I knew just what I wanted to make with it! The lovely colors of the ribbons and the way they were folded just screamed a turkey's feathers to me! So that's what I did, I made some turkeys with them!! I made a Thanksgiving Dinner invite and a Turkey Candle/Placecard Setting.

I used a simple $1 candle and turned it into a Turkey that can be displayed on your Thanksgiving Dinner table as a placecard setting. And then your guests can then take them home as a special gift! Just use the top of the candle as the base for the feathers. First, fold some small pieces of ribbon in half and add a dab of hot glue on one end to hold it together. Use a few different color ribbons, at different lengths. Then glue one by one around the top of the candle, in two rows.


Then using some removable glue dots, so it can be easily removed for lighting, adhere the finished turkey feathers lid to the back of the candle with the "feathers" behind and above the top of the jar. Then decorate as desired!

For the card/invite I did the same procedure with the ribbons onto a piece of round chipboard, which I covered with patterned paper, to make the turkey.


 Using the same gorgeous Autumn Ribbon Assortment, I made a pumpkin decoration. I took some real mini pumpkins and hot glued them together. I then decorated it with the ribbons by making a multiple colored bow. The bow can be made easily by using the Bow Easy Tool.  I also used some Natural Jute String  and some fun Moss Jute Ribbon!


And lastly, one of my favorite things in the shop is, of course, the seam binding and bakers twine! I just had to make a Halloween card using the Orange Seam Binding and super cool Halloween Bakers twines! I used both the orange/black (will be back in stock soon!) and orange/white twines.  For more projects to come, just visit my blog HERE.

I hope you all have a lovely Fall and wonderful Halloween!!

Hugs....
Melissa