Showing posts with label September Ribbon Club Assortment. Show all posts

Wednesday, September 29, 2021

Magical Midnight Tales Halloween Card

Magical Midnight Tales Halloween Card by Kathy Clement PHoto 01

 Hello, Ribbon Lovers!  Halloween is creeping up on us, isn't it?  Time to share some too cute to spook cards embellished with beautiful Really Reasonable Ribbon!


I love to create layered ribbon borders on my cards.  For this 6" x 6" top fold card, layer  the Halloween Cats and Black Delicate Stitched Satin ribbons from the September Ribbon Club at the top of the card.


 Use your Zutter-Bow-it-All Tool to tie a double loop Halloween Cat bow.  Then add just the right amount of shimmer with Silver Metallic String. 


Here's a peek at the finished interior.  Such fun colors and images are really too cute to spook!

Do you make Halloween cards?  

Thanks for stopping by!  

Cheerio,

kathy

Thursday, October 24, 2019

Fun Fall Card Featuring Tangerine & Neutrals

Hi friends! Linsey here today sharing a simple and fun Fall card featuring some of the lovely ribbons from the September Ribbon Club Assortment. This Halloween themed assortment consists of some ribbons that work beautifully for Fall and Autumn themed cards and projects alike. I love the versatility and value of the Ribbon Club Assortment. If you love gorgeous ribbon--duh!--and a great deal--double duh!--check out the RRR Monthly Ribbon Club! I used Black/White Striped Grosgrain and 5/8" Satin with Grosgrain Edge Tangerine.
 A simple bow tied in the middle with the tangerine, some cardstock stickers and a few sequins finish this card.
And that's all for me today! Thank you for stopping by and hanging out. I hope you have a very wonderful and creative day!

Wednesday, October 9, 2019

All Hallow's Eve Mini Album Page


Hello everyone.  Today I have another page for the mini album I've been working on. This one is the All Hallow's Eve page designed for Really Reasonable Ribbon, and will be for Halloween photos. On this page I wanted to use the beautiful ribbons from the September Ribbon Club Assortment as they are all so pretty!

So for this page I used black card stock for the base, and made it so it's open on both sides for easy attachment to the album. Next I created the flaps and pockets using Graphic45 design papers. I kept the decorations  pretty simple for this page. I did add beautiful ribbons from the Septembers Ribbon Club, some covered buttons, bats, and a candy. I love making these pages to be interactive and have lots of room for photos and journaling. Hope you enjoy my post, as I've also included a little video showing how the page opens.


Really Reasonable Ribbon Supplies used:
Scor-Tape
Tape refill scotch
Delicate Stitched Satin tangerine
Swiss dots black
diamond satin grape

Thank you for stopping by and have  a lovely day!
Hugs to all,
Cheryl

Monday, September 30, 2019

Spooktacular Ribbon Topped Treat Tags


Hello, Friends!  Halloween is coming!  And these spooktacular ribbon topped treat tags are perfect for all the grown up ghouls and ghosts on your list!


I've topped each tag with a wonderful cluster of Halloween Ribbons from the September Ribbon Club.


I've also wrapped ribbon around the pocket base on each tag.  Doing this really gives the tag a finished, professional feel.


The pocket holds treats that any grown up trick or treater would enjoy.  I've wrapped individual packs of cookies with designer paper, added ribbon and a rosette to a vintage silver spoon, tucked in a tea bag, candy corn, chocolate treat and honey stick to complete the gift ensemble. 


The ribbon cluster takes these tags from fabulous to frightfully fabulous!  And it is so easy to do!  Just thread lengths of the September Ribbon Club ribbons through the top of the tag.  Tie them off with a length of the Grape Diamond Ribbon Satin to secure.  Top with a boo-tiful bow for the perfect finishing touch.


I upcycled some clothing tags by painting them with black chalk paint.  The jute string on the tag is also tied into the ribbon cluster.  Then I added a mini Halloween card on the front of the tag.


This is where you can add your ghostly greetings.

Here's a look at the second tag:


I'm telling you, friends...ribbon is magic!  I hope I've shared some tips and ideas that you can use in your own crafty adventures!

Thanks for stopping by!
Cheerio,
kathy

Friday, September 27, 2019

Happy Halloween Gift Carton

Hello everyone and Happy Friday to you all! Today I have a sweet little Halloween Gift Carton I decorated with Really Reasonable Ribbon and some sweet little dies. This project is super easy and comes together quickly.

I love making different little gifts, and this one sure is sweet! I chose the Gift Carton from Makers Movement and then decorated with Really Reasonable Ribbon from the September Ribbon Club Assortment. I added the striped grosgrain ribbon along the bottom of the gift carton, then the cute little candy print in orange to embellish the top of the carton.

The Halloween dies are CottageCutz and are super cute addition to this gift carton. Perfect little treat to give at Halloween to your friends or family with some yummy treats inside.

I tied the top closed with some black burlap string and then tied on the bow.  The bat is hot glued on, and the little Halloween tag is also tied on. I think I need to make 12 of these for my club as they would be super cute to give to the ladies in October.

Really Reasonable Ribbon Supplies used:
September Ribbon club
black burlap string
scotch advance tape refill
foam squares
foam tabs

Hope you enjoyed my post for today! Thank you for stopping by.

Hugs,
Cheryl

Monday, September 24, 2018

Fabulous Fall Ribbons

Hello, Ribbon Lovers!  Fall has to be my favorite season of the year.  Crisp apples, crunchy acorns, colorful pumpkins and fluttering leaves make me happy, happy, happy!  To use up some of my stash of retired fall ribbons, I decided to create a fabulous fall stash buster of a mini album all tied together with fabulous fall ribbons from RRR.


This is a 5" x 7" chipboard cover, O-Ring bound mini album with a mixed media cover.  I've combined about 4 different paper collection from different manufacturers with dies, flowers, brads, buttons, and burlap.  To tie all these elements together, I used gorgeous fall ribbons.


In addition to the ribbons in the September Ribbon Club Assortment, you'll find Autumn Diamond Print Grosgrain Ribbon and Noble Peacock Seam Binding tied to the O ring binding.  I love the way these vibrant ribbons resemble fluttering fall leaves, don' t you?

The album is loaded with flips, flaps, inserts, tags, mini folios and other goodies.  To help you get a feel for all the album features, I've prepared a little Youtube video tour.  I share lots of tips that you can use in your own crafty adventures here.


I hope I shared some tips and tricks that you can use in your own crafty adventures!

Thanks for stopping by!
Cheerio,
kathy

Wednesday, September 20, 2017

Trick or Treat Card

Hello ribbon lovers! Are you ready for a little Halloween Inspiration?
I couldn't resist using this cute spooky spider ribbon, which is one of the ribbons included in this month's Ribbon Club Assortment.
Next I added the Clear Flatback Rhinestone to the bow.  Then I added some glitter glue to the vintage image and pattern papers.
I hope you enjoyed this sweet trick or treat Halloween card.
 Wishing you a creative day.

Sheila

Tuesday, September 20, 2016

Too Cute To Spook Headband

Hello all,

It's Debbie here, I have something to share with you all today. I tried something new with ribbons from Really Reasonable Ribbon. I have been wanting make a headband for many many months but just a little nervous to do it. You know Bonnie, who is the owner of Reasonable Ribbon, she makes headbands all the time and they are just beautiful. Well I followed one of her videos and she makes so easy to create one of these fun headbands I had so much fun. Of course I need a little more practice but I thought for my first one it was pretty good. I made this little headband for my granddaughter Reminie, she's been talking none stop about Halloween, being 2 years old this will be a fun time. I think she'll like the headband. :D

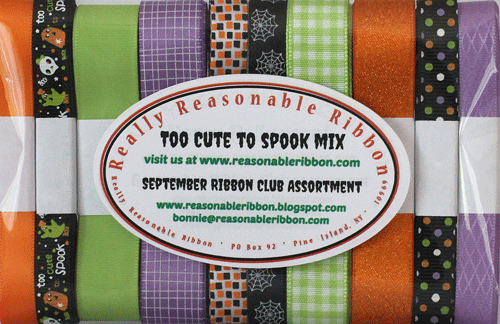
I used the wonderful Too Cute To Spook Mix it's the September Ribbon Club Assortment.
So super fun!!
Monthly Ribbon Club, Domestic

 For the hairband I used three ribbons 

 Here is a front view of the headband. 
I just thought these ribbons looked good together 
and I really like the little black ribbon 
To cute to spook print is just the cutest Halloween ribbon ever!! :D 

 Here is the back of the headband it looks so cool. 
I am really pleased with how it turned out. 

A lovely sideview, you can see the little green spooky guy, 
there is a skull and the word Boo. 

 A topview of the headband showing the bow I created using the Bow It All V3.0 found at 
Reasonable Ribbon Store. You can also get the headbands at the Store too. 
Here is the link to Bonnie's Youtube video showing you how to make these fun headbands.

Supplies:
Accessories: Really Reasonable Ribbons - Too Cute To Spook Mix and the plastic headband 1/2 inch.

Thank you all for joining me today. I appreciate you taking the time to stop by and visit. Hope you all head over to the Really Reasonable Ribbons and check out the store and this months ribbon of the month  Too Cute To Spook Mix. Also don't forget we have a fun new challenge up so join in the fun. 

As Always Take Care 
Hugs, 
Deborah xxx

Wednesday, October 28, 2015

It's Almost Halloween ....

It's only 3 days until Halloween and everything is set for trick-or-treaters around the house.  Today I am sharing a frame that I picked up at my local craft store and painted and stamped.  Of course the best part is the pretty ribbons that I used from the Really Reasonable Ribbon store.
I wanted to do this really simple and easy so I just sanded and painted the unfinished frame in orange and then used black ink to stamp the cobwebs all over it.  I am hoping to get a good photo this Halloween to put into it, but meanwhile I made this cute little photo collage with some papers and tags that I had from Crafty Secrets.  It went super cute with the ribbons that I used.  
Most of the ribbons are from the September Ribbon club assortment but you can still get them online in the Halloween section of the ribbons here.  It's always good to have lots of pretty ribbons on hand for things and since Thanksgiving is coming up too the oranges and other gorgeous colors will work great for that one.  So many fun craft projects to make and so little time, right?

Thank you for stopping over and sadly today is my last post for a little while.  I am taking a short break but hopefully will be back after Easter.... Thank you so much for all the kind words you post for our hops and everything else that we all do to inspire you with these amazing ribbons.  The Really Reasonable Ribbon family is one amazing group of ladies and I have been blessed to be a part of it for so long :)  Happy Crafting everyone... Teresa

Monday, October 6, 2014

Haunted House Treat Bag and a Mulberry Flower Storage Idea Video


Hello everyone, and Happy Monday to all!
Today I have a Halloween Treat Bag I made for Really Reasonable Ribbon using the beautiful ribbons from last months Ribbon Club assortment. I also used the beautiful Sweetheart Blossoms, Leaf Trim, and some Lace to complete my bag.


I started with my treat bag, then cut some Spellbinders frames for the background using American Crafts design paper. Next I layered the black and orange ribbon and ran in from the left corner to the bottom right corner, alternating the colors. Then I used foam squares to pop the frames off the bag, and then added my CottageCutz Haunted House and Spooky Sign. Once that was done, I added the Leaf Trim in black and orange, and then used Really Reasonable Ribbons Sweetheart Blossoms in orange and white. I did dust them both, using orange on the orange flowers, and black on the white. Next I went over them with some American Crafts liquid glitter glue. I love the look of them in person. To put the lace and ribbon on the bag I used Scor-tape in 1/4" .

I wanted to share how I store some of my Really Reasonable Ribbon Sweetheart Blossom flowers for easy grabbing. So here is a short video showing how :)   Enjoy!!!


Thank you for stopping by, and I hope you enjoyed today's post!

Hugs to all,
Cheryl

Thursday, September 18, 2014

Fun Ideas for Tricks or Treats


Hi everyone and happy Thursday to all of you.  Today I have lots of fun ideas to share with you to create fun goody bags to give to friends and family this year.


There are lots of these little white thin paper bags out now and these bags are the perfect size for little ATC cards to fit on the front.  I used stickers from my stash and a few Spellbinders dies that I had and then finished them off with beautiful ribbons from the September Ribbon Assortment and black jute ribbon to make them really special.  It's going to be fun to make up a lot of these since they are so fast and easy and you can use up some of those stickers you have been saving!!


For my little Spider pail, I used an old pail that I had been saving to re-purpose, and made up a pattern first to fit over it out of plain white paper.  Then I cut it out and carefully glued it to the pail and added some black ric rac from the September Ribbon Club Assortment to seal the bottom.  For the top I cut 2 pieces of the Spellbinders scalloped circle and glued them on.  And then I finished it by adding lots of pretty ribbons on both sides of the handle in a gorgeous shade of apple green.  And the cute sticker that says trick or treat is from Doodlebug.  Now it's ready to fill up and give away or maybe just use to decorate my house.  I am not quite sure yet :)  

Thanks for stopping over and have a wonderful day...

Teresa

Wednesday, September 17, 2014

SPOOKY Witches "Trick or Treat" Bag


Hello Friends!!!!
Today I'm sharing my Trick or Treat "SPOOKY Witches" Goody Bag that I created for Really Reasonable Ribbon using the beautiful ribbons from this months Ribbon Club Assortment kit. I love making these, and this one is a little different than the normal one.  It has 2 pockets. 


So what I did with this bag was cut the top part off, and then add it to the bottom to create a pocket to hold the tag. I guess I could put a goody in there as well, but didn't have any to add :)

I used Scor-tape to close the bottom pocket.  The 1/8" width tape is what I used, and to attach it I used the 1/2" Scor-Tape, both from Really Reasonable Ribbon.

Ribbons I used from this months Ribbon Club Assortment are: The Black Ric Rac, Green Polka Dot Satin, Black Gingham, and Black Delicate Stitched Satin. LOVE all the ribbons in this months kit!  Well, I love them every month! Bonnie always does an AWESOME job at having these assortments perfect for all of us to use.


Next I added some of the Orange Pom Pom Mini to the bottom and top of the bag, and then the Green Polka Dots from this month's Ribbon Club Kit. For the top part of my bag, I used the Ric Rac in Black, as well as on my Witches Shoe.

The Hemp Cording I used as laces, and I chose to use both Black & Orange from Really Reasonable Ribbon.  I also used Buttons as well, and tied the Black hemp through one. My little Sweetheart Blossom, is also from Really Reasonable Ribbon, and Bonnie has tons of these in stock. These are now and have been my FAVORITE flowers to use on all my crafting projects :)

The Bag, design paper, and tag are all from Pebbles Thirty One Collection. My witches shoe was cut out using the Cricut and the cartridge called Happy Hauntings. Little tickets are from SU!, and hopefully I didnt forget anything here :)


Thank you all for looking and have a super wonderful day!!

Hugs to all,
Cheryl

Sunday, September 7, 2014

Halloween Candy Jar with Fun Ribbon Embellishments


One of my favorite crafts to make is a version of this pot jar candy holder. All the beautiful colors of ribbon this month at Really Reasonable Ribbon inspired me to create one to decorate for Halloween in a couple of months and I used lots of fun things I had in my stash to create it with.


To create one of these jars you will need a small glass fishbowl and then a pot to fit underneath and a flat dish to go on the top.  I painted both of them first with Americana Paints in black, orange and white and let them dry.  Then I glued them together and let that dry too.  Next I had some fun spider stickers from Stampendous and I applied those to the front and the back.


To finish it I tied ribbon around the center and tied lots of pretty bows with the ribbons from Ribbon Club this month and some black eyelash yarn too.  The top has just a few cobweb stickers and I tied a star with some black twine to make it pop.  It was really fun to make.

Thanks for visiting and be sure and get the RRR Sept Ribbon Club Assortment before
they're all gone.  We have lots of amazing projects to inspire you all month to create with !!

Hugs and Smiles....Teresa

Tuesday, September 10, 2013

Wedding Card by Tracey Sabella

Hi, it's Tracey here to share a special card with you. When I think of weddings ~ ribbon, flowers and lace all come to mind, and I've used each of these Really Reasonable Ribbon products on this card. My mom asked me last week if I would make a card for the wedding of a special couple her and my dad will be attending. This is what I created:

"Love"
Wedding Card

Really Reasonable Ribbon Products:


Tips and Techniques:
I tied a double loop bow with the gorgeous Sheer Iridescent Champagne Ribbon. This is becoming one of my favorite ribbons to create soft bows to tuck into my flower clusters. Ginny's tutorial for the double loop bows can be found here. I also tucked in some of the sweet May Arts Pink Crochet Lace. I just adore the soft touch this lace provides!! 

Here's a side view of the lovely flowers and bow. Bonnie is now carrying a large selection of gorgeous Wild Orchid Crafts flowers in the RRR store. To see her entire selection of flowers, go here. I used the WOC Mulberry Paper 20mm Open Roses in Ivory/Pale Pink along with a Pale Pink Large Open Rose. The shabby edges are created with my Zutter Distrezz-it-All by Donna Salazar Designs. 

I also decorated the inside of the card by layering coordinating papers by s.e.i and tucking a piece of lace from the September Ribbon Club Assortment below the signature block. The sentiment is stamped and heat embossed on a coordinating sticker. I also heat embossed the "Love" sentiment on the card front. 

I hope you've been inspired to grab your ribbon, flowers, and lace from Really Reasonable Ribbon and create a project of your own. 


~ Blessings ~