Showing posts with label Juliet Natural Crochet Lace. Show all posts

Friday, December 8, 2017

Happy Holiday Card

It's easy to add that extra wow to your holiday cards using Really Reasonable Ribbon.  
I picked up the beautiful colors of the papers that I using the Danish Blue Seam Binding and Peppermint Bakers Twine.  Nothing says Christmas than the Peppermint Bakers Twine.
Next, I added the Juliet Natural Crochet Lace to the bottom.  It adds such softness to the card.  Then I added a little shimmer with some glitter glue.

 Wishing you a creative day, dear friends.

Sheila

Wednesday, March 29, 2017

Family Heritage Layout

Hello ribbon lovers.  I am sharing a family heritage layout using beautiful ribbons and flowers from Really Reasonable Ribbon.  
I tied a bow using the Leather Tan Seam Binding. I glued the Wild Orchid Open Rose Mixed Pink Tone to the layout and added a little glimmer to the rose tips by adding glitter glue.
I added Juliet Lace at the top of the layout to complete.
I hope you enjoyed a little family heritage layout inspiration.
Wishing you a create day, dear friends.
Sheila

Monday, January 9, 2017

Just Because Card

Hello, ribbon lovers.  Do you enjoy creating cards to send to that special someone?  
To create visual interest and dimension, add layers of pattern paper, ephemera and images.
I added a little of the Juliet Lace to add additional layers.  And don't forget that you can add dimension to your ribbons and bows too.
I layered the bows by creating two bows using the Soapstone Seam Binding and sandwiching the Burlap String Ivory bow between.  
You don't need a special occasion to send a greeting... You can send a card just because.

Thursday, December 29, 2016

Dream - Altered Frame

Hello Ribbon Lovers!  
Sharing a dreamy altered frame today that is super easy to create in record time using beautiful ribbons and embellishments.
Gather your list of supplies:
Frame
Vintage Music 
I glued on a few of the ivory flowers, then I made a double bow with the ribbon and adding the bling embellishment.  Next I tucked and glue the Juliet Lace into place.

Using the frame as a template, I cut out the vintage sheet music and tucked inside.

I hope you enjoyed another fun and easy project.

Thursday, October 10, 2013

Pillow Gift Box by Tracey Sabella

What beautiful fall weather we are having here in Ohio with cooler days and gorgeous fall leaves. 

It's Tracey here to share something a little different. You know those clear plastic pillow boxes that some embossing folder sets come in? I decorated one as a pretty gift box featuring Really Reasonable Ribbon along with Donna Salazar Designs Antiquities paper.

Pillow Gift Box


Tips and Techniques:
Bonnie is now carrying the Zutter Bow-it-All in the Really Reasonable Ribbon Store. I used it to created this gorgeous double loop bow using Silky Crush Champagne Ribbon. I scrunched the ribbon and tacked into place using Helmar 450 Quick Drying Glue. The portion of the ribbon wrapped around the box is adhered with Scor-Tape

I trimmed the top of the gift box with gorgeous Juliet Natural Crochet Lace. This lace has a lot of give and curved around the "pillow" top beautifully!! 

I used my new Spellbinders Labels Twenty-Two dies. The slots in the sides of these dies is just perfect to thread this gorgeous ribbon through. 

I have a thing for beautiful jewelry findings and this beautiful black piece by Tori Spelling is a recent find. I love the dangling chain segments which add so much motion to this piece. 

These Wild Orchid Crafts flowers make such a lovely cluster above the bow. I added a berry sprig from my stash. I inked the edges of the die cut pieces to help them pop. 

I hope you've been inspired to pull out your stash of Really Reasonable Ribbon lace, ribbon, flowers, tools and adhesives to transform some packaging into a beautiful gift box. 

~ Blessings ~ 

Saturday, September 21, 2013

Thanks Big Time by Tracey Sabella

I can't believe how quickly the year is passing by. I'm enjoying the cooler fall weather that's arrived this week.

I have so many things to be grateful for, and it's always nice to share a thank you for a special kindness. My card features lace, flowers, and twine from the Really Reasonable Ribbon Store along with Donna Salazar Designs papers.

I normally include a tutorial with this post, but I'm changing things up this month, so be sure to check back on Sept. 30 for a layout and tutorial for two kinds of Grungy Jute/Burlap Flowers.

"Thanks Big Time"

Really Reasonable Ribbon Products


Tips and Techniques
Aren't these WOC Cosmos and Sweetheart Blossom Flowers so darling? The Cosmos Daisy required some propping up on the top where the chipboard ended, and the Tombow 3-D Tabs were perfect for this task. 

I played around with this flower cluster, and although a larger bow overwhelmed these delicate flowers, this thin 10-lb Bamboo Cord tied into a simple little bow was just right.

The Blue Fern chipboard was dabbed with Jasmine Mix'd Media Inx and then lightly sprinkled with MMI Jasmine Embossing powder and heat set for a grungy look.

I used 20-lb Bamboo Cord to "wrap" each end of my sentiment die-cut. 

I added Juliet Natural Crochet Lace below the paper block, adhered with a strip of Scor-Tape. It is so easy to use Scor-Tape to adhere lace and ribbon to my projects! The Juliet lace is so pretty with the lovely scalloped edge! 

The top border is hand stitched, and I distressed and inked all the edges. 

I hope you've been inspired to pull out your Really Reasonable Ribbon supplies and create!! 


~ Blessings ~

Monday, July 29, 2013

"Celebrate" layout by Tracey

Good morning, it's Tracey here to share a scrapbook layout with you featuring Really Reasonable Ribbon.

Weddings are a time for celebration, and I just adore this photo of the wedding party celebrating Elizabeth and Andrew's special day. This page features several of Bonnie's gorgeous ribbons, lace, and cording and is created with the ScrapThat! August Kit.

"Celebrate"
MK, EAO, FAO

Really Reasonable Ribbon Products:


Tips and Techniques:
Four Loop Ribbon Bow ~ I used a variation on Ginny's double loop bow to create this bow with gorgeous white Seam Binding. Instead of using my fingers, I got creative and used the handles of my pliers. You can find Ginny's Double Loop Bow Tutorial here

Ribbon Leaves ~ I wanted the ribbon leaves to be tucked into my cluster, so I cut off lengths of May Arts White Ribbon Leaves with just one or two leaves and placed them around my flowers. 

Tucked Lace ~ Bonnie has so many fabulous laces to chose from, and I used one of my fave's to tuck into the edges of my page, the Juliet Natural Crochet Lace

Chipboard ~ I "painted" on some Smooch Accents in moonlight to add the creamy pearlized accents to my Dusty Attic chipboard. 

Gem Banner ~ I used the pearl gems from the ScrapThat kit along with some decorative jewelry links from my stash to create this corner feature. I used Bonnie's Tombow 3-D Foam Tabs to adhere the pearl gems. 

Corrugated Butterfly and Heart ~ These are hand crafted from corrugated board with tiny ridges, the kind in postal shipping boxes. The heart was wrapped with RRR Iridescent White Metallic String by May Arts. This is one of Bonnie's must have's from her store. I love the sparkly bling this sweet thread adds to my projects!! My Corrugated Butterfly Tutorial can be found here

A close-up of my glittered butterfly. 

I used this Bird Is the Word sketch and featured word, "Celebrate" as inspiration.

Be sure to stop by the Really Reasonable Ribbon Store to check out Bonnie's amazing selection of ribbon.

Thanks for stopping by today. I hope you have been inspired to add ribbon, lace and cording to your next scrapbooking project!! 

~ Blessings ~

Thursday, July 11, 2013

Mixed Media Combines Hemp and Organza!

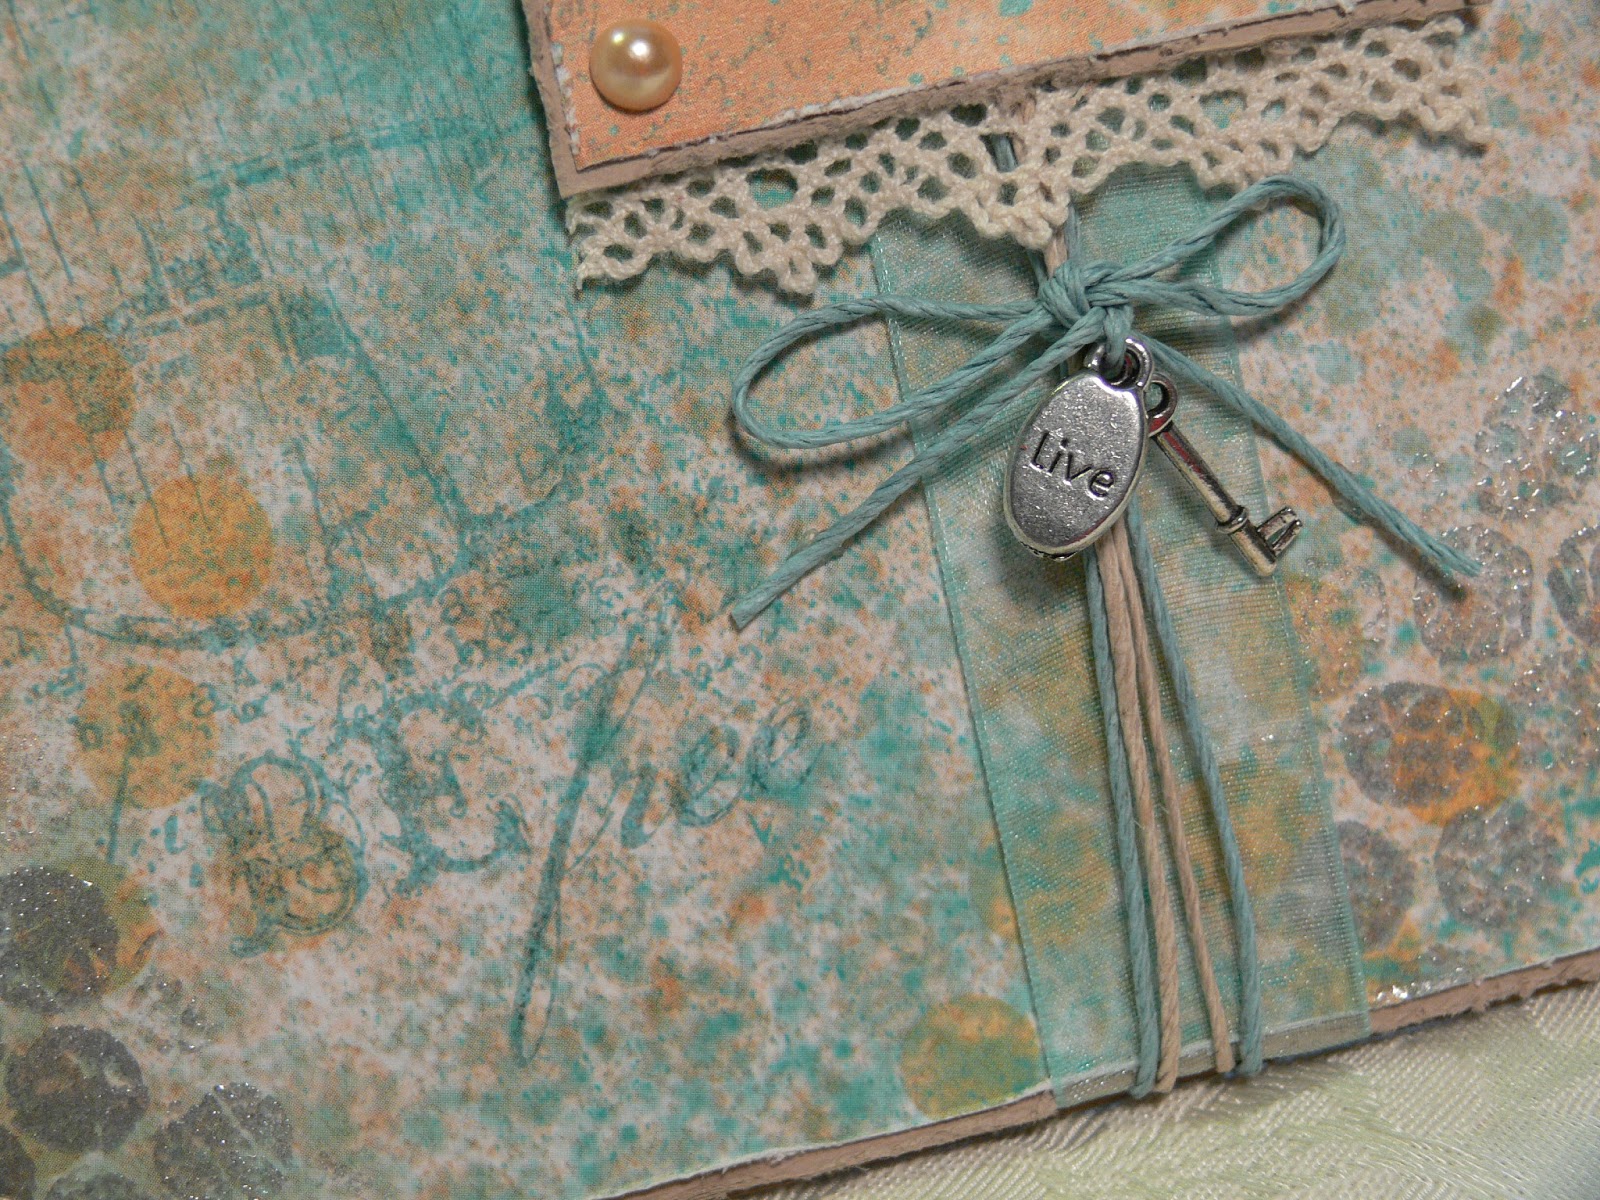
Today I am sharing a mixed media project using trims from Really Reasonable Ribbon and Unity's The Strongest People stamp set. Mixed media is everywhere you look right now!
Although mixed media always scares me, I love making it because I am such a control freak and with this I can't be. It is fun to know that any "mistakes" will look just fine!

To create this background, I started out with the Summer Splash paper from Stampington and Co., and added some gold and silver Encore ink. I embossed the silver with Clear EP for added texture. I used sprays and direct to paper in various places and then stamped the bird cage from the stamp set using Poptone Blu Raspberry Ink. On a separate piece of Summer Splash, I stamped the sentiment with Poptone Hot Chocolate ink. All the edges were distressed.
I added Juliet Natural Crochet lace, Aqua Organza ribbon and two colors from Hemptique's Aquamarine Hemp Cord Set (all Really Reasonable Ribbon), and tied two little charms (a key and the word "Live") in the bow. A couple of Kaiser Latte pearls, and it was all done!

Thanks for stopping by today!


Wednesday, July 10, 2013

Celebrate with a Feminine Birthday Card

It's Tracey here to share a card with you. Birthdays are such a wonderful time to celebrate the special people in our lives. I created this card for one of our daughters who's favorite color just happens to be purple. It features fabulous ribbon and embellishments from Really Reasonable Ribbon.


Really Reasonable Ribbon Products:

Tips and Techniques:

Dyed Ribbons ~ As you probably know, I like to dye and color my ribbons to coordinate with my papers and other embellishments. Here I dyed the White Wrinkled Ribbon with Alcohol Ink, then once dry, I decided I wanted a deeper purple and mottled colors. I rubbed Distress Ink on a craft mat, misted with water, then I pulled and scrunched the ribbon into the ink. Oooh la la, I love the dimension and texture this added to the color in my ribbon. I also colored the bright green ribbon from the July Ribbon Club Assortment by spritzing it with a golden brown glimmer mist, then inking the edges with purple. Another amazing transformation. You can find my Dying Ribbon with Alcohol Ink Tutorial here

Four Loop Ribbon Bow ~ I used a variation on Ginny's double loop bow to create this bow with my now colored Wrinkled Ribbon. Instead of using my fingers I used something I had on hand - the handles of my pliers. :-) You can find Ginny's Double Loop Bow Tutorial here

Bead Loops ~ These are so easy to create!! I snipped off short lengths of Bonnie's Pearlized String Beads, then formed a loop - kind of in the shape of a daisy petal with the two ends side by side. I crushed off the bottom bead on each side (with pliers) and glued the strings together. An easy way to add a nice touch of bling to any flower cluster. 

Handcrafted Flower ~ I used Spellbinders Spiral Blossom One to create this lovely rolled paper flower. 

Be sure to stop by the Really Reasonable Ribbon Store to check out Bonnie's amazing selection of ribbons, laces and other goodies.