
Showing posts with label Glitz Ribbon. Show all posts

Monday, May 5, 2025

Graduation 2025

 Hi there all my Really Reasonable Ribbon Friends! Misty @Mommyof kids here with you today sharing a Feminine Slimline Grad card.Do you know a young lady who will be graduating this year who would love a feminine graduation card as opposed to the mainstream monotonous ones? Not that those are terrible, but most girls like a bit of ribbon and roses and "Fru-Fru"....right? 

Well, you can make one for them and it can have as much or as little "Fru-Fru" as you want! 


I chose to keep the feminine "Fru-Fru" to a minimum, but I am so in love with how it turned out! 

All I have used for this card other than cardstock and adhesive has come from Really Reasonable Ribbon and Bonnie Garby Designs.  If you haven't browsed both shops, you SHOULD!  Trust me, You will find something for every celebration...Even Divorce! LOL...Not even joking! 


For this card, I used:

Glitz Ribbon Gold

Wild Orchid Craft 25mm Cottage Roses Mixed Blue Tone
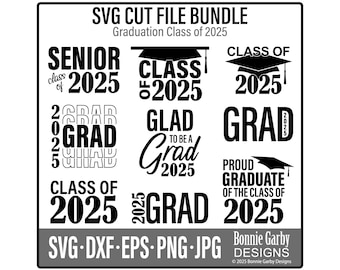

And This Cut file Bundle from Bonnie Garby Designs:
Graduation 2025 SVG Cut File Bundle, Digital Stamp, Cricut, Silhouette, 2024 Grad, Clip Art, Graduate 2024 DIY T-shirt, Clip Art, Cricut

Obviously I did modify the cut a tiny bit so that it would fit onto my card base, but that is the beauty of Bonnie's cutfiles!  They will easily adapt to any and all sizes of craft bases!  I genuinely LOVE all of the designs in her shop, and have used MANY! 

With this, I love the BIG BOLD letters...they make a statement worthy of such an accomplishment.  I decided to make a shadow for them and pop the letters up on foam tape...which made it stand out even more in real life.  WOW WOW WOW I love this card! Here is an aerial view so that you can see the lift I gave to the letters in GRAD. 

Bonnie's Ribbons and Sentiments come together to give this card such tasteful elegance. I LOVE it, and I truly hope the recipient will as well.

Thanks for stopping by and checking out my project! I hope I have inspired you to begin one of your own.  If I have....Head on over to Really Reasonable Ribbon and start your shopping list! 

Friday, April 29, 2022

Fun with Foil

Hello, Ribbon Friends! I had a fun time playing with foiling over the weekend, and I wanted to share one of the results with you! 
The type of foiling I used for my card is called "transfer foil" and is accomplished by first heat embossing the sentiment with Versamark ink and clear embossing powder. Once the sentiment was embossed, I placed a sheet of foil over the top of the cardstock and passed the "sandwich" through a hot laminating machine. Presto! Chango! A foiled sentiment
Because the foil is so shiny, it is very hard to get a good photograph! If you are familiar with heat embossing with gold powder, you will be able to see that the foil is quite a bit smoother and shinier than embossing powder. 
To make sure I was keeping the shine going, I used Glitz Ribbon and Metallic String to finish off the card. The card is a standard 5 1/2" x 4 1/4" made from black cardstock. I lined the inside with white cardstock to give a place to stamp or write a message. 
I wrapped a piece of the purple Glitz Ribbon around the bottom of the card and added a loopy bow made from the gold Metallic String to the left edge. I created a flower cluster with some purple, blue, and yellow flowers.
I placed a few glitter enamel dots around here and there. 

Thank you so much for stopping by!

Really Reasonable Ribbon Supplies Used:
Scor-tape (1/2")

Other Supplies Used: Graphic45 Midnight Masquerade paper, black and white cardstock, Stampin' Up Hello Life stamp set, Doodlebug Design and Echo Park enamel dots, Elizabeth Craft Design stitched square die, Royal Sovereign laminator, parchment paper, iCraft Deco Fiol (champagne), Versamark ink, WOW clear gloss super fine embossing powder, hot glue, ATG, foam tape  

Saturday, September 23, 2017

Happy Anniversary Card

Hello ribbon lovers.  Bonnie here with you today with an anniversary card I created using pretty ribbon, mulberry flowers and embellishments from Really Reasonable Ribbon.
I started off with some Distress Ink paper I made using the color Stormy Sky for a nice mottled background paper.  I selected the digital sentiment from the Happy Greetings set from Graciellie Design.  I reshaped the digital sentiment to perfectly fit in my oval die and printed it out.  I also used the Lattice 2 die from Cheery Lynn Designs to layer over the bottom 2/3 of my card for added interest.
I ran a piece of 5/8" Silver Glitz Ribbon topped with 3/8" Mixed Blue Confetti Dots Grosgrain Ribbon across the middle of the card to cover the top of the lattice die.  I added the sentiment over the ribbon and then added three Royal Blue 20mm Open Roses under the sentiment.
My card was topped off with a pretty bi-color bow created on my Bow-it-All V3.0 Tool using 5/8" Capri Blue and Royal Blue Delicate Stitched Satin Ribbon.  The center of the bow is adorned with a pretty Heart Shaped Pearl Embellishment.

For a video tutorial on how to make this beautiful bow, please click HERE.
Thanks so much for stopping by today.  For more information on the other products used on my card, please visit my Make Time to Craft Blog.


Saturday, December 31, 2016

Happy New Year!

Hi friends.  Bonnie here with you for the last post of the year for Really Reasonable Ribbon.  Wow - how can it be the last day of 2016??!!!
This card features a fun new Shaker Card die from Cheery Lynn Designs along with Silver and Gold Glitz Ribbon.  Glitz Ribbon is fast becoming one of my favorite ribbons for creating gorgeous bows.  It performs wonderfully.
I wrapped some Silver Metallic String around the middle of the card and also used some to accent each side of the sentiment.
My bow was created on my Bow-it-All V3.0 using Silver and Gold Glitz Ribbon from Really Reasonable Ribbon.  I used a 14mm Flower Shaped Acrylic Rhinestone Embellishment in the center of the bow.

For a video tutorial on how to create this gorgeous bow, please click HERE.
Thanks so much for stopping by today.  For more information on the other products I used on my card today, visit my Make Time to Craft Blog.

I want to wish you all a very Happy, Healthy and Crafty New Year!!

Monday, December 12, 2016

A Smile is the Best Christmas Decoration

Hi there.  Bonnie here today with another Christmas card to share which I embellished with some of my favorite ribbons from Really Reasonable Ribbon.
This is an unusual color combination for me, but I think it works.  Add some gorgeous ribbons and a touch of mulberry paper and anything looks great, right?!!
My lovely sentiment is from Quietfire Design and the dies on this card are from Cheery Lynn Designs.
The beautiful bow was created on my Bow-it-All V3.0 using 5/8" Gold Glitz Ribbon and Old Gold Delicate Stitched Satin Ribbon.  I love the shiny and matte contrast with the two ribbons.  Both are a delight to work with.

For a video tutorial on how to make this pretty bi-color bow, please click HERE.
For more information on other products used on my card, please visit my Make Time to Craft Blog.

Sunday, October 23, 2016

Happy Birthday

Hi friends.  Today I have a fun birthday card created in seasonal colors featuring Copper Glitz Ribbon from Really Reasonable Ribbon.
This pretty Glitz Ribbon comes in 11 great colors.  It's a lovely lightweight shimmery ribbon and it is wonderful for bow making.
I also played around with some machine and hand stitching on this card.  I really like the look.
My bow is a simple double loop bow created on my Bow-it-All V3.0.

For a video tutorial on how to create this double-loop bow, please click HERE.
Thanks so much for stopping by today.  For more information on the other supplies used on my card, please visit my Make Time to Craft Blog.


Monday, September 26, 2016

Gather Blessings Woodland Card

Hello, Ribbon Lovers!  It's Kathy here with another fun card for fall. 


I just love the colors and textures of fall, so I added lots and lots of both to this card made with Authentique Harvest papers.  The combination of humble burlap, homespun  Debra crochet lace, and rustic brown burlap string with Copper Glitz Ribbon is a real winner in my book!


The belly band was created with Antique Gold wired edge Burlap Ribbon. This is no longer carried by RRR (insert moment of silence here).  BUT you could easily get the same great texture by substituting either Antique Gold Netting or Brown Netting.

Of course, I tied that bodacious Copper Glitz bow with the aid of my trusty Bow it All Tool!  It's a must have item in my studio!  To learn how to make the most of it in your craft space, you can subscribe to the Really Reasonable Ribbon YouTube Channel.  Bonnie has an amazing array of helpful tutorials there.

That's all for me today, my friends!  Thanks for stopping by!

Cheerio,
kathy

Sunday, January 24, 2016

A Note to my Peeps

Hi there crafty peeps!  I am back today to share a card I made with a new stamp set I purchased and ribbon from Really Reasonable Ribbon


The stamp set  used is from Fun Stampers Journey called Favorite Peeps.  I colored the chick in the egg with my Copic markers and glitter. I then created a layered focal panel with Yellow, White, and Purple cardstock and also a layer of wide patterned Washi Tape.  I then stamped the sentiment on a thin strip and adhered it to the bottom of the focal panel.  I then worked on making a 5x5 square card with White cardstock and a few JillyBean Soup patterned papers from my long hoarded stash.  I then added a sash and triple loop bow with White Glitz Ribbon.  Finally, I popped the focal panel up on the card with foam tape.  I hope you enjoy my card.  Have a great day!

Thursday, December 24, 2015

Merry Christmas

Hi there crafty peeps!  I am back for one last Christmas card share before the big day arrives.  Sometimes with a card you don't need a big fancy bow but you can still use some pretty ribbon as an accent.  I used several patterned papers from a hoarded October Afternoon paper collection to create my card base.  I then created a fun belly band as an accent using Green Glitz Ribbon.  I placed my retro Santa image on top.  I then fussy cut out the sentiment and popped it up with foam dots on the card.  I added a snowflake flair button next to Santa and then three white enamel dots at the top.  As a final touch I added Stickles to Santa's fur trim and then traced the letters with Glossy Accents.


Head on over to the Really Reasonable Ribbon store to pick up all of your accent ribbons.  I hope you enjoy this card and all of you have a Merry Christmas and a very Happy New Year!'

Monday, December 14, 2015

Christmas Greetings

Hi there crafty peeps!  I am back on the blog today to share a simple but beautiful card I whipped up for a party I will be going to this Christmas season.  With life being so hectic right now it is good to always have some supplies on hand to make quick cards in a pinch.  I did just that with a couple of different ribbons from Really Reasonable Ribbon's Store and one of my creativity kits from Polly's Paper on Etsy.


I adhered two printed papers to a Kraft card base.  I then wrapped Ivory Double Faced Satin Ribbon and Gold Glitz Ribbon vertically around the base.  I used the same glitz ribbon to make a simple double looped bow with my Bow-It-All and adhered it to the top of the ribbon band.  I then layered  a digital music sheet print.  I took my Santa focal image and matted it onto Kraft cardstock.  I popped that on top with foam squares.  As a final accent, I added three gold glitter enamel dots to the bottom left corner.  Voila!  This card only took about 15 minutes to put together and looks perfect to send to anyone to help them celebrate the season.  Have a wonderful day!

Tuesday, October 27, 2015

Believe...

Hello friends.  Bonnie here today with a fun Christmas card using glittery metallic ribbons and some pretty Wild Orchid Crafts open roses from Really Reasonable Ribbon.
I went with a non-traditional color scheme on this one, but I think it works really well.  This was a really quick and easy card to put together.  It's really just several layered die cuts with a digital stamp sentiment.  I also dry embossed the white layer with a snowflake embossing folder.
I finished my card off with some pretty Mulberry Paper Roses and an attention grabbing bi-color double-loop bow with the beautiful and sparkly Glitz Ribbon using my Bow-it-All V2.0.
For a video tutorial on how to create this gorgeous bow, please click HERE.
Thanks so much for stopping by today.  For more information on other products used on my card, please visit my Make Time to Craft Blog.  Have a crafty day!

~ Bonnie ~

Tuesday, October 20, 2015

Winter Snowman Fun with Really Reasonable Ribbon

Hi everyone, Bonnie here.  Today my card showcases my favorite Glitz Ribbon from Really Reasonable Ribbon.
I love the fact that this ribbon has a beautiful glittery sparkle AND it's really great to work with too.  Some metallic ribbons do not cooperate well, but this ribbon is a dream to tie a bow with.
The great Glitz Ribbon comes in eleven great colors.  Many of those colors are show in the Glitz Ribbon Assortments below.
I tied a simple double-loop bow from white glitz ribbon to top off my card.  I felt like a classic and simple bow would be enough for this card because the shimmer of the ribbon already draws your eye.  For a video tutorial on how I created this bow on my Bow-it-All V2.0, please click HERE.
It's hard to see in the photo, but the shimmer of the ribbon works perfectly with the glitter that I used on the snowman hat.  
Thanks so much for stopping by today.  For more information on other products used on my card, please visit my Make Time to Craft Blog.

~ Bonnie ~

Thursday, July 23, 2015

Silver and Gold Christmas in July


I'm still working on some Christmas in July cards.  Soooo not in the mood!  Frankly I'm never in the mood for Christmas - even in December.  Bah Humbug!!  
Beautiful glitzy ribbons from Really Reasonable Ribbon help me get in the right frame of mind though....
The beautiful Glitz Ribbon I used for my bow in Silver and Gold is a gorgeous sparkly ribbon and I'm thrilled that I finally captured that in a photo.  I love this ribbon for Christmas and it comes in eleven gorgeous glitzy colors.  It's really very easy to work with too which you can see by how well it behaves for this bow.
My bow was created on my Bow-it-All V2.0.  You can view a video tutorial for this bow HERE.
For information on the other products I used on my card, please visit me at my Make Time to Craft Blog.  Thanks so much for stopping by today.

~ Bonnie ~







