Wednesday, November 30, 2011

Ribbon Ornament Tutorial


Hi everyone!  I hope you guys all had a wonderful Thanksgiving!  We did but I sure am tired of eating turkey.  Next year,  I will definitely be making a smaller one, lol! 
For my project today, I have a pretty ribbon ornament.


This is so simple to make.  Start out with a 3" foam ball from the craft store.

Cut your ribbon in 3" strips.

Glue the ends together with your hot glue gun to form loops.
Attach the rings to the foam ball, seam side down, with straight pins.   Add a larger ribbon loop, like I did,  to make an ornament or "kissing ball".  If you use a larger foam ball you can insert a wooden dowel to create a beautiful ribbon topiary for any occasion.  Check out my blog  to see one that I made for July 4th last year.

Thanks so much for stopping by!

Corri


Tuesday, November 29, 2011

Holiday Fun!


Well, now that Thanksgiving, Black Friday & Cyber Monday are both over, we can officially start our countdown to the holidays!

Today I wanted to share with you a little album that I made out of toilet paper rolls. Yep, you read that right! I love making these mini albums, but when most people look at them they say "Where are the toilet paper rolls?"


Can you see the rolls now? I use them as a base and paint them with acrylic paint. I love using TP rolls because you can stick little tags in the ends for hidden photos & journaling.


I also love these albums because it gives me the chance to use lots and lots of pretty ribbons! One of my favorite ribbons is the Sheer Iridescent Parrot Green ribbon that I used on the cover of this album. It's so pretty and it changes from green to gold, a real fun & festive ribbon!

Thanks for stopping by today! I hope I could inspire you with my project! Don't be afraid to look around your house for ideas... toilet paper rolls aren't trash at all, they are treasures in my home! :-)

♥ Emily


Monday, November 28, 2011

Teddy Envelope Easel Card

Hello everyone and Happy Monday to all! Today's Envelope Easel was designed using Really Reasonable Ribbon's Beautiful Satins, lace and double ruffled edge ribbon.

For my bows I used different widths of Pink Satin.  I LOVE all the Satins that Bonnie carries.  They are sooo BEAUTIFUL and easy to work with!!  For the roses I used Hot Pink Satin.  Next I used the White Satin Double Ruffled Edge ribbon to make a border and then added some Noelle Crocheted White Lace in the middle of it.

Really Reasonable Ribbon Supplies-
White Satin Gathered Ruffles/for the piece behind the rose


Other supplies-
Card Stock/Basic Grey
Image/Michelles Scrapbooking and More
Copics to color
Feathers,pearls,charm
Spellbinders, Martha Stewart Punches
sewing

Lately I've been hooked on making these envelope cards.  They are super fun to make. :)  I really love that there is a card piece that pulls out from the inside and you can write on it's front and back.
I hope that you enjoyed today's post and thank you for looking!!
Have a lovely day :)
Hugs to all,
Cheryl


Sunday, November 27, 2011

Santa's Train Winner and a Tutorial

Hello friends!   Jan here and do you remember a couple weeks ago when I blogged that I was giving away "Santa's Bringing A Train Load of Twine"? Well, the lucky winner is Tracy!   Congrats and please email me your mailing address so I can get this cute little bugger in the mail.  A HUGE THANK YOU to all of you who left such sweet comments.  It was so much fun, I will be doing a giveaway again :)
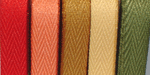
Today, I'm using White Wrinkled Ribbon, available over at Really Reasonable Ribbon! Well, it was white. I really liked this vintage image of birds, but didn't have coordinating ribbon so I grabbed a Copic Marker and some Creme de Chocolate Mist, and PRESTO, just what I was looking for.
Here's how to make your own.
1.) Start with a 4.25"x 5.5" card base. (Mine is a light sage green).

2.) Mist the card with light brown mist.
3.) Distress the sides of the card using a pair of scissors.
4.) Cut a piece of burlap just slightly smaller than the front of the card.

5.) Using a sewing machine, sew around the edges of the burlap.

6.) Using a glue pen and glitter, add glitter to some of the flowers.

7.) Color the ribbon with a light Green marker.

8.) Spray some light brown mist in the palm of your hand, and the rub the ribbon in between your hands.


9.) Make a shabby bow.

10) Glue the image on the top center of the burlap.
11.) Add vintage crocheted lace to the bottom center of the card.
12.) Glue the bow in the center, where the vintage lace and image meet.
13.) Using scrap burlap string, make a bow and hot glue in the center of the shabby bow.
13.) Hot glue a pearl in the center of the bow.
14.) Add a few pearls to the bird image.

Friday, November 25, 2011

Gift Giving from the Heart

For our current SALE code, click HERE.

Well,  today is "Black Friday"...the busiest shopping day of the year.
I used to do the Black Friday thing, but I no longer enjoy fighting the crowded stores and the crazy drivers in the streets just to get a good bargain.  
Giving the perfect gift is just so much MORE than that to me.
 I have gotten more into 
"Gifts from the Heart" rather than the stores.
If I had it my way, I would completely De-commercialize Christmas and demand handmade gifts.
Unfortunately, I can not do that world wide, but I have been successful the last few years in doing it with my own family.  Rather than buying a gift, I have my kids pick
 a person that they want to make a gift for.
When they have chosen the person and decided what they want to make, then we go buy the materials that we need in order to MAKE it. The only guidelines that I give them in helping them decide who and what...is I tell them that it should be a Gift from their own heart.
This year, Skye decided that she wanted to give some clips to her little cousin for Christmas since she always admires the ones that Skye wears.
She picked the ribbon out of my stash from the Really Reasonable Ribbon Store.
(She did have a little bit of help from me picking MATCHING colors...LOL)  

Here is the Flower Clippie Bouquet that I made for my niece...(with a little help from Skye)
The flowers are made out of 3/8 inch ribbon loops, alligator clips and buttons.
They are mounted on dowel rods covered with floral tape and are easily removable for wear!
Skye wanted to model one for all of you today!
This little bouquet will be wrapped up and given to my niece for Christmas.
Hopefully, she will love it as much as Skye does.  

I hope your Thanksgiving was wonderful and blessed!
I would love to hear your ideas about giving Gifts from the Heart!


Thursday, November 24, 2011

My Memories Winner and 3-Day SALE!

Hello everyone and Happy Thanksgiving to all our US customers.  I hope everyone has an enjoyable day with their family.


Thanksgiving Pictures, Comments, Images, Graphics
 

First off, we have a My Memories Digital Scrapbook Suite to give away.

And our winner is.........................

Random Integer Generator
Here are your random numbers:  6
Timestamp: 2011-11-23 22:19:51 UTC

Congratulations Cindy Lou!!

Cindy Lou said... 6 I have never even attempted to digitally scrap, just seemed like I would be wasting time trying to figure it all out and then I wouldn't like it. If it is as easy as you say, I might be interested in trying it. You would have to do some final finishing once you print it though or you wouldn't have any lovely ribbons on it! :)

Please contact us using the 'contact us' button at the top of the blog within 48 hours and we will get your prize to you.  Thanks so much everyone for participating.

********************

Now, for our SALE..............

In order to celebrate Thanksgiving and 'Black Friday' here in the US, we are having a 3-day SALE at Really Reasonable Ribbon.  All day on Thursday, Friday and Saturday 11/24 thru 11/26 we will be having a 15% OFF your ENTIRE ORDER including sale items!!

Please use the code TURKEY15 in the promotional code area on the first page at checkout. 

This offer is good through midnight (EST) on Saturday 11/26.
(Sale code is not valid on prior orders, ribbon club subscriptions, ribbon club gift subscriptions, or special order items).

This is the perfect time to pick up those last minute Christmas ribbons or just try something new.  Happy shopping!


My Memories Digital Scrapbook Suite Giveaway!!


This post will remain at the top until 11/24.  Please scroll down for new daily posts.

You will find directions for entering for a chance to WIN this terrific software suite (a $40 value) at the bottom of this post.

When My Memories contacted me offering me and one of my Really Reasonable Ribbon's Ramblings readers a free My Memories Scrapbook Suite, I was delighted!  I've always loved the idea of digital scrapbooking but I never thought I'd have the time to learn how to do it.  I was more than pleased to try out this amazing software.

My Memories offers digital scrapbooking software with a huge variety of templates, papers and embellishments, plus you can add more options any time you wish from the extensive offering on the My Memories website. 

I found the software to be very easy to learn and I had the page below done in less than 10 minutes the very first time I opened the software.  What a great idea for sharing photos with friends and family via the internet.  You can create projects in a variety of sizes and shapes, create albums, add music to your albums and so much more.


 I also found some great Christmas Card templates for the holidays.  Design your card, add your signature, print it out, add some ribbon and it's ready to go in a matter of minutes.  Perfect!!

I printed my card on matte photo paper on my home printer, added a moss cardstock base and a bow from Moss Satin with Grosgrain Edge ribbon made with my Bow Easy Tool.  How easy is that??


A terrific looking Christmas card that looks like you spent a lot of time on it when you didn't.

~~~~~~~~~~~~~~~~~~~~~~~~~~~~


Good news!

My Memories is offering $10 off the purchase of the My Memories Scrapbook Suite v.2  plus a $10 credit toward any purchase in the My Memories store. So every Really Reasonable Ribbon reader can save $20!

Just copy and paste this promo code STMMMS43716.
Why not treat yourself for the holidays!

What a great deal! But that’s not all.....

My Memories is also GIVING one lucky Really Reasonable Ribbon's Ramblings Reader their very own My Memories Scrapbook Suite
(a $40 value!)

Here is how you can win:
1. Visit My Memories, http://www.mymemories.com/, and then leave a comment on this post letting me know what products you like the best.  You must leave a comment on this post telling us what My Memories products you love to be entered in the drawing.
2. Become a follower of our Blog.  We've got lots of great projects and challenges coming up and we don't want you to miss them!
3.  Tell your friends.  Blog about this great giveaway, facebook it, twitter it, or just tell a friend.

We'd also love to have you visit and 'like' Really Reasonable Ribbon on Facebook.  We're just starting out on Facebook and we'd love to have you stop by.

We will be selecting our winner from the numbered comments on this blog post using random.org.  The drawing will be open until 5pm Eastern Time on Wednesday, 11/23.  Stop over on Thanksgiving Day 11/24 to see if you won.


Wednesday, November 23, 2011

Christmas Wreath


Hello crafty friends! It's Joanna B. here. Today I'm sharing a fun DIY Christmas wreath..lately I've been on Pinterest a LOT..if you don't know what Pinterest is, it's basically a place to pin and catergorize anything you want and each pin takes you straight to that subject. So I've been pinning wreaths I can make for Christmas and have been getting so many awesome ideas I finally had to go get some supplies and make one for my home.
I wanted to have a banner going across it, I used my Cricut to cut the banner letters and hot glued them to some  white ric-rac ribbon and added some red grosgrain ribbon for bows.
I wrapped the entire wreath with grey yarn and made some fun yarn pom-poms.

The nice thing about making these is that they are totally customizable and fun to make! You can make them any color you want!

Thanks for stopping by, have a great Thanksgiving Day tomorrow! :)

Tuesday, November 22, 2011

All Puffed Up!

Goodness! From the title it sounds like I might be talking about our neighborhood turkeys! We have anywhere from 8-20 turkeys roaming the neighborhood in the fall and winter. I think they are in hiding until Thanksgiving is over! November is quickly zooming by and 2012 will be here before you know it! 


I love wide ribbon! Sometimes I can't fit it into my design, and then have to choose a smaller width, but today's project incorporates one of my favorites: the 1.5 inch Black Gingham Ribbon:

Today I want to share a quick, little tutorial with you showing the way that I "puff up" my ribbon. I learned this from a friend awhile back, and I am sure there are other, and maybe even easier ways to do it, but this is how I do it!


First you will need a little handful of batting, some linen thread, and your ribbon of choice:

Tie off a section at the end, leaving room to fold under a layer of cardstock:

 Next, tie off a section with the thread and fill with a tiny bit of batting:
 Continue to tie and fill until you have as many "puffs" as you would like:
You can tack the openings shut with thread, or leave them open. One option for additional decoration is to add another contrasting ribbon or bow. Here I used Black Grosgrain with a white stitched edge:
Trim your thread ends, and cover the thread with pearls or another embellishment, or more contrasting ribbon all down the puffed piece. Fold the ends underneath a cardstock layer. All done!


Designer paper is the Mariposa Stack by DCWV. The sentiment is Word Art from TLC Creations. For more info and a close up, please also visit my blog, Joy in a JAR.  
Thanks for stopping by today!

Monday, November 21, 2011

Guest Designer - Sandee Setliff


Hi everyone! My name is Sandee Setliff, from Inspired To Scrap, and I am so happy to be a guest designer today for Really Reasonable Ribbon. I love ribbon and all the fun things you can do with it and I love checking in to see what fabulous creations that the awesome design team keeps coming up with!
My projects today are some fast and fun ways to use ribbon to spruce up your holiday place setting. A little ribbon can make something great into something fabulous! I have a couple here to show you and over on my blog I'll show you 2 more! I know everyone is getting ready for Thanksgiving so I really hope these ideas can create a little spark for your entertaining!

All my projects were created with the ribbon assortment Autumn Twill, which you can find here
at the Really Reasonable Store! But I can also imagine doing this with the November monthly club assortment for Christmas!

3/8"  AutumnTwill Assortment RESTOCKED!

For my first project I dressed up my wine glasses with a simple twill bow and then hot glued a flower on the ribbon, adding three leaves and simply tied it to the glass stem. ( I'll show you the back of the glass on my blog so you see how easy this is )

Next I made matching napkin rings by cutting a paper roll into quarters and covering each section with the twill. It was super easy to do and by using the ribbon assortment as my inspiration my table embellishing just fell into place. We need simple, easy and elegant sometimes, especially since holidays can be a tad bit stressful!
I hope you like my ideas and if you are interested in seeing the rest of the table including the centerpiece I hope you will take a moment to pop over to my blog and check it out. Here's wishing each and everyone of you a wonderful Thanksgiving with friends and family!
:)