Showing posts with label Kaiser half pearls. Show all posts

Wednesday, October 23, 2024

A Pair of Autumn Cards

Hello Ribbon Loving Frinds! 
Happy Wednesday to you all, I hope you are having a crafty week! 
Misty @Mommyofkidz here with you today
to share a pair of Autumn Inspired cards with you. 

I have been making more cards recently because I intend to start next year with intention of sending more written notes as opposed to texts or email. I have been stock-piling my cards so that I have ZERO excuse come 2025! 

For this first one, I used Ivory Burlap String and Double Faced Satin Aqua Ribbon 1.5 inch width.  I also used the digital stamp sentiment on the inside. 


For this Next Card, I used Jute String, 12mm Flat Backed Pearls, And the Pumpkin Spice Digital stamp from Bonnie Garby Designs.

TIP: I used a razor knife to remove all the insides of the pumpkin that were black in the stamp.  I then used the plaid paper behind it to create the look of the pumpkin. 
I then added the Wild Orchid Mulberry Paper Leaf to the stem to make it look even more realistic. 


Both Cards Feature a Digital Stamp Sentiment from Bonnie Garby Designs.

I love how my Pair of Autumn Inspired Cards came out! 
As I learn more about card making, I would definitely say that having a
sentiment already prepared makes a difference in the process! 
I will definitely be making more cards with 
Digital Stamps! 
Actually, I have a Baby Shower card already in the making! 
Maybe I will share that one on my next post!
See you all soon!
Have a wonderfully crafty week!!


Friday, December 14, 2018

Winter and Sweater Mini Album

Hello ribbon lovers!  I am sharing a little more of my Winter and a Sweater Mini Album using this Monthly Ribbon Club Assortment.
For the tree I added the the Silver Metallic Baker's Twine to add some more shimmer and shine. 
Next, I added the white lace and ribbon from the assortment at the top of this pocket.  
Then I added the gray snowflake bow on the top of this page. 

It is so easy to add interest and dimension to your next creation using beautiful ribbons and lace.  
Happy creating!

Sheila

Saturday, June 22, 2013

Ruffled Embellished Ribbons - A Tutorial

Today I want to share an easy tutorial with you on how to make ruffled embellished ribbons. I love the look of ruched ribbon, and adding pearls (my favorite embellishment) seemed a natural thing to do.

You can also add glass beads, charms, or any other kind of embellishment that has a hole for sewing it on.

I chose Noble Peacock Seam Binding for this card today. I love the color and the ease with which it gathers. There are a lot of beautiful colors in the RRR Store here.

Here are the steps:


1. Collect supplies needed. Cut a length of ribbon 2-3 times longer than you want for the final length (Do you like my vintage spool of thread? All wood. Miss those!).


2. Tie a knot in the end of your ribbon, and pass through the ribbon a couple of times, leaving a long enough tail to tuck under a layer or behind your cardstock.


3. Thread one or two pearls or beads onto your needle and pull tight enough to make the ruffle. You can have loose or tight ruffles, or a combination.

Here is an example of the kinds of stitches I took (not planned, not straight, not even! Easy!)

4. Continue adding pearls/beads until you have the look you want. At this point it may look like a tangled mess, but it will straighten out as you gather it up and adhere it to your project.  I used 1/4" Scor-Tape and attached a piece to my card where I wanted the ribbon. Then I carefully arranged and laid it out on the tape to adhere. Tuck in the other end and fasten off.

Here is the final project:
 I hope you will try it!


Stamps: sentiment is from Spring is Sprung (Flourishes)
Paper: Crumb Cake (SU!), Sweet Tooth (Poptone), MME DP
Ink: Memento Tuxedo Black 
Accessories: pearls (Kaiser and SU!), pennant dies (SB), scalloped doily die cut (MS), distressing tool, Noble Peacock seam binding (Really Reasonable Ribbon)


Wednesday, May 22, 2013

Quick and Easy Thanks


I have some really lovely designer paper that I hoard. I bought it because I loved how it looked, but then I never use it! So today I pulled it out because I needed some butterflies. I think I am one of the few stampers that has no butterfly stamps or punches! This pretty paper is from The Mariposa Stack (8x8) by DCWV.

My images are sentiments from Flourishes' With Gratitude. I stamped them with Memento Tuxedo Black ink along the bottom and inside the frame, right on the designer paper.  

Pewter Kaiser Pearls and Black Ric Rac finish the design. Everything is adhered with 1/4" Scor-Tape.

I love quick and easy cards that look elegant!
Thanks for stopping by today!


Thursday, May 2, 2013

Find Joy

Happy May! I would love to see some flowers on May Day, but since we had freezing drizzle yesterday, I will have to be satisfied with looking at them on this card! I am really wishing for a warmer Spring right now, and lots of flowers in my garden.
My card today uses a sentiment from Flourishes' Old Fashioned Florals. I stamped the sentiment with Elegant Eggplant (SU!) ink.
The trims are White Mini Pom Poms and Black Licorice Baker's Twine. I added some Snow Pearls for embellishments. Everything is held together with Scor-Tape.

My designer papers are from Basic Grey's Sweet Threads 12 x 12 Collection. I have so many 12 x 12 papers and never use them, so thought I would start making a teeny dent in that stash.
I hope it is warmer in your garden~!

Stamps: Flourishes Old Fashioned Florals
Paper: SU! Sage Shadow, Colorbok Textured White, Basic Grey Sweet Threads DP
Ink: SU! Elegant Eggplant
Accessories: Kaiser Snow Pearls, Licorice Baker's Twine, White Mini Pom Poms, Basic Grey Sweet Threads Stickers

Friday, April 26, 2013

sweet Angel Anya


Hello everyone.  Today I thought I would share a sweet Angel Anya card I made. I came across this Stamped image and thought she would be perfect for today's post. Of course "Sweet Angel Anya" needed some SWEET Really Reasonable Ribbon to go along with her :)


So for my card I used Hot Pink Really Reasonable Ribbon in 2 sizes, and then Pink Sheer Box pleated trim for my flowers. Buttons are also from Really Reasonable Ribbon and give my card some bling! 

RRR Supplies Used:
Buttons-Rose Garden
White Pearls

Dp is from Imaginisce/Loves Me , and I used white card stock and some baby blue card stock. Next I used pink thread for my sewing. All frames are spellbinders, and SU! Anya was colored with Copic markers, and lastly I used a heart shaped button for the large bow.


Thank you for looking and have a lovely day!
Hugs to all,
Cheryl

Tuesday, December 11, 2012

Let It Snow!


As a cardmaker every day, I struggle with whether to make or buy my holiday greetings. I have a lot of different cards for the holidays, but I really don't like making more than one of any design. No assembly line production at my house! I also know it takes me forever to make a card, and I don't want to send it if it will just get thrown away after a few days or after the holidays (like I would know anyway!). So -- I generally buy my cards to send with a short newsy family letter and send handmade greetings to those in my family who also make their cards.

But here is one I am sending this year to a friend. It has some fun papers and one of my favorite trims. My lace trim is 1.5" Ivory Crochet Lace by Really Reasonable Ribbon. I LOVE this lace so much and have used it on so many projects. I like how it adds a hint of lace, but is very open to see the design underneath. And of course, I added my favorite embellishment - pearls! These are Latte pearls.

My sentiment is Let It Snow - 1518 by Hambo Stamps. The glitter is on the tree branches is from Sparkle N Sprinkle and the tree dies are by Cheery Lynn. My designer paper is from Authentique and the poinsettias are by Hero Arts. The circles were cut with Spellbinders dies.

Do you make your holiday cards or buy them?
Thanks for stopping by today and for your comments!


Sunday, December 2, 2012

Pink Poinsettias Are My Favorite

Pink poinsettias are my favorite color of that flower. I love the boldness of the red, but the pink really is prettiest to me. So for my first December post, I decided to share this pink poinsettia! The image is from Hero Arts. I stamped it three times and embossed with White embossing powder, coloring with Copics, and then cut it out and layered it, adding Latte Pearls to the center.

The gorgeous Pearl Pink Grosgrain ribbon provided a beautiful "border".I added a little vintage trim from one of my "junk jaunts" and more Latte pearls. A little subtle sentiment from Inky Antics and all done!  Everything is held together with Scor-Tape.

What is your favorite poinsettia color?
Thanks for stopping by today!


Stamps: Christmas Pride (poinsettia) by Hero Arts, Noel sentiment by Inky Antics 
Paper: Very Vanilla, Pink Pirouette (SU!), Winter Park DP (Echo Park) 
Ink: VersaColor Sand, Soft Sky (SU!), Copics R83 & 85, RV02 
Accessories: White Detail EP (Sparkle N Sprinkle), Latte pearls & Pearl Pink grosgrain ribbon (RRR), lace trim (stash)

Saturday, August 11, 2012

A Last Dash to the Beach

Nothing better than a lazy day on the beach! School starts for me next week, so I wanted to get in one more summer card before I feel like it's fall (even though officially it's still over a month away!).

My little Sunbathing Mouse is a digital image from I Brake For Stamps. He is on his sandy beach, just hanging out with his cool pink sunglasses (real mice wear pink). I printed my image on Georgia Pacific White cardstock, and then colored it in using Copic Markers. 
I added a little pennant banner blowing in the beachy breeze and held together using Lemon Baker's Twine and Hot Pink Kaiser Pearls. The beautiful Yellow Sheer Two-Tone Stripe ribbon adds a nice touch to the second panel with its bow.

I hope your summer has been fantastic!


Stamps: Sun Bathing Mouse - digital image by I Brake For Stamps
Ink: Copic Markers
Paper: Pink Passion, Summer Sun (Stampin' Up!), designer paper by Cosmo Cricket and The Paper Studio
Accessories and Tools: pennant punch (Stampin' Up!), Circle dies (Spellbinders), embossing folder (Cuttlebug), Lemon Baker's Twine and Yellow Sheer Two-Tone ribbon (Really Reasonable Ribbon)

Thursday, July 26, 2012

Favorite Flower


My card for today was designed using Really Reasonable Ribbon's BEAUTIFUL Wrinkle Ribbon & Mid Ruffle Satin.

On my card I ran the Blue Wrinkle Ribbon down the side, and ruffled it up, then ran the Mid Ruffled Satin down the middle. Tied a bow and added some buttons, and pearls. It was super easy to do and I think makes my card! I used scor-tape to hold the ribbon down, and Helmar 450 to add my bow and buttons.

The design paper is from Webster's Pages, now that is the blue striped, the red and white polka dot is from Crafty Secrets. My darling image and sentiment are both from Victorine Originals Stamps and is colored with copics.

RRR Suplies Used:

Other Supplies:
Victorine Originals Stamps
Helmar 450 Quick Dry
Helmar Zap Dots
Helmar Premium Craft Glue
Websters Pages/Your Life is Beautiful
Craft Secrets dp
Sewing
Feathers
Buttons
Spellbinders Circle/Scalloped Circle

Next I added some buttons, I did cut off the shanks and glued them on with Helmar 450 Quick Dry. The feathers are feathers my mom gave me when i helped her with the doll show, and I LOVE using them as well!!

Thank you for looking and have a lovely day!!

Hugs to all,
Cheryl Walker

Sunday, July 22, 2012

Chevrons are Everywhere!

Chevrons are a hot decorating item right now and I am seeing them everywhere -- even on this awesome twill!
I used the sweet Gracee Goose from the Country Bumpkin line (Peachy Keen Stamps) on my card. I stamped her in Memento Tuxedo Black and colored her with Copic markers. If you look closely (or click on the photo), you will see she has a row of Kaiser Chino pearls that she is using to accessorize today!

The pearls, Chevron Striped Yellow Twill and Aqua Baker's Twine (in the buttons) are all available from Bonnie -- along with MANY other fabulous colors of each type of trim!

How will you accessorize today?


Stamps: Gracee Goose (Country Bumpkin) by Peachy Keen Stamps
Paper: Pool Party, Crumb Cake (Stampin' Up!), White (Georgia Pacific), Dots & Stripes, Summer Days DP (Echo Park) 
Accessories and Tools: distressing tool, buttons, Aqua Baker's Twine and Chevron Striped Yellow Twill, Kaiser Chino Pearls (Really Reasonable Ribbon), Threading Water border punch (Fiskars), Spellbinders label die


Monday, July 2, 2012

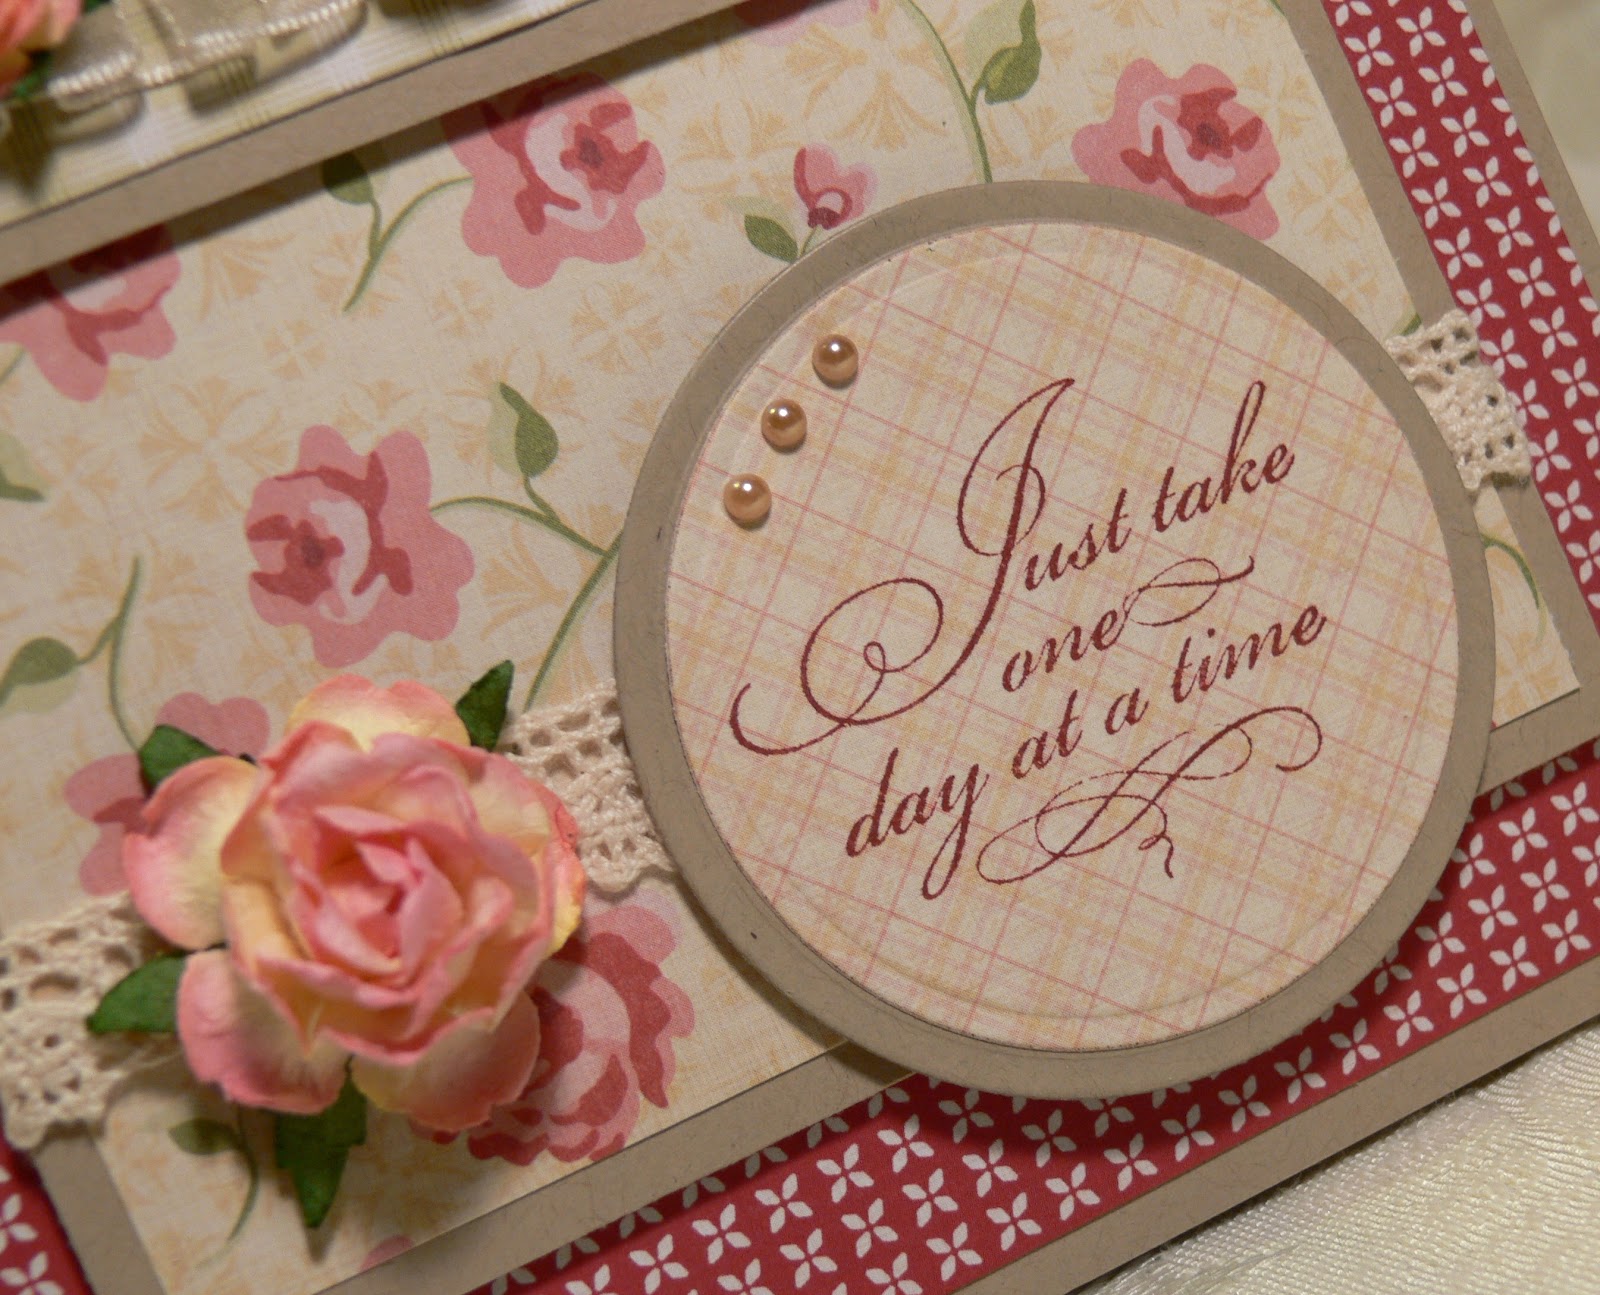
One Day at a Time

Feeling overwhelmed with a "to do" list? Is the summer fleeing more quickly than you imagined? Then this card is for you! Just take one day at a time. :)
My sentiment is from Inspirational Plate #2 by I Brake for Stamps. I stamped in Cherry Cobbler ink on Tea for Two designer paper by Cosmo Cricket. The Ivory Box Pleated Ribbon and Penelope Crocheted Lace are just perfect for the designer paper. The pearls (Chino) are my favorite non-ribbon embellishment in the RRR Store!
My sketch is Deconstructed Sketch 58. Thanks for stopping by today!
     
Stamps: Inspirational Plate #2 by I Brake For Stamps
Ink: Cherry Cobbler
Paper: Tea for Two DP by Cosmo Cricket, Crumb Cake
Accessories: Chino Pearls by Kaiser, Ivory Box Pleated Ribbon and Penelope Crochet Lace by Really Reasonable Ribbon, Circle dies by Spellbinders, paper roses by Wild Orchid