Tuesday, October 6, 2015

Bewitching Really Reasonable Ribbon

Hello, Ribbon Lovers!

Have any of you had a chance to play with the Rare Oddities collection from Graphic 45 yet?  I stole a few moments the other day, and found some bewitching Really Reasonable Ribbon and trims to go with this spook-tacular collection.  I waved my magic wand, and the next thing I knew there was a frightfully fabulous shaker card sitting on my desk.  (If only it worked that way, Ribbon Lovers....if only!)
I love the beautiful prints in this collection and really wanted to pull out the purple and gold hues.  Naturally, I called upon ribbon to do all the heavy lifting for me. This Plum Diamond Satin Ribbon looks fantastic with these papers, doesn't it? I super love the way the diamond pattern in the ribbon complements the plaid background paper.
I created my layered bow with my Zutter Bow-it-All Tool.  The bottom layer has 3 loops and the top one has 2.  I pulled all the loops out and "fluffed" them to make it look really poufy.  This ribbon is easy to work with, has a nice finish and ties boo-tiful bows!
After cutting a 3" piece of Old Gold Shimmer Satin Ribbon, I cut fishtails on each end.  It was folded in half, touched with a spot of hot glue to hold the fold and then glued on top of that luscious Plum ribbon.   this was topped with a loopy gold metallic string bow.  The finishing touch was adding that gorgeous Earth Tone Trellis Rose.   I have totally fallen in love with these beauties, and they come in a ton of colors!
While digging through my stash of embellies, I stumbled upon these cool paisley ribbon slides.  I added more of that sparkly Old Gold Shimmer Satin Ribbon and glued them on either side of my chipboard sentiment.
The fun thing about a shaker card is that it's like getting a party in a card, and both the inside and the outside are fun to look at.  I have to say....this bewitching ribbon and paper combo makes this Ribbon Lover happy, happy happy!

Thanks for stopping by!

Cheerio,

kathy

Monday, October 5, 2015

Joy and Hope..


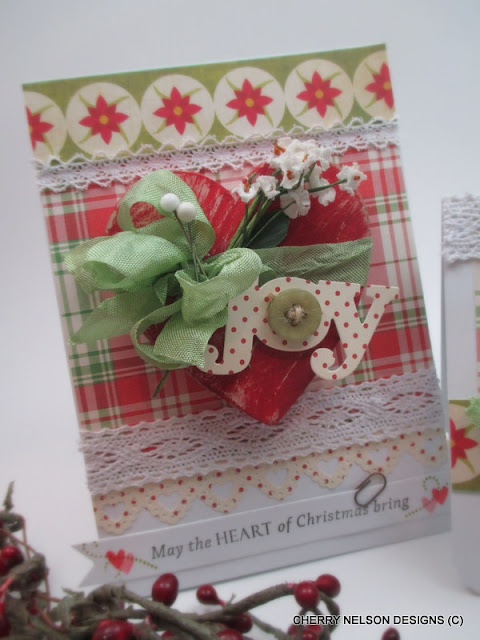
Happy Monday!  I'm sharing a couple of cards with you today here at  Really Reasonable Ribbon.  I have been  bit by bit bringing out my Christmas goodies.  I finally broke down and played around a bit.  I used papers from Raspberry Road Designs.  These are very simple cards using diecuts, stamp sentiments, and wood cut outs from my stash.  I used moss green seam binding, burlap string, sharon crochet lace, and white crochet lace  from this month's ribbon club.  I like the simple folksy look of them.   If I keep this up I will have a good stash by the time Christmas rolls around.  Hope you enjoy!  hugs, cherry

Sunday, October 4, 2015

Giving Thanks

Hi there crafty peeps! Amber here, and I am back today to share a Thanksgiving layered card I made with some of my supplies and ribbon from the Really Reasonable Ribbon Store


I started by creating a center panel with cardstock and Fall patterned paper from Fun Stampers Journey.  I stamped the wreath from my Grateful Heart ATS stamp and colored the berries with Raspberry Berry and Tangerine True Color Fusion Ink and Fusion Blender from FSJ.  I then stamped the sentiment with Versamark Ink and heat embossed it with some gold embossing powder.  I colored the "grateful" in the sentiment with the same Tangerine ink.  I fussy cut the wreath and sentiment out and popped them up with foam tape on the panel.

I wrapped the panel with the natural colored hemp cording from the Bright Hemp set.  I also created my single loop bow with this as well.  I then covered a 3.5x4in card base with more patterned paper.  I wrapped some Turftan Brown Satin with Grosgrain Edge ribbon.  I adhered the panel to the base and added Journey Glaze to the berries on the wreath.  As a final accent, I added some Doodlebug Gold Sprinkles to the upper and lower corners of the card.  I hope you enjoy the card, and it inspires you to make some cards to give to your loved ones at Thanksgiving.  Have a great day!

Saturday, October 3, 2015

Give Thanks

Hello ribbon lovers and Happy Saturday!  
Today my card uses some of the unsung heroes from Really Reasonable Ribbon for embellishing Autumn themed cards.
I've used Natural Mesh Ribbon across the center of the card under the sentiment.  The ivory color would work as well.  The ribbon is really strings of fibers which are held together with a thin monofilament.  I simply unraveled the monofilament until the strands were loose up to the edge of the sentiment panel.  This gives the look of adding several strands of string, evenly spaced beneath the sentiment panel without the hassle!
This rustic bow was created on my Bow-it-All V2.0 in less than a minute.  Really!!  I just figure eight wrapped the Cocoa Jute String around the pegs until I had 4 loops on each side.  When tying my knot I wrapped the center string around two extra times to make a wider center for the bow.  That's it.  To see a video tutorial for a similar bow, please click HERE.
It's fun to experiment with unique ribbons and trims.  What are your favorite styles from the Really Reasonable Ribbon Store?
Thanks so much for stopping by today.  For more information on the other products used in my card, please visit my Make Time to Craft Blog.

~ Bonnie ~ 

Friday, October 2, 2015

RRR Challenge #127 - Halloween with Ribbon or Trim theme


Hello everyone! It's time for a new challenge here at Really Reasonable Ribbon. Please scroll down to the next post for the winners of the last challenge.


The theme for Challenge #127 is Halloween with Ribbon or Trim.
Create a card, layout, multi media piece, tag, ATC, hair bow, you name it. Just be sure to follow the theme above and use ribbon/lace or trim somewhere on your project.
  
*******************

Here is a little inspiration from our design team for challenge #127 to get you started.  All of the sample projects feature ribbon from Really Reasonable Ribbon.


************************

Now, let's see your Hallween themed creations! 
We will be selecting our top three favorite projects to feature, so stop back on October 16th to see our picks along with our next challenge theme. 

Here's what you need to do:
* Create a new project using the posted theme. A layout, card, ATC, home decor item, hair bow, or anything you can think of.
* You may enter up to 6 projects, but you're asked to provide newly designed projects. No back-linking please.
* All projects must also include some sort of ribbon, lace or trim.
* A maximum of 6 entries per person per challenge please.
* Post your project on your blog or an online gallery (using code RRR127) and link it here with the Inlinkz tool below. Please provide a direct link to your post, not an entire blog.
* You have until October 13th at 11:59 PM Eastern time to enter your projects. Thanks so much for playing and good luck.
 
 PLEASE consider turning off your word verification.
It would be a great help to us if you would consider turning off your word verification if it's active on your blog. To do this is really easy and all you need to do is go to Customize > Settings > Comments > then scroll down to where it says comment moderation and select always (this won't stop anybody leaving you a comment but they won't show on your blog till you approve them). Then scroll down to show word verification for comments? and select No.
We love to visit your blogs and leave comments on all the terrific entries, but the word verification really slows us down. :o)

RRR Challenge #126 Winners!


Challenge #126 was lots of fun with our 'Orange' You Glad it's Autumn theme. 
We saw a wide variety of wonderful projects this time around. Many thanks to all who participated.

Our top three picks for Challenge #126 in no particular order are:

Congratulations to our top 3 for a job well done. Grab your "I made the RRR Top 3" badge (located on the right column of the blog, near the bottom) and display it with pride. You ladies did a fantastic job!

~~~~~~~~~~~~~~~~~~~

Thanks again to everyone who played along with us on our 'Orange' You Glad it's Autumn themed Challenge.  I hope to see you all back again for Challenge #127 which is now up and running.


~ Bonnie Garby ~

Thursday, October 1, 2015

Retro Christmas Greeting Card Set

Hey there Paper Peeps! It's the first of the month and you know that means.... I get to share a little something I created with the Ribbon Club Assortment Crazy for Christmas.

I created a set of Retro Christmas Cards.
I used a fun die to cut the wood grain paper to  give the look of a country snowfall then  layered on fun and festive retro Christmas sentiment images. I coordinated the holiday ribbons to the image and added them to a layer of the lace from the assortment.
Once I had all the cards completed I bundled them together and tied them with some sweet Swiss Dots on Red Satin Ribbon and added a chipboard tag and glittery snowflake.
Okay that's all for me. Wishing you all a happy and productive day with lots of time to be creative : ) G