Showing posts with label October Ribbon Club. Show all posts

Wednesday, October 19, 2022

Trio of Christmas Cards

Hello, everyone! It is Gloria with you again! I have a trio of Christmas cards to share today! I am still playing with the October Ribbon Club Assortment, because I like to use as much of an assortment as I can before I put the leftovers away!

All the cards are standard 4 1/4" x 5 1/2" but since I added ribbon I may need a more roomy envelope, or at least more postage on a standard envelope. 

I am using the papers and stickers from the Photoplay Here Comes Santa card kit (from 2018). I am not usually one to use a card kit, but if I do, I always add my own twist. I like to add more dimension, and of course ribbon! 

For the first card I created a focal sentiment then added some ribbon loops and sequins for "pizzazz"! I used 5/8" Forest Green Plaid, 3/8" Red Checkerboard Satin, and 5/8" Poinsettia Print on White Satin ribbons to make the loops.

The second card has a nice, loopy bow made from the 3/8" Holiday Ornaments on White Satin. I also added dimension by popping the sentiment and berries with foam tape, and of course...more sequins! 
This last card is WAY out of my comfort zone! I added the ornament and star stickers to a white piece of cardstock! Yes, stickers! I popped the sentiment with foam dots, and added a foam sticker to the bow! Sequins make everything all shimmery. The bow is made from the 3/8" Forest Green Checkerboard Satin, which is also sparkly when the light hits it.
 
Black and white cardstock
Photoplay papers and stickers
Sequins

Monday, December 4, 2017

Christmas Isn't Just a Day...

Hello Crafty friends and Happy Monday to you all!
Today's card was created for Really Reasonable Ribbon using the beautiful satins, foam squares and embellishments.

Two of the ribbons used are from the Octobers Ribbon Club Assortment, and those ribbons are called Delicate Stitched Forest Green Ribbon , Gauze Print Poppy Red Satin , as I thought they went perfect with all the layers on my card. I also added a sweet rhinestone embellishment .

Each layer was put together using the  Scotch advanced tape runner refill. , and then popped up using Really Reasonable Ribbons Foam squares . I did add sewing to the 3 layers.

Sentiment Frame- was done using a die cut from JustRite, and the stamp is from The Project Bin, and I also added distressing using Club Scrap ink.

Top panel under the sentiment frame- I used a fancy Quadrafoil Square Doily die cut from Cheery Lynn Designs.

I had a lot of fun creating this card, hope you enjoy my post for today! thank you!
Have a nice day!

hugs to all,
Cheryl

Saturday, October 14, 2017

Sweet Christmas Tag

Hello crafty friends, Cheryl here with a sweet Christmas tag I created for Really Reasonable Ribbon using some of their gorgeous ribbons from the October Ribbon Club Assortment, and then some embellishments as well. I picked two ribbons and then the lace from this month's kit. Love them all!!!

On my tag I chose to use Graphic45 design paper to cover this large tag, then cut one of the design papers that had little tags and added this one using the foam tabs, and that is where the Santa and sentiment came from. I had some red poinsettia's that I had cut extra for my card yesterday and thought they would be cute on this tag, so I added what I had left. I also added some 8mm pearls, metal leaves, and green leaves to the cluster of poinsettias. I added lace across the bottom, and then used the large diamond satin to tie through the hole, and then used the other satin to create my bow.

I had a lot of fun creating this sweet little Christmas tag, as it took very little time, and was super easy to make. Love when you can make tags fast, and they turn out cute! :)

Really Reasonable Ribbon Supplies Used:


Thank you for looking and have a lovely day!
Hugs to all,
Cheryl

Saturday, October 29, 2016

Christmas Hair Accessories

Hi all,

Today is my last post for Really Reasonable Ribbon. I am so sad to be leaving such a wonderful team. I feel so honored to have been a part of Bonnie's team and to have worked with her for the past 6 months.I have learned so much from Bonnie and the team. I truly have loved every minute of it and loved working with such beautiful ribbons from her store. Thank you Bonnie for having me on your team, I've had so much fun!

For my last post I made a few items with the beautiful ribbons from this months Ribbon Club Assortment - Traditional Christmas Mix. I seriously had a hard time deciding on what to make. lol
I made several different hair accessories with this beautiful assortment. I used Bonnie's tutorial again to make the hairband and I made a baby hair clip and a regular hair clip. Of course I am giving a couple to my granddaughter and one to my great neice Sophia, who was just born.

Here are the items I used to make all my Hair Accessories, you can find all these at
Headband, Rectangular clips, and Round Head Snap Clips

Here is a photo showing all the items using the 

 For this headband I used Bonnie's tutorial showing you how to use ribbons from Really Reasonable Ribbon to create these awesome headbands. I added a bow on top of the headband with a little red flower embellishment. 

Here is a close up of the little red flower embellishment. 
These are new in the store and they are so so cute. I totally love these
little embellishment. They are 10mm Resin Flower with Rhinestone Flatback
Cabochons. I have the multi colored pack that comes with red, white and other colors.

Here is a photo of the two hair clips I created using October ribbon club assortment -
Traditional Christmas Mix. These ribbons are truly beautiful bright greens and reds for
Christmas, they are just gorgeous. I coldn't help but add the cute little flowers in the middle. 
These little flowers are just so cute. Great addition to any project. 

Here is the back of the first hairclip using the 2 3/8 inch round head snap clip.
I only glued the ribbon on the top of the clip and at the ends of the bottom of the clip, as I didn't 
want it to have an affect on the opening and closing of the clip. I created a triple layered bow with my Bow it All, bow maker. I then double layered my bows, last I glued the little acrylic flower on top of the bow.  

A close up of the side of the 2nd hair clip, showing how I glued the ribbon onto the Rectangular clip with teeth.  These little hair clips are just perfect to make baby hair clips. 


Supplies:

Thank you all so much for stopping by today I so appreciate it. I hope you are inspired to use some of these items. I just love using the ribbons from Really Reasonable Ribbon.  They are just gorgeous, and the flowers are just beautiful. Check out the items I used plus other wonderful items at the Really Reasonable Ribbon Store.  As I sign off for the last time with Really Reasonable Ribbon I would like say again, Thank you Bonnie for inviting me on your team and all your support. 


Hugs and wishing you all a great crafty day, 
Deborah xxx

Wednesday, October 26, 2016

Jolly Old Saint Nicholas

Hello Ribbon Lovers!  Have you started working on your Christmas cards yet?  I got totally inspired to get mine going when I received the Traditional Christmas Mix in this month's Ribbon Club Assortment. To my absolute delight, these ribbons are the perfect playmates for Graphic 45's Saint Nicholas collection.


Just look at how yummy this Bold Red Check Plaid ribbon is with these pretty papers!  


My Zutter Bow it All Tool is my extra set of hands whenever I need to tie a big poufy bow.  This one is topped with Natural Jute String and a pretty floral pick.

Inside, I created a little treat pocket that's just the right size for a mini chocolate or two.

I'm curious...when do you start making your Christmas cards?  I'm usually a last minute kind of gal, but I'm trying to do better this year.  I'll keep you posted on how that goes!  

Thanks for stopping by!

Cheerio,
kathy

Friday, October 14, 2016

Christmas Blessings

Hello everyone, Cheryl here today with a Christmas card I created for Really Reasonable Ribbon using the Plaid Ribbon Red Bold Checked from this months Ribbon Club Assortment. Love all the beautiful ribbons in this months kit!!

So for my card I decided to make 2 big bows using the Plaid ribbon, and then for the centers I used Really Reasonable Ribbons NEW 12mm Silver Glitter Stardust Rhinestones Embellishments, I am absolutely LOVING all the new embellishments that RRR now carries. You can find all these beauties here on the RRR Store.

My card base is as follows:
6" x 12" white , scored at 6" to make a 6" x 6" card base
Layer 1- Blue colored card stock is 51/2" x 5 1/2" , then the red is 5 1/4" x 5 1/4", next the dots design paper is 5"x 5"
Layer 2- blue card stock 4 1/2" x 4 1/2" , then red is 4 1/4" x 4 1/4", then design paper is 4" x 4"
Layer 3- 3 3/4" x 2 3/4" for the red card stock, then the blue is 3 1/2" x 2 1/2", then the dots are 3 1/4" x 2 1/4"
Layer 4- is a frame cut out, and stamped on using The Project Bins new Luke 2 stamp set

Embellished with 2 big bows, and 2 of the 12mm silver glitter stardust Rhinestones.

 The design paper I used is from DCWV Big "Tis The Season" Stack. I LOVE all the design papers in this stack :)
I hope you enjoyed my post for today! Please let me know what you think, and thank you for stopping by!
Hope you all have a lovely day!
hugs to all,
Cheryl

Monday, October 27, 2014

Fun with Chipboard Ornaments


Hi Everyone.. today I have another Christmas idea to get started before the holidays are upon us using the October Ribbon Club Assortment and a few other beautiful ribbons that I have from RRR.  This month the assortment is jam packed full of gorgeous ribbons to use and I had a hard time deciding what to use on it :)  So I did a few of the ornaments to share with all of you today.


This is another fun chipboard product that I found and it was soooo easy to cover with papers and the ribbons on the sides to finish them.  Each is something different and this would be a great project to use up some of the things you have saved in your stash and then you can hang them on the tree each year and enjoy them instead of being tucked away... 

  
This is my favorite and I used a premade Santa and then cut circles and a fancy lacy circle to back the chipboard ornament.  The ribbon on the front is from the RRR club assortment and on the sides.
The ribbon on the side is christmas dots and green ovals and the front ribbon is metallic edge satin ribbon in green.  This one comes in lots of shades and is one of my favorite.


For this one I used some snowflake papers for the theme and then cut a big snowflake from a Spellbinder die to put on the front.  And of course lots of pretty red snowflake ribbon and the white organza dot ribbon with dots that look like snow.  This was super quick and easy to do.


And lastly I decorated this one with some pretty red snowflake papers and added poinsettias that I made and added gold to the edges so that they would match the metallic gold thread.  Guess I am going to be needing to go back to get more of these to make for gifts... It's really fun :)

Thanks for stopping over and don't forget to leave a comment...

Hugs and Smiles, Teresa

Friday, October 17, 2014

Christmas Mini Page 2 with Really Reasonable Ribbon


Hello everyone, Cheryl here with Page 2 of a Christmas Mini I'm currently working on for a Christmas Gift.  On this page I used some more of the beautiful Really Reasonable Ribbon that is in this month's Ribbon Club Kit.  I LOVE all the Christmas ribbons and lace in this month's kit.


I used ribbon for the tag pulls, and also made bows for all the tags. There are two tags to the left that pull out for photos, and one tag at the bottom for more photos.  All have bows and ribbon pulls on them.


Next I added some of the beautiful lace to the left bottom corner, and then the right upper corner. In the photo below, you will see some of the Green Delicate Stitched Satin, used as tag pulls on both of the tags on the inside.


I love how this 2nd page turned out for my mini.  It's been a long time since I've made a Christmas Mini, so I'm super excited to be working on this one.


Thank you for stopping by, and have a super wonderful day!

Hugs to all,
Cheryl

Tuesday, October 30, 2012

Quick and Easy Holiday Gift Ideas...


We all need them, don't we??? Well I know you think those "holiday gift giving times" are far off in the future...I mean, come on, Thanksgiving isn't even here yet, RIGHT?? Right, however, taking the time to start prepping cute little QUICK & EASY handmade gifts NOW will save you so much frustration later!! So as my final project as a guest designer for Really Reasonable Ribbon, I thought I would share with one of my "go to, quick & easy" gift ideas. :  
A Double Chocolate Mint Cocoa Gift Kit.

 
 As you can see the ingredients are simple and relatively inexpensive. Two packages of cocoa, a baggie filled with chocolate chips, and four starlight mints (or two candy canes but I didn't have any on hand yet - I refuse to buy them until November - atleast!!!!).

So to begin you slip all of your kit ingredients into your clear bag. See how cute my mints look all lined up?? ***TIP: Use a bit of adhesive or a glue dot and STICK THEM TO THE COCOA PACKET!!!! :) Keeps 'em looking all cute and in a line!!!

Once you have placed all your kit ingredients into your bag you seal it up and make a paper topper. To do that simply cut a piece of cute paper 3" x the width plus 1/4" of your clear bag. So my bag was 6 1/4" wide, I cut my paper 3" x 6 1/2". Fold it in half and staple it over the top of the clear bag. Next the fun part - EMBELLISHING!!!
 
 As you can see, I have used two different types of ribbon here. I first wrapped a length of Ivory Grosgrain around the bottom edge of the paper topper and glued it in place. I then layered on a cute red printed ribbon from October's Monthly Ribbon Club Pack and then glued it in place. And then I tied my bow using the Ivory Grosgrain again with the help of the hand dandy Bow Easy Tool.
 
 
 And you know me and my fetish for embellishments....it was cute with the dual ribbons and the bow but oh why not throw a totally cute Snowman Button from Buttons Galore & More onto the center of the bow for that perfect finishing touch? :)

I have really enjoyed my time designing for Really Reasonable Ribbon and I hope you have enjoyed the array of different projects I have brought you this month. Remember, it's always better with a bit of ribbon!!!


Saturday, October 22, 2011

Sweet Snowman


Happy Saturday!

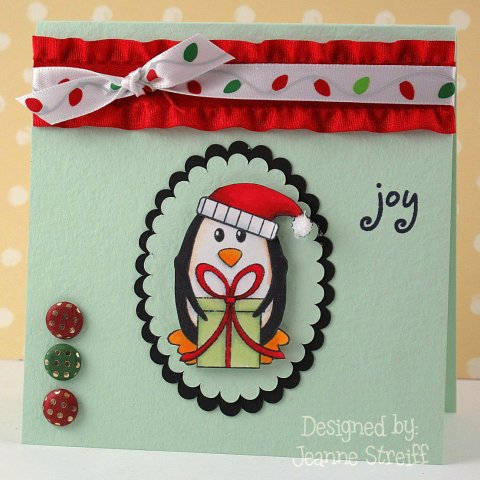
Sometimes it's fun to do something unexpected with trims and ribbons. For this card I took the red ruffled ribbon from the October Ribbon Club and let it hang off the edges of the card a bit.


Supplies:
Stamps: Kraftin’ Kimmie Stamps (Sending Winter Hugs)
Papers: www.discountcardstock.com (Neenah Solar White 80#, Nautical Blue Light Prismatic 70#, Midnight Black 80# ), Authentique (Wonder Bundle)
Ink: Memento
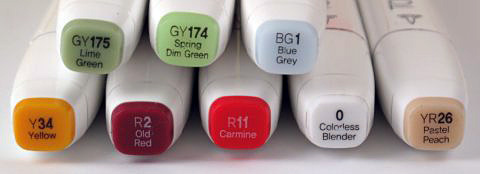
Markers: Shinhan Touch Twin (see above for colors)
Die cuts: Sizzix Framelits (Scallop Circles, Circles)
Ribbon: Really Reasonable Ribbon (October Ribbon Club)
Flower Soft (Polar White)

Sunday, October 2, 2011