Wednesday, September 25, 2013

Tag Banner Tutorial

Howdy all. It's Ginny here to share a great tutorial on using  bakers twine to add tags to a banner. We make banners all the time in the shop...and I love to add loads of layers to make them look really nice and full. One of the challenges is hanging all the elements so they don't twist and turn. This technique is perfect for keeping all the  fronts forward : ) It also ensures that you can adjust the pieces to the proper spacing once you hang up your banner. 
Here is a look at my finished banner left side:
Right side:
You can see that all the little bits are hanging facing forward and spaced just right : )
Here's how it's done:
You'll want to choose the elements you want to hang on your banner. I've got small tags here. You'll notice that I've punched a tiny hole in the tops. I like to use twine to hang all the parts on....since it's smooth and you can slide things easily for spacing. For this project...I'm using Halloween Bakers Twine.

Make a small loop and thread it through the hole in the tag with the loop on the finished side.

Pull the tails behind the twine.
Pull the tails through the loop. Snug....but not too tight.
Flip to the back unfinished sided and pull tails down to the back of the tag and secure with a good tape. Trim the excess. Once you have all the elements tied on flip over and adjust the spacing. 
Another look at the banner:

I've dressed up the front with sweet little bows of Black Gingham.  Want another look at the Double Loop Bow-torial I used to tie the awesome bows? Just click here.There's also some paper rosettes for dimension, fun vintagy Halloween images, and a fair bit of stickling and inking. 
While I had all the paperie goodies out I went ahead and made a pretty tag to hold my twine:
Before I go I want to make sure you all know that Bonnie is having an Autumn Sale at Really Reasonable Ribbon!!!!! 
Click here to get the details.
I hope this helps you to create a fabulous banner to add to your holiday decor. Wishing you all a happy and  productive day and time to be creative : ) Hugs Ginny

Tuesday, September 24, 2013

Autumn SALE at Really Reasonable Ribbon

 
This is the second post of the day. Please scroll down so you don't miss the fun project Misty shared with us today.
 
We're rolling in with a BIG Autumn SALE here at Really Reasonable Ribbon. 


 Now through midnight Eastern Time  on Sunday, 9/29/13 we have a terrific SALE going on. The more you buy, the more you save!! Please use the applicable code found below in the promotional code area on the first page at checkout.


The codes are good now through midnight Eastern time on Sunday 9/29/13.
(Sale code is not valid on prior orders, ribbon club subscriptions, ribbon club gift subscriptions, or special order items).
 
Order subtotals from $.01 to $39.99 SAVE 10% using code AUTUMN10.

Order subtotals $40 and up SAVE 15% using code AUTUMN15.


The sale code is good on everything including SALE items. Did you know we stock a wide variety of Scor-Tape? Take advantage of our sale and stock up on this great product.  Don't forget to take a look at our fun decorative bags. 


We are now offering the fabulous Bow It All Tool from Zutter.  
Grab one today with your discount code!!


Check out all of our fun Halloween and Autumn themed ribbon available individually and in fun Assortment Packs.


And don't forget, Christmas is right around the corner!!  Start your holiday crafting early.


Don't forget, we now stock a large variety of Mulberry Flowers from Wild Orchid Crafts.


Are you a member of our 
Monthly Ribbon Club yet? 
 If not, enroll today and we'll give you the discount on your first assortment.
(All future shipments will be billed at full price.)

Our September Assortment contains 9 styles and a total of 17 yards of ribbon with a fun Autumn theme. What a terrific way to build your ribbon stash so you always have the perfect ribbon for any project! We also have gift subscriptions available if you are looking for a fun gift for a crafty friend.


Most of our orders ship same or next day!

Happy Shopping!!

~ Bonnie ~

Ribbon Bracelet

Remember this bracelet I did and promised that I would do a tutorial for you all?
Well, I finally BEAT the YouTube MONSTERS that kept kicking me out and I got a video done of the basic process. 
SO...you all get a 2nd tutorial from me this month!!  

I did try to keep it short and sweet though, because I think that it was TIME that kept keeping from being able to load it. 
For your materials, you will need:
Doll Headband
Lighter
Hot glue gun
Ribbon
Center embellishment


Hope you enjoy...Have a wonderful week!

Monday, September 23, 2013

Fall...


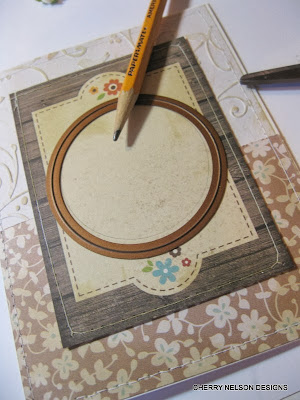
Hello to you!  I have a card to share today for RRR.   I fell in love with the sweetheart blossoms and used them to create a fall wreath.  I started with covering my cardstock with my pattern and embossed papers.  From there I used a spellbinders circle as my template to lightly draw on to my diecut paper for the wreath. I added some stitching for a homespun look.   I  than added my denim blue ribbon around my card by cutting a slit in the side and tying my knot.  From there I piggy backed another bow on top for fullness.  It was now time to adhere my flowers around the pencil circle.  A corrugated heart and mother of pearl button was added to the middle.  A metal thankful was added that I lightly sprayed a bit of rust paint to along with a stamped Fall sentiment.  I added Chloe natural lace to the bottom for softness and was done!  I like the blue added to the traditional fall colors!  I always adore a wreath...it's the country girl in me!  Enjoy!  Cherry
 

Sunday, September 22, 2013

With Sympathy

This is my last post as a member of the RRR Design Team. I have truly loved being on this team so much. Bonnie has been a gem to work with, and has such a generous heart, and the girls on the team are so much fun and are so spunky!  Be sure to check out the Design Team Call and apply. You will love it!

Today's card is a simple CAS design that highlights the ribbon so well. It adds such color and pattern to the overall design, while not being overwhelming.
I used the Olive/Celery Sheer Two-Toned Striped Ribbon to accent my sympathy card. Just enough for the serene card I wanted to send. The pearled flowers were purchased and the sentiment is from sign4words by The {Stamps} of Life, as is the ink.

Be sure to check out all of the Two-Toned ribbons in the RRR Store here.

Thank you for looking at my designs over the past DT terms. I have loved sharing them! Best wishes to the new team members!

Saturday, September 21, 2013

Thanks Big Time by Tracey Sabella

I can't believe how quickly the year is passing by. I'm enjoying the cooler fall weather that's arrived this week.

I have so many things to be grateful for, and it's always nice to share a thank you for a special kindness. My card features lace, flowers, and twine from the Really Reasonable Ribbon Store along with Donna Salazar Designs papers.

I normally include a tutorial with this post, but I'm changing things up this month, so be sure to check back on Sept. 30 for a layout and tutorial for two kinds of Grungy Jute/Burlap Flowers.

"Thanks Big Time"

Really Reasonable Ribbon Products


Tips and Techniques
Aren't these WOC Cosmos and Sweetheart Blossom Flowers so darling? The Cosmos Daisy required some propping up on the top where the chipboard ended, and the Tombow 3-D Tabs were perfect for this task. 

I played around with this flower cluster, and although a larger bow overwhelmed these delicate flowers, this thin 10-lb Bamboo Cord tied into a simple little bow was just right.

The Blue Fern chipboard was dabbed with Jasmine Mix'd Media Inx and then lightly sprinkled with MMI Jasmine Embossing powder and heat set for a grungy look.

I used 20-lb Bamboo Cord to "wrap" each end of my sentiment die-cut. 

I added Juliet Natural Crochet Lace below the paper block, adhered with a strip of Scor-Tape. It is so easy to use Scor-Tape to adhere lace and ribbon to my projects! The Juliet lace is so pretty with the lovely scalloped edge! 

The top border is hand stitched, and I distressed and inked all the edges. 

I hope you've been inspired to pull out your Really Reasonable Ribbon supplies and create!! 


~ Blessings ~

Friday, September 20, 2013

Just Because


It's Tammy Louise today to share my use of some of the fabulous ribbons I found at Really Reasonable Ribbon last month.  The Big Sky Hand-Dyed Silk and the Netting went perfectly with the Paper cord (on sale now) for the Rick St Dennis I lovs you dis Much image I've colored up.  


At first I wasn't sure about the sentiment for this card but when I placed the gorgeous rich colored buttons from Buttons Galore and More on the project instead of flowers, I just knew it would be perfect for an all occasion multi gender card.


I've shared more of the specifics on the project on my blog and would love for you to stop in for a visit to both get inspired and to join in on the candy available!  Happy Crafting!

 Hugs,
Tammy Louise