Hi all it's Ginny here : ) I'm overwhelmed by the number of requests I received for a tutorial for the bows I tied for mine and my BFF Heather's blog hop projects. So great to get that kind of feedback : ) I had another tutorial lined up....but since I love all you RRR Peeps I'll jump this one to the front of the list! I will warn you in advance....there are a lot of pictures here....but the bows are so easy to tie that you'll be doing them in your sleep. I'll also say that we are in the midst of several home improvement projects before my sons graduation....so a manicure was out of the question. lol.
Okay...on to the bow-torial.
First start with a length of ribbon around 14 inches. Less for narrower ribbon...more for wider....but not too wide or you can't get it tied tight enough to stay.
If you're right handed like me..hold the ribbon in your left had between your thumb and middle finger....leaving a bit of a tail. If you're left handed...I'm guessing you would do the opposite???? Next wrap the ribbon over the top of your index finger.
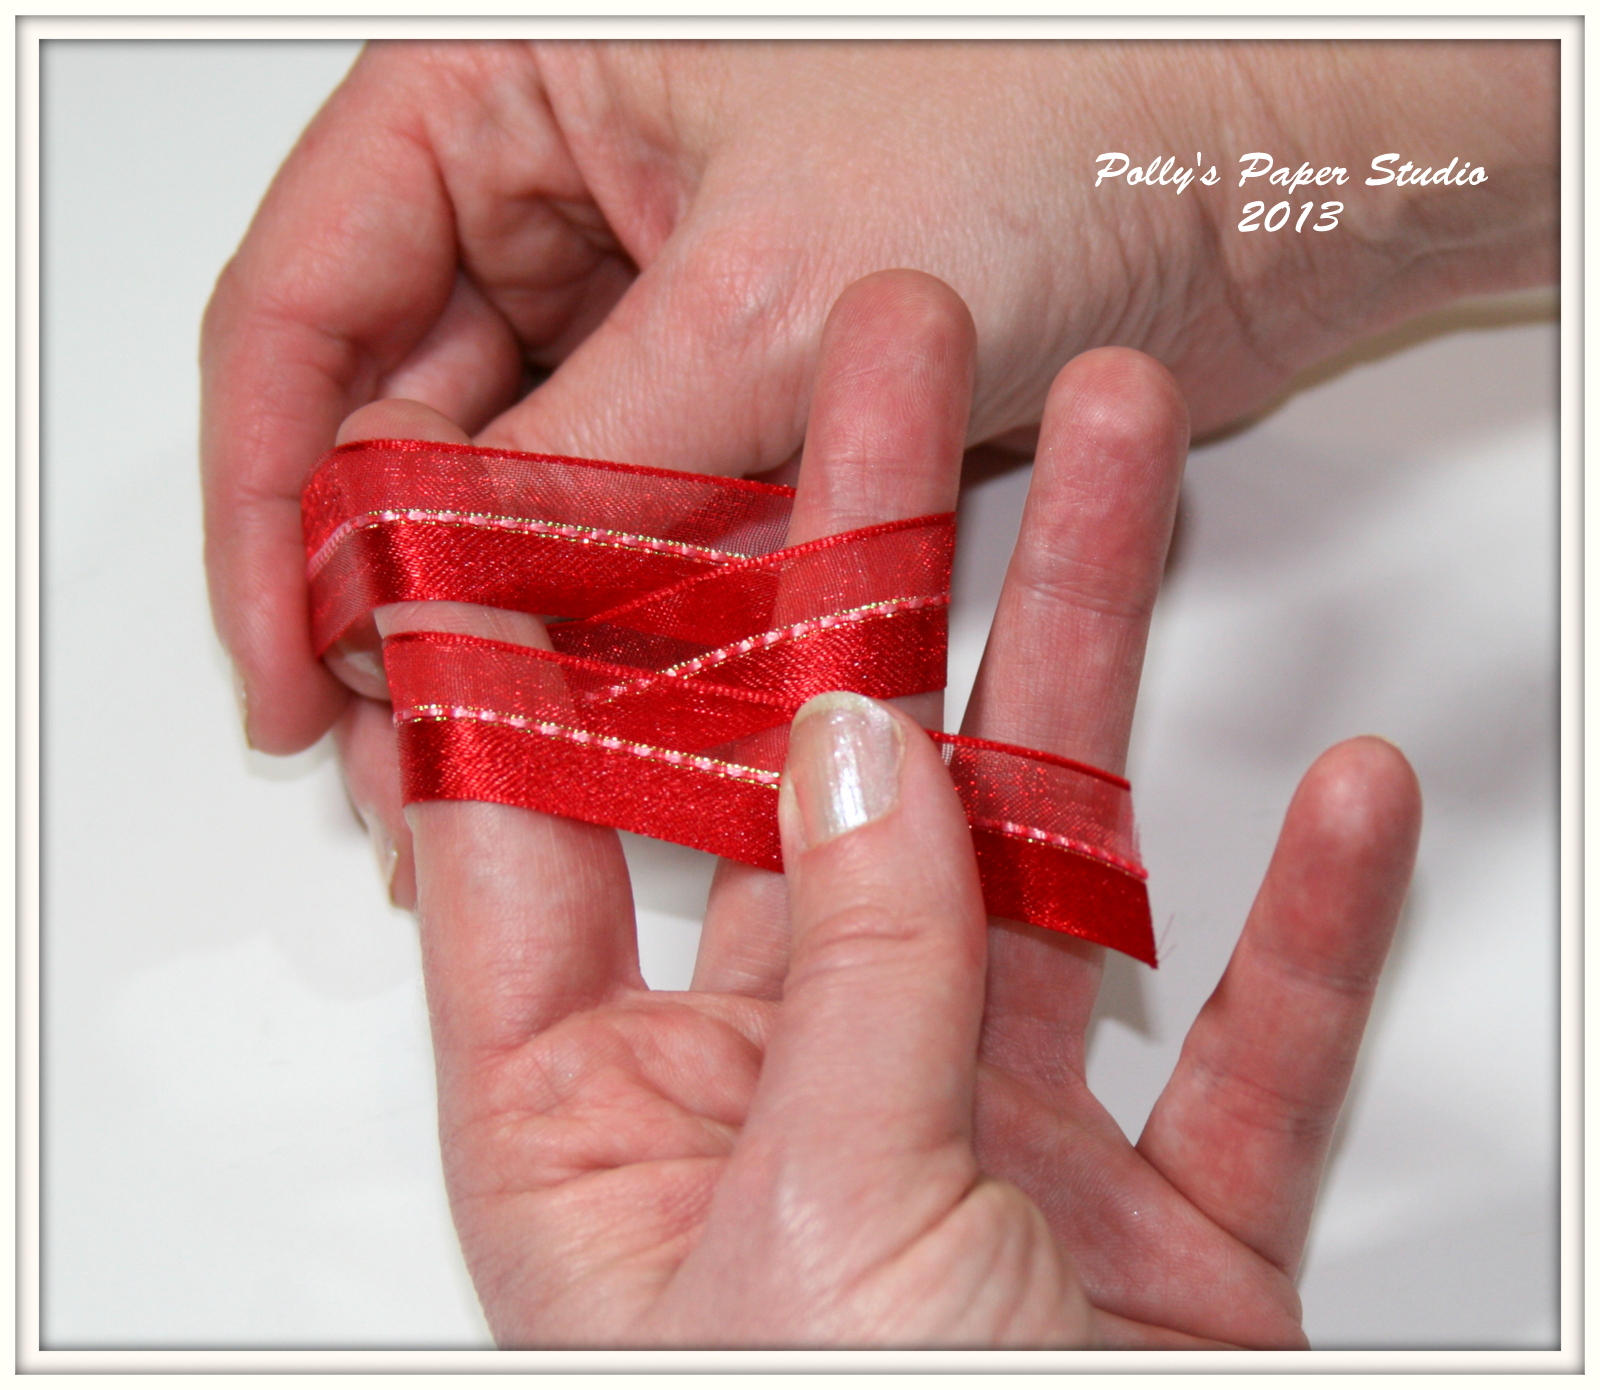
Now you'll want to weave the ribbon through your two extended fingers...so the ribbon is now over the middle finger.
Wrap the ribbon around your middle finger and weave it back through between your fingers.Your ribbon should now be wrapping over your index finger again.
Wrap the ribbon under your middle finger one more time.
Remember your still using your left thumb to hold the tail. Now pull the ribbon though the v of your fingers...closest to your palm.
Now pull the trim around the back so it's coming straight up between your fingers. Remember the trim should still be behind.
Pull the trim over to the front side.
And tuck it behind the the last crossover that was made when you brought the trim to the back.
Pull the trim straight up.
Now pull the ribbon up and down....tightening the center knot.
Now you've got the center tight enough to slip the bow off your fingers : ) Not too tight that you're stuck lol. Go ahead and clean up the tails with a nice diagonal cut so they won't fray.
You'll want to practice a few times to get the hang of it...but trust me...it's easy peasy. I tried it with twine too and it worked perfectly...I was even able to get a few more loops on with the thinner trim.
If you'd like to see the bows on my finished project please click
HERE. Any
Really Reasonable Ribbon trim will work great...as long as it's not too wide and thick. I used my favorite
Scor-Tape to attach the bows to my project.
Okay...that's enough bow-torial for one day lol...sorry for so many pictures! I hope you all have a happy and productive day and find some time to be creative...Huggs Ginny