Showing posts with label Double Faced Satin. Show all posts

Monday, March 10, 2025

Decorated Glitter Egg wit RRR

Hello everyone, DT member Cheryl here with a fun little project. I decorated this glitter egg using Really Reasonable Ribbon supplies. Love doing these!

Egg I bought at Walmart, and then used the flowers from RRR stamens , and little embellishment, and ribbon.

Ribbon I used is really reasonable ribbons satin, I used a pink cherry blossom flower, some mini and regular size sweetheart blossoms, Open roses, rosebuds, and another little flower. I hot glued the flowers all on the ribbon leaves, and had a lot of fun doing this.


Thank you so very much for stopping by and have a lovely day! hugs to all, Cheryl 


Monday, January 10, 2022

Beary Sweet Valentine Bag


 Hello everyone and Happy New Year to you all! Today I have a super sweet Valentine's Gift bag designed for Really Reasonable Ribbon using the gorgeous satin and grosgrain ribbons. 
I bought these little gift/treat bags years ago at our local warehouse sale, and I love decorating them. I started with a doily, then layered with another die cut. Next I chose this darling bear that was cut on my Cricut using an SVG file that was a santa bear. I added some chipboard hearts, and the I heart U chipboard pieces, and then added my bows and ribbon layer. This was super fun to put together, as it's been awhile since I've crafted.

Thank you for stopping by and have a lovely day! Hugs to all! Cheryl

Friday, July 26, 2019

Many Thanks Card


Hello everyone and Happy Friday to all!  Today I have a sweet Thank You card I made for Really Reasonable Ribbon using the beautiful ribbon, flowers and embellishments from the RRR store. Its been a while since I've stamped so I thought this sweet little kitty would be perfect for this thank you card.

On my card I used this darling stamp I purchased years ago, it's colored with Copic markers, and then the many thanks sentiment is a StampinUp! stamp. I used Scor-Tape, foam squares, and Scotch ATG refill to put it together and layer it. Next I used the beautiful double faced satin brown ribbon, and then the carnations, rose buds and sweetheart blossoms.  The tag is an oldie from Cheery Lynn Designs and so are the corner brackets.
I added dots to each layer using a white gel pen. I love the look of the dots on the brown. The design paper is also an oldie and I can't remember who its from, as it was scrap pieces I used.

Really Reasonable Ribbon supplies Used:
Brown double faced satin ribbon
Bronze Leaves
Carnations
Rose buds 
Sweetheart Blossoms
Flower embellishments
Scotch Advance Tape Refill
Foam squares
Scor Tape 1/4"

I hope you enjoyed my post for today! Thank you so much for stopping by and have a lovely day!
Hugs to all,
Cheryl

Wednesday, July 27, 2016

Hello!

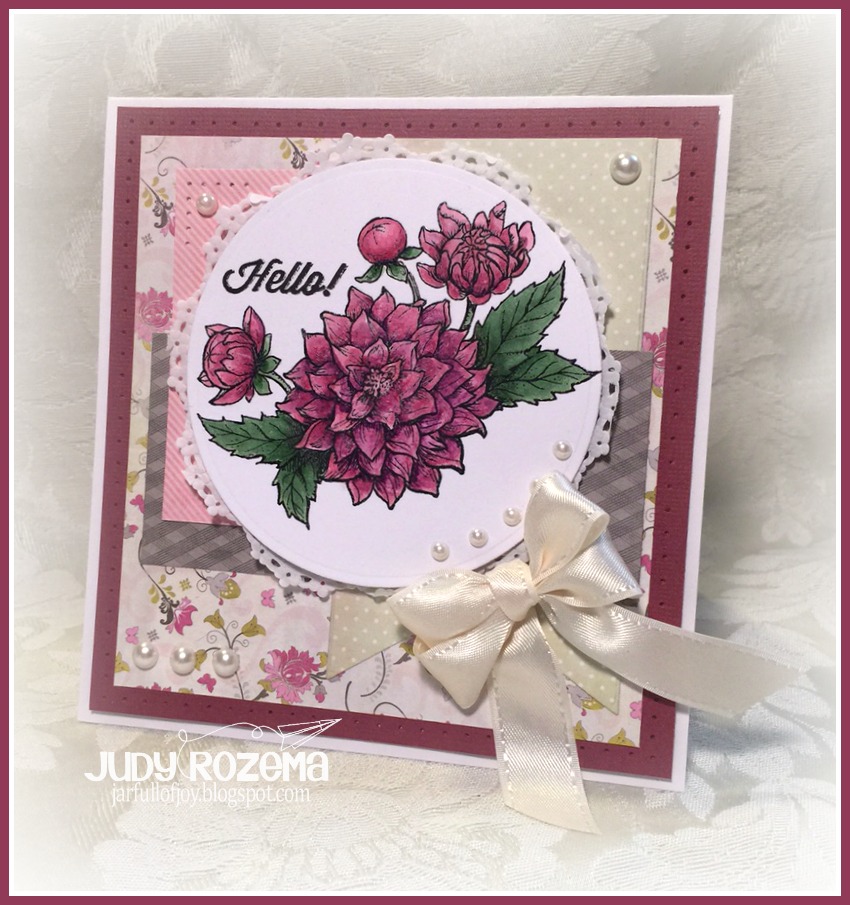
Hello ribbon fans! Today I am sharing a card with one of my favorite ribbons -- Double-Faced Ivory Satin. It is a DREAM ribbon and adds elegance to any project!
I am quite a novice at using my Bow-It-All, but am learning a little more each time I tie a ribbon. Bonnie has some simply wonderful tutorials on different bows and designs she makes, and they are really helpful for a visual person like I am. BUT -- you MUST have this tool if you love bows! It makes it very easy - even when you don't get it quite right at the beginning!
I tied a double loop bow for this project using the yummy Ivory Satin ribbon, and help all of my layers together with 1/4" Scor-Tape (another MUST-HAVE!). The papers and ribbon and pearls remind me of a sweet Bed and Breakfast that we stayed at recently - from times gone past!

Are you a Ribbon Club member yet? If not, you need to RUN (yes, run!) right over and join! We have a new collection coming out in a few days and you will love it!


Friday, June 24, 2016

Precious BABY

Hello everyone, Cheryl here today to share this SWEET card that I created for Really Reasonable Ribbon, using the Beautiful Ribbon, Seam Binding, and flowers that the RRR Store carries! I LOVE them all, and LOVE how my card turned out for today! This baby card was also created for my daughter, son in-law, & grandbaby Chloey! Can't wait to see her!

Card Measures 5 1/2" x 5 1/2"
White Card stock cut at 5 1/2" x 11" then scored at 5 1/2"
Layer 1- 5 1/4" x 5 1/4" , then yellow design paper cut at 5" x 5"
Layer 2 Pink cut at 4 1/4" x 4 1/4" , then pink dp at 4" x 4"
Layer 3 - JustRite Hope Oval Frame Die cut in white, then a spellbinders die in pink, then spellbinders scalloped oval in white, and then the oval from Hope Oval frame cut in white, and airbrushed in pink copic. On top of that I used the sweet teddy from The Pixie Cottage Stamps.
Cuddly Cute Bear - colored with copics E43,E31,E51,E93 (for teddy), pinks are RV23,RV11 for the little mice, I used C3, W-1,
SU! Ticket- airbrushed with RV23, and YR31!
Flowers -Really Reasonable Ribbons Cherry Blossoms Baby Pink, Miniature Sweetheart Blossoms Mixed Pink
Seam Binding- Really Reasonable Ribbons Moss Green, and ruched for the greenery.
Bows- Really Reasonable Ribbon Satin 3/8" pink.
Sewing done on machine.

Hope you enjoyed my post for today! Please leave a comment letting me know what you think! I always love reading them! Thank you!!!

 Thank you for looking and have a lovely day!
hugs to all,
Cheryl

Saturday, May 14, 2016

Girly Posh Mini Album Page

 Hello everyone , Cheryl here with a page I designed for a Mini Album I am working on for my Grandbaby Chloey who is due to arrive this month!!! Wooohooo, can't wait to meet her!!! I am loving how my album is turning out, and I used LOTS of beautiful Really Reasonable Ribbon on this page today!
So for this page I used the beautiful Satin Double faced ribbon in Hot Pink 5/8" wide for my BOW! On the interactive part where the photos will go inside I used the Black Sheer Box Pleat Trim.  I hot glued it, and then added some bling. Next I added some of the Double Ruffled Edge Satin in Azalea 1 1/2" thick, cut in half and layered for a double ruffle layered look.
 I did add some WOC flowers, random flowers, and glass leaves to my layout for today. I used feathers, and some swirl bling for my page as well.  I can't wait to finish my album and share in a video with you all!
 I absolutely LOVE LOVE LOVE how all the ribbon and embellishments look on this Posh Paper! I hope my daughter loves it too! I figured this will be Chloey's album for when she is in her toddler years. I will have to work on an actual BABY album, and have plenty of time to do so :)
 Supplies:
Really Reasonable Ribbon Black Box Pleated Trim, Double Ruffled Edge Satin Ribbon, Satin Hot Pink Ribbon 5/8". Feathers, flowers, bling, sewing, swirls, tag, Posh paper line. Interactive Page! Really Reasonable Ribbon Scor-Tape
Thank you for looking and Please let me know what you think of my page today!! :)
Hugs to all,
Cheryl

Saturday, November 7, 2015

My Silky Crush True Love

Waving a BIG Hello from over here!!! :)

I'm Jennifer, and this is my first post as a NEWBIE here with all of you on the RRR blog! to say I'm happy to be here would be a slight understatement! I'm still floating around on Cloud 9 that I'm a part of this most fabulously amazing team of crafters....

I confess right off the bat that I have a crush on the silky crush ribbon.... yes, it's corny, but oh so true! You'll probably find me saying that I am in puppy love with pretty much every ribbon Bonnie has in the store, but there is just something so irresistible about this line of ribbons.... so yes, I think I ordered them all. ha!
When I received my ribbon kit for this month (okay, have to stop and go SQUEAL for a moment.... isn't it fabulous?!?!!?), I noticed how well the golds blend with the champagne silky crush. Bingo!  - card making time!
I needed a card for some friends of ours who married, so the golds went perfectly with the blues from their color scheme. the delicate stitched satin old gold from the kit, paired with the champagne silky crush, a pop of white from the ever so lush double faced satin ribbon, and this card is ready to go!

You can find more info on my blog, "Just Coffee Please...".  I'll also have more tag photos from the Pocket Advent Calendar I made for our newest challenge, "Tag, You're It." I do hope you'll play along. :)

Jennifer