Tuesday, December 24, 2013

Scrappin' Off The Page


Good morning!  I hope you're all ready for Christmas tomorrow!  Today I have a special gift to share with you.  For Mother's Day this year I made a set of frames for my mom of our family.  This year my cousin's-in-law's mother passed away and my aunt asked me to make something similar for her to give her daughter-in-law for Christmas.  
 
This post is a little pic heavy, but be sure to stick around until the end because I have a mini tutorial for you!

This is what I came up with, using tons of gorgeous flowers and ribbons from Really Reasonable Ribbon:  


And here are a few close-ups of the more decorated frames:


Really Reasonable Ribbon Products Used:

Dots Organza White
Sage Green Grosgrain  
White Grosgrain  
1.5" Lavender Netting
Dots Organza Lavender
Chloe Natural Crochet Lace
Sheer Organza w/Satin Center White  
Diamond Satin Assortment Pastel  
Delicate Stitched Satin Light Orchid 
Wild Orchid Craft 25mm Cottage Roses Mixed Purple/Lilac
Wild Orchid Crafts 20mm Open Roses Purple
 

Now for that mini tutorial I promised you.  The frame I used came from Wal-Mart and is actually black.  I wanted to have something softer, so I decided to paint it white.  But I also wanted it a little shabby looking, so I decided to crackle the paint.  I didn't have any crackle paint on hand and I also didn't want to have to paint the frame twice, so here's the little time-saving trick I used.


I used glue to crackle the paint.  I don't know if this works with other kinds of glue, but I know it works with Aleene's Tacky Glue. 
 
I just squirt a glob on random spots all over the frame:


Spread it out with my finger:


Then I just paint over top of it and voila!  As the paint dries, it gives me nice big cracks.  

The tacky glue is also great for gluing down all these beautiful bows and flowers.

Monday, December 23, 2013

Ole St. Nick is almost here...


Well...it is almost time for Ole St. Nick to make his rounds.  I am popping in with one last little creation before Christmas time is fully upon us.  This is yes...another stocking.  Sorry, but like I said I had a lot of fun doing these this year.   This one has more of a shabby old world feel to it.    I used some lovely Riddersholm papers, an image from my stash, and a pretty pine cone from JoAnns.   I used the most gorgeous Pewter crochet lace from May Arts, Charcoal Gray seam binding, Diamonds and Dots on silver, and a bit of  Amelia white crochet lace on the "toe and heal" of the stocking.    Hope you enjoy and have a very Merry Christmas!  hugs, cherry


Sunday, December 22, 2013

Merry Christ-Mouse!

Hi everyone!  
Christmas is almost here!!
That magical holiday that we spend an entire month preparing for and it lasts for a couple of hours......  Bah humbug!   :)

Dear Santa, 
All I want for Christmas is an extra day each week 
so I can play all day and not feel guilty.......

```````````````````````````
The beautiful ribbons and trims on my card today naturally came from Really Reasonable Ribbon.  
The perfect place to find all the best ribbons and trims!!


Anyhoo, when I was working on another project, I found this cute image that I colored when I was working on learning how to use my Copics quite a while back.  It's probably over a year old, but I really like it.  One of my millions of New Year's resolutions is to make the time to practice my coloring.....  

My bow is made with Emerald Delicate Stitched Satin and it's a triple loop figure 8 bow made on my Bow-it-All Tool.
This ribbon style is one of my Top Picks for making beautiful loopy bows.  It's very inexpensive too and it is available in a variety of colors.


If you don't have a Bow-it-All Tool yet, WHAT ARE YOU WAITING FOR!?
YOU DESERVE ONE!!
After all you've done this last month, treat yourself to the new 'must have' tool.

The center of the bow is a 10mm Mulberry Open Rose.
I also wrapped some Christmas Baker's Twine around the lower part of the card.

And below is the finished inside of my card.

To view all of my Bow-it-All Video Tutorials, visit our 

May you all have a wonderful Christmas and plenty of family fun.
ENJOY!

~ Bonnie ~

Supplies:
Digital Image:  I don't know!!  If anyone knows the source, please tell me
Christmas sentiment: (antique) PSX stamp
Design Paper:  The Paper Studio
Ink:  Verafine Satin Red
Mulberry Rose:  10mm White Open Rose
Paper Punch:  Martha Stewart
Spellbinders A2 Matting Basics A & B
Cuttlebug Embossing Folder

Saturday, December 21, 2013

Tri-color Masculine Birthday Card

Happy Saturday!

I bet some of you are running last minute Christmas shopping this weekend. To get you away from the hectic holiday preparation madness, I am here to inspire you with a fun masculine birthday card! One of the most frequently requested cards I get from the readers are to share more masculine card. What a better way to have your trim on hand to inspire you for the whole card?


I love, love, LOVE all the hemp collection that Bonnie carries at the RRR store - this is one of my favorite. I used 20lb Hemp Variegated Spool Sandalwood (which is one sale!) for this card and got the whole color scheme of the card from it. This hemp has few different colors combined and you can see different colors as you roll it out. I thought this would be perfect for a guy's birthday. 

So to match the color scheme of the hemp, I used gray, light brown, dark brown, and blue to create a fun background for the card and stamped the sentiment. Added few enamel dots to compliment the hemp and the background. 

Let the trims on your hand inspire you! I hope you have a Merry Christmas! Thanks for stopping by!

Friday, December 20, 2013

How I Learned to Tie the Perfect Bow


RRR December 20 08

How I Learned to Tie the Perfect Bow

Really Reasonable Ribbon

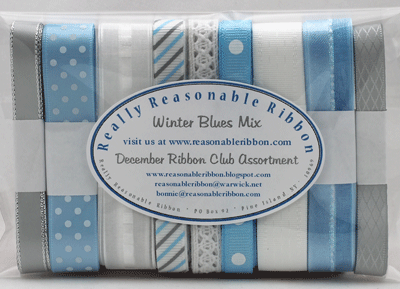
Hello, all you fabulous ribbon lovers!It's Kathy from Kathy by Design  back with another project featuring Really Reasonable Ribbon. I fell hard for the December Ribbon Club Assortment. Those Winter Blues had my fingers itching to make a winter wonderland card. Check it out:

Monthly Ribbon Club, Domestic

Is this ribbon yummy, or what? Here's what I made with the white delicate stitched satin and white sheer stitched center ribbons.


 RRR December 20 07  


These ribbons were absolutely the perfect pairing for the Graphic 45 Nutcracker Sweet papers. 

RRR December 20 03
They were also really easy to work with. 

Aaaaand...now it's time for a true confession. I treated myself to an early Christmas present. I purchased the Zutter Bow-it-All Tool. I really struggle with making perfect bows. After watching Bonnie's You-Tube tutorials I found myself really wanting this tool. 

I have a long and sad history when it comes to tying bows. I struggled mightily to learn how to tie my shoes. (My mother: "They won't let you into 1st grade if you can't tie your own sneakers." Me: "Waaaaaaah. I wanna go to school but I can't do it.It's too hard." 

Then fast forward to high school: My Mother: "You are not going out of this house with that bow tied like that." Me: "You tie it." Mom: "Not on your life. Anyone as smart as you are can certainly learn how to tie a bow." 

Fast forward to me as a married woman (she blushes with shame) My Mother: "I can't believe you still can't tie a bow. That is inexcusable." Me: no response. I had given up by this point.

So, you can see why a product that promises perfect bows would appeal to me. And you know what? It works. For real. My days of needing remedial help in the bow tying arena are over. Check out this triple loop bow I tied with the help of my new best friend:

RRR December 20 06
(She beams with satisfaction.) 

I know my mother is resting easier in Heaven, knowing that her ne'er tie well daughter can now create a perfect bow. Not just any bow...a triple loop bow, thank you very much!

 An era of shame has ended and now I can tie bows with the best of them! I'm working on mastering the two tiered bow now. Not even Mom could do that. 
Thank you Zutter Bow-it-All and Really Reasonable Ribbon. 

RRR December 20 01


Here's a peek at the inside:

RRR December 20 04
This is a great all-purpose winter card...good for a winter birthday or a Christmas card. I love versatility.

And that's it for me today, folks. Thanks for stopping by. I hope you were inspired, maybe got a chuckle from my tale of bow tying woe. I'd love to hear from you. Do you struggle with tying the perfect bow, or have you been a perfect bow tie-er since birth? I told you how I learned to tie the perfect bow...how did you learn? Leave me a comment...it'll make me happy right down to the tips of my crafty (and perfect bow-tying) little fingers.
Until next time,

Cheerio,

kathy

Thursday, December 19, 2013

Jolly Holiday by Jenn Cochran

Good morning RRR!  Hope everyone is enjoying the crazy holiday rush.  For many people part of the Holiday Festivities is doing a Secret Santa exchange.  My sister works for the mouse and does an exchange within her area.  Her Secret Santa got the Mary Poppins treatment this year.  I made this card for my sister to give along with a couple of tickets to see Saving Mr. Banks.  I thought this was an awesome gift.  The card was so much fun to make using the Wired Woven Chevron Ribbon in Black and White.  It turned out awesome!  Hope you all like it.


JENN


Wednesday, December 18, 2013

Merry Christmas Pocket Tag

Hello Friends!!  I hope you are having a fabulous day!!

Heather here and today I would like to share with you a Christmas Tag that I designed.
Here is the front.  
You may recognize Lily and Mr. Pugsley from my blog hop projects.
I used some fabulous ribbons and trims from Really Reasonable Ribbon!
I tied off the top of my tag with the Antique Gold Organza, cream seam binding and Gold Swirls ribbon!
Here is a close up of the top.
I used a couple of collage sheets that I designed to create this tag as well as the Poinsettia Svg.   I added a couple seed beads to the center of my poinsettia.
Here is a look at the mitten.  This time I cut out my mitten from my collage sheet, folded it in half, and placed it on my tag, so that the tag base is sandwiched between the mitten.  I used Juliet Lace and Pink chevron twill at the top of my mitten.  
I used a piece of teal baker's twine for Pugsley's Lantern.  I did ink the bow with Ranger's Frayed burlap.
I used a Bingo ATC card, looks like it is in the mitten, but it is actually attached to the base of the tag.  I used pop dots to elevate the mitten so I could tuck my goodies inside of it.
Here is a look at the back.
I used the 1/2 inch pink wrinkled ribbon and my Bow it all tool to create the fabulous triple loop bow.  I used some of my favorite Moss green leaves and a Deep ivory Mulberry Rose as well.  Teal baker's twine was used to tie my little note card closed.  On this side I only used the pop dots at the top of my mitten, and glued down the edges and bottom of the mitten (so things still fit in it, but it remains mostly flat.  I added some glitter to my poinsettia so it would look pretty from the back as well.  The focal piece on my Mitten is a collaged piece that I did using Gecko Galz images.
Above is what my tag looks like with the goodies out of the mitten pocket. You could write a sweet little message on the tiny note card. 
I hope that everyone enjoys their Holiday and is getting all of their crafting done!!  I hope you remembered to add some Fabulous Ribbons, Trims and Goodies from Really Reasonable Ribbon to your Christmas List!  
I will be waiting in line to talk to Santa myself today :0)
Thank you for visiting!!
Hugs
Heather