Hello Ribbon Friends!!
Heather here and today I am going to show you how to create a simple double pocket and tags card.
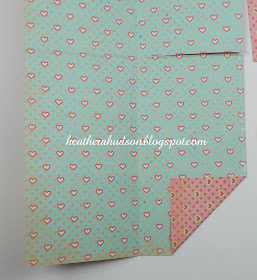
I printed out a sheet of my tiny hearts digital paper, then put the piece back into my printer so I could print another one of the papers onto the back. Now I have a pattern on both sides of the paper.
I like to keep things simple so my paper is a standard sheet that measures 8.5 inches by 11.5 inches.
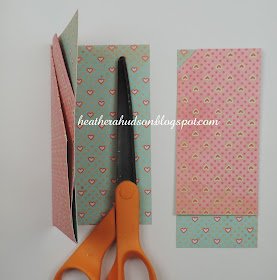
Simply cut off a piece that is 2.5 inches off the right side. This will leave you with a 6 inch piece on the left.
Next you are going to score the larger piece in half both vertically and horizontally. Please refer to photo below. I also cut my smaller sheet into two pieces. One tag will be 6 inches long the other will be 5 inches long.
Heather here and today I am going to show you how to create a simple double pocket and tags card.
I like to keep things simple so my paper is a standard sheet that measures 8.5 inches by 11.5 inches.
Simply cut off a piece that is 2.5 inches off the right side. This will leave you with a 6 inch piece on the left.
Next you are going to score the larger piece in half both vertically and horizontally. Please refer to photo below. I also cut my smaller sheet into two pieces. One tag will be 6 inches long the other will be 5 inches long.
I have a cut starting on the horizontal score line starting on the right side of my paper and ending at the Vertical center score line (please refer to photo below). Then I have added a bead of glue to the lower right edge....you can see it in the photo below. I have folded the lower right corner in leaving about an inch of the paper left before you reach the center score line. Glue that down.
Next I have folded the upper left corner over to the vertical center score line. I have also added more glue to hold down the corner, and also to hold our pockets in place. I have folded my lower right section on the vertical score line to the left.
You will notice in the photo below that my pockets are not quite completely glued down. So I added some more glue to the edge of the pockets and glued them down. Remember to stay close to the edge with your bead of glue or your tags won't fit inside. I have also started to cut off the corners on my tags. I cut one side first, then flip the tag, so I can cut the other side of the other tag...so they look the same.
Once everything is dry, you will find that you may have to trim across the top of your card and the right of your card (the opening), so it all lines up really nice. You will see the the hearts on the front are upside down...so when using your own paper...check to see what kind of patterns you have...because you wouldn't want upside down writing... The hearts don't bother me...because I am going to cover up the front with other goodies anyways :0) I have added Pink Crochet lace along my folded pocket's edges. I put the tags in so you could see how they will look.
I went ahead and started adding some images from a few of my digital collage sheets. I used the Tombow Foam Tabs to elevate some of my images. I added a bead of glue to the center of both pieces of pink crochet lace, and added a piece of Red Micro Gingham. I used my Bow it All tool and Red Seam binding to create a double bow that I placed above my bingo card. I also added a piece of the Gingham across the bottom of the front of card, under the Cherub, Valentine's Day Ticket and tiny conversation hearts images.
I used 3 of the small Deep Ivory Mulberry Roses. I did simple tags, just layering some of my Valentine's Day Images on top of each other. So Hearts and Cupid, more chocolate tickets, more conversation hearts images, and conversation hearts words, and medium heart images.
I kept my tag tops simple too in that I used the same red seam binding and tied a simple double knot. Again I used my Bow it all tool to create a tiny red seam binding bow.
Here are the tags and close up of the front...with Glitter added of course.
I hope you have a wonderful day and have fun trying out one of these double pocket cards!
Thank you for visiting us at Really Reasonable Ribbon today!!
Hugs!!
Heather


No comments:
Post a Comment
We'd love to hear what you have to say