Isn't he adorable!!
Step One
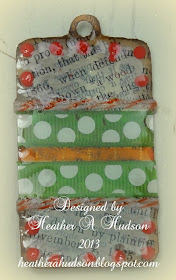
I applied glue to my chipboard and then applied my book page. Trimmed it, and inked the edges with Ranger's Vintage photos.
Step Two
I used some glue to apply my green dot and orange ribbon to my charm base.
Step Three
I added another layer of green dot ribbon and some orange baker's twine from Really Reasonable Ribbon.
Step Four
I applied some dots of Berry Red Enamel, and let that air dry for about 15 minutes. Then I applied a coat of Instant UV Resin, and set it under my UV light for 3 min to cure.
Step 5
I cut out my Gecko Galz image, distressed the edges with scissors and then inked them with Ranger's Vintage Photo. I adhered this to my charm and then added one more coat of instant UV Resin. Set it under my UV light for 3 min. to cure.
I topped it off with more Orange Baker's twine and a cute little Berry button from the Berrylicious Button collection from Really Reasonable Ribbon.
I hope you enjoyed my tutorial and make some sweet little charms of your own that you can add to your scrapbooking projects!
Hugs!!
Heather


Gorgeous tag x
ReplyDeleteHow fun! I love the idea of making my own charms! So cool!
ReplyDeleteThis is so cool. I love it. Thanks for sharing the tutorial!!
ReplyDeleteSweet idea!
ReplyDeleteHow cute is that, love your colors and choice of ribbons! Great tutorial!
ReplyDelete1
What a darling charm!! ~ Blessings, Tracey
ReplyDeletehttp://gracescraps.blogspot.com/
This is gorgeous. Thanks for sharing. Love the dog and the colours.
ReplyDelete